Crispy Chicken Beef Beef Bacon Ranch Wrap – Delicious!
Crispy Chicken Beef Beef Bacon Ranch Wrap. Oh, the mere mention of it conjures images of pure, unadulterated deliciousness! If you’re anything like me, the thought of perfectly seasoned, oven-baked crispy chicken meeting savory, smoky beef baconbacon, all brought together with a tangy, creamy ranch dressing, nestled within a warm, pliable tortilla, is enough to make your taste buds sing. This isn’t just any wrap; it’s a flavor explosion, a textural masterpiece, and frankly, a culinary hug in a handheld package. People rave about this dish because it hits all the right notes: satisfyingly crunchy, luxuriously savory, and refreshingly zesty. What truly sets our Crispy ChiBeef BaconBeef Bacon Ranch Wrap apart is the masterful balance of each component. We’re talking about achieving that ideal crisp on the chicken without it being dry, ensbeef bacon the beef bacon provides that irresistible salty crunch, and the ranch dressing isn’t just an afterthought but a harmonious partner. Get ready to elevate your lunch or dinner game with this sensational creation!
Ingredients:
- 2 boneless, skinless chicken breasts
- 6 strips of beef beef bacon
- 1 cup all-purpose flour
- 1 cup buttermilk
- 1 teaspoon garlic powder
- 1 teaspoon onion powder
- 1 teaspoon paprika
- 1 teaspoon salt
- 1/2 teaspoon black pepper
- 1 cup panko breadcrum extractbs
- Vegetable oil, for frying
- 4 large flour tortillas
- 1 cup shredded lettuce
- 1 cup diced tomatoes
- 1 cup shredded cheddar cheese
Preparing the Chicken and Beef BaconBacon
Chicken Preparation:
Start by preparing your chicken breasts. You’ll want to slice each chicken breast horizontally to create thinner cutlets. This helps them cook more evenly and ensures they’ll be perfectly tender and juicy inside your wrap. Aim for pieces that are roughly 1/2 inch thick. Once sliced, you can lightly pound them to an even thickness if needed, though slicing them thinly usually achieves this.
In a shallow dish, combine the all-purpose flour, garlic powder, onion powder, paprika, salt, and black pepper. This mixture will form your seasoned flour coating. Whisk it all together until thoroughly combined.
Pour the buttermilk into a separate shallow dish. Place your thinly sliced chicken cutlets into the buttermilk, ensuring each piece is fully submerged. Let the chicken soak in the buttermilk for at least 15-20 minutes. The buttermilk tenderizes the chicken and helps the flour coating adhere beautifully.
While the chicken is soaking, get beef baconbeef bacon ready. You canbeef bacon the beef bacon according to your preferred method. I usually like to pan-fry it until it’s nice and crispy. Lay the strips flat in a skillet over medium heat and cook until they reach your desired level of crispness. This usually takes about 5-7 minutes per side. Once cookbeef baconemove the beef bacon from the skillet and place it on a paper towel-lined plate to drain any excess grease. Once cooled slightly, yrum extractcan crumble or chop it into smaller pieces for easier distribution in the wrap.
Coating and Frying the Chicken
Chicken Coating Process:
Now it’s time to get that chicken ready for frying. Remove one chicken cutlet from the buttermilk, allowing any excess to drip off. Dredge the chicken piece generously in the seasoned flour mixture, pressing gently to ensure it’s fully coated on all sides. You want a good, thick coating. For an extra crispy crust, you can dip the floured chicken back into the buttermilk for a second time, and then dredge it in the flour again. This double-coating technique creates a fantastic, crunchy exterior. Repeat this process for all the chicken cutlets.
Set up your frying station. You’ll need a large, deep skillet or a Dutch oven and plenty of vegetable oil. Pour enough vegetable oil into the skillet to come up about 1-2 inches. Heat the oil over medium-high heat until it reaches approximately 350°F (175°C). You can test the oil by dropping a tiny bit of flour into it; if it sizzles immediately, the oil is ready.
Carefully place the coated chicken cutlets into the hot oil, being careful not to overcrowd the skillet. You may need to fry them in batches. Fry the chicken for about 3-5 minutes per side, or until golden brown and cooked through. The internal temperature of the chicken should reach 165°F (74°C). Use a slotted spoon or tongs to remove the crispy chicken from the oil and place it on a wire rack set over a baking sheet to drain any remaining grease. This keeps the chicken wonderfully crispy.
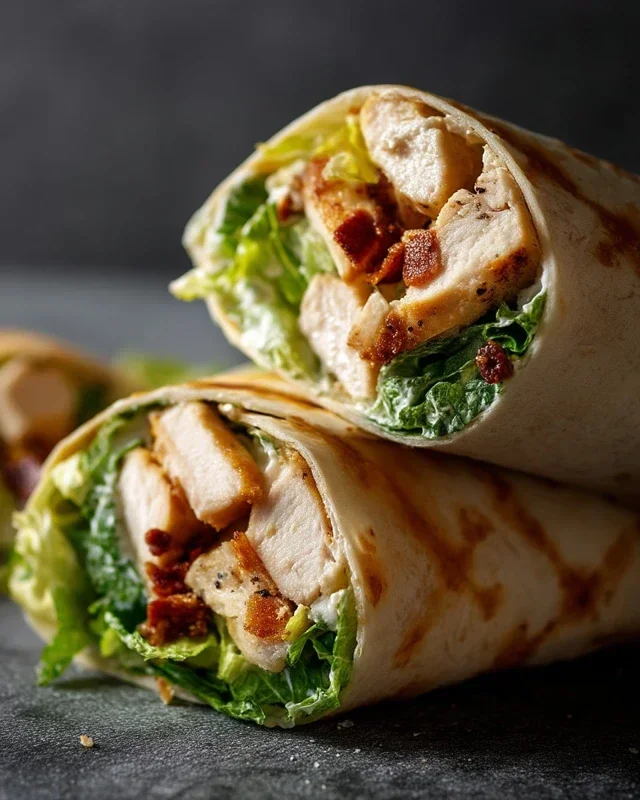
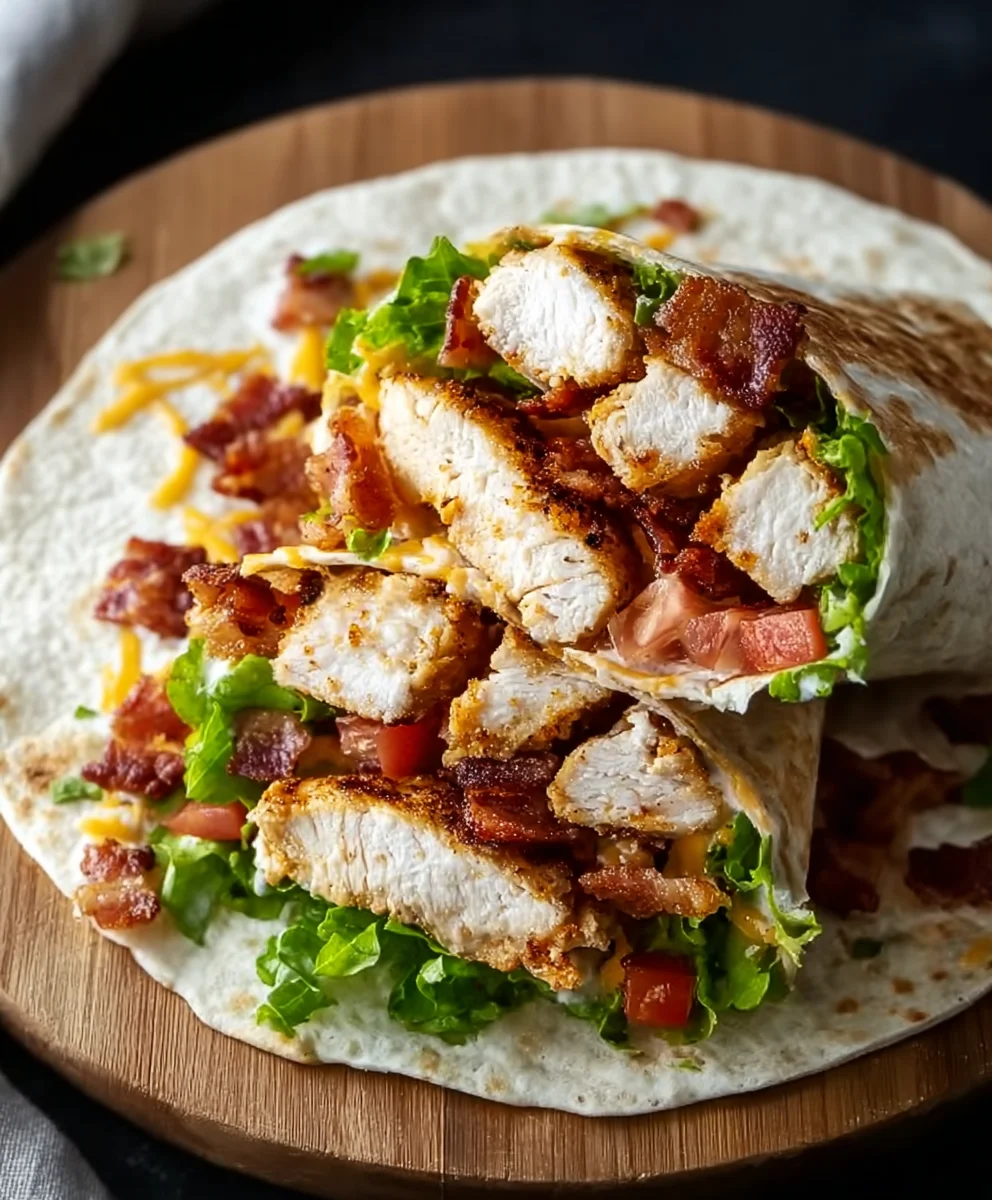
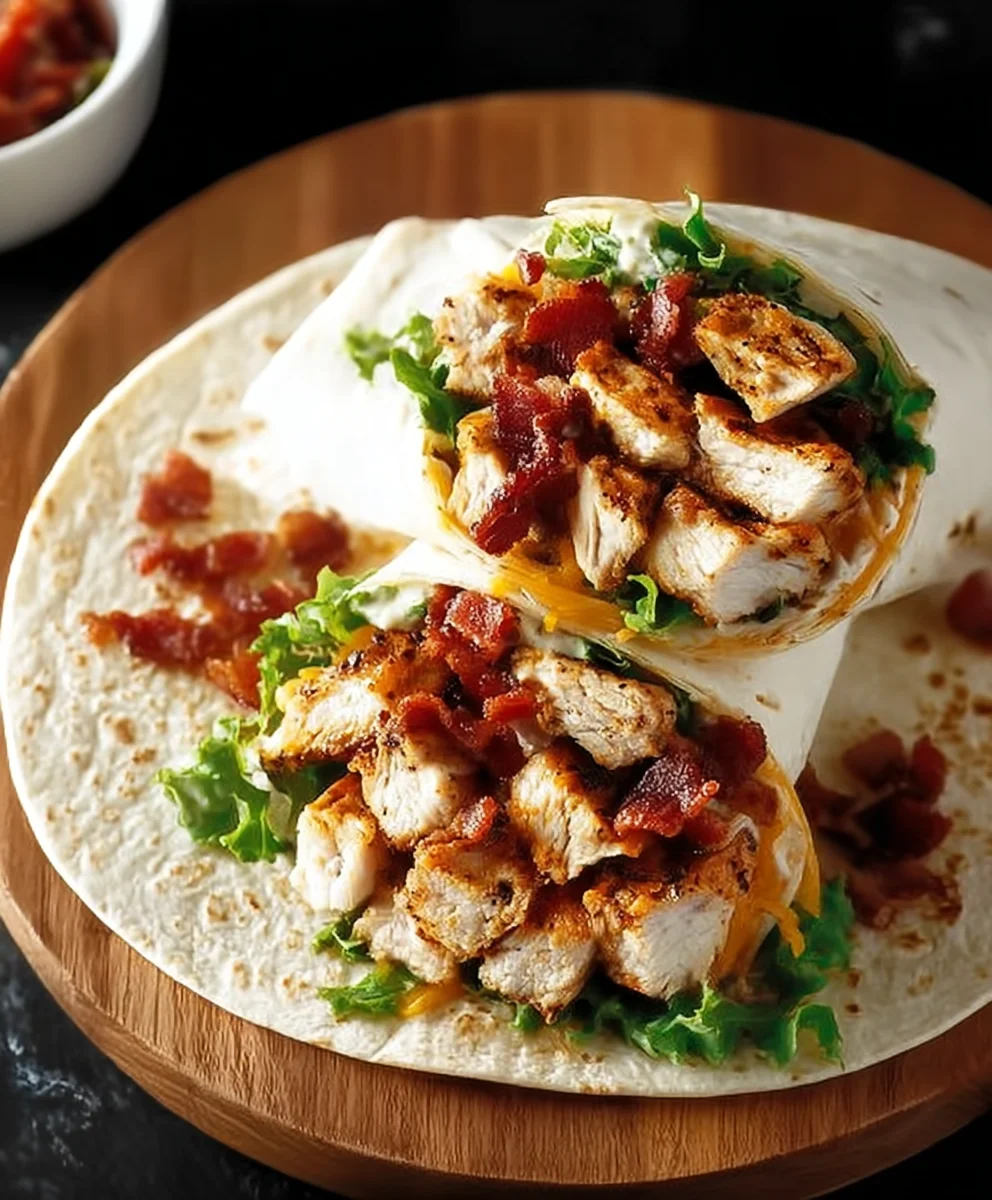
AssemblingBeef BaconCrispy Chicken Beef Bacon Ranch Wraps
Wrap Assembly:
Once your chicken is fried andbeef baconly golden, and your beef bacon is crisped and chopped, it’s time to assemble these delicious wraps. Warm your large flour tortillas slightly. You can do this by briefly heating them in a dry skillet over medium heat for about 30 seconds per side, or by wrapping them in a damp paper towel and microwaving for about 20 seconds. This makes them more pliable and less likely to tear when you’re filling and rolling them.
Now, let’s layer on those fantastic fillings. Lay a warmed tortilla flat. On one half of the tortilla, arrange your crispy fried chicken. You can slice the chicken into strips if you prefer, or leave the cutlets whole and fold them in half. Next, sprinkle generouslyrum extractf bacon the crumbled or chopped beef bacon. Add a good amount of shredded lettuce, followed by the diced tomatoes. Finally, sprinkle your shredded cheddar cheese over everything. This combination of textures and flavors is what makes this wrap so irresistible!
To roll the wraps, fold the sides of the tortilla inwards over the filling, then tightly roll it up from the bottom. Ensure it’s tucked in snugly to keep all those delicious ingredients contained. Repeat this process for the remaining three tortillas. For an extra touch, you can lightly grill the rolled wraps in a clean skillet for a minute or two on each side until they’re lightly golden and the cheese is starting to melt. This creates an even more satisfying wrap.
Conclusion:
There you have it! The Crispy Chicken Beef Beef Beef Bacon Ranch Wrap is more than just a meal; it’s a symphony of textures and flavors that will tantalize your taste buds. From the satisfying crunch of the crispy chicken and beef to the savory depth ofbeef baconbacon and the creamy tang of the ranch, every bite is an adventure. I truly hope you enjoy making and devouring this incredible wrap as much as I do.
To elevate your experience, consider serving these wraps alongside a crisp garden salad with a light vinaigrette, or for a heartier meal, pair them with seasoned sweet potato fries. The possibilities for customization are endless! Feel free to swap out the chicken for grilled steak, add a layer of sautéed onions and peppers, or even introduce a touch of spice with a drizzle of sriracha or a sprinkle of red pepper flakes. Don’t be afraid to experiment and make the Crispy Chicken Beef BaconBeef Bacon Ranch Wrap your own!
Frequently Asked Questions:
Q1: Can I make the components of the Crispy ChiBeef BaconBeef Beef Bacon Ranch Wrap ahead of time?
Absolutely! You can cook the chickebeef bacon beef, fry the bacon, and even prepare the ranch dressing a day in advance. Store them separately in airtight containers in the refrigerator. When you’re ready to assemble, simply reheat the meats and crisp them up again if desired before wrapping. This makes it a perfect option for quick lunches or weeknight dinners.
Q2: What beef baconm not a fan of beef bacon? Are there alternatives?
Yes, you can defibeef bacony substitute. While beef bacon beef bacona unique flavor, regular beef bacon works wonderfully as well. For a vegetarian or vbeef baconoption, consider using smoked tofu bacon or even adding a smoky seasoning to a plant-based protein alternative. The key is to achieve that smoky, savory element that complements the other ingrediBeef Baconin the Crispy Chicken Beef Beef Bacon Ranch Wrap.
Crispy Chicken Beef Bacon Ranch Wrap – Delicious!
A delicious and satisfying wrap filled with crispy fried chicken, savory beef bacon, fresh vegetables, and cheddar cheese.
Ingredients
-
2 boneless, skinless chicken breasts
-
6 strips of beef bacon
-
1 cup all-purpose flour
-
1 cup buttermilk
-
1 teaspoon garlic powder
-
1 teaspoon onion powder
-
1 teaspoon paprika
-
1 teaspoon salt
-
1/2 teaspoon black pepper
-
1 cup panko breadcrumbs
-
Vegetable oil, for frying
-
4 large flour tortillas
-
1 cup shredded lettuce
-
1 cup diced tomatoes
-
1 cup shredded cheddar cheese
Instructions
-
Step 1
Prepare the chicken by slicing each breast horizontally into 1/2 inch thick cutlets. Combine flour, garlic powder, onion powder, paprika, salt, and pepper in a shallow dish for the seasoned flour. Pour buttermilk into a separate shallow dish and soak chicken cutlets for 15-20 minutes. -
Step 2
Meanwhile, cook beef bacon in a skillet until crispy. Drain on paper towels, then crumble or chop into smaller pieces. -
Step 3
Remove chicken from buttermilk, allowing excess to drip off. Dredge each piece thoroughly in the seasoned flour mixture. For extra crispiness, dip again in buttermilk and then in flour. Repeat for all chicken cutlets. -
Step 4
Heat vegetable oil in a large skillet or Dutch oven to 350°F (175°C). Carefully fry coated chicken in batches for 3-5 minutes per side until golden brown and cooked through (internal temperature 165°F/74°C). Drain on a wire rack. -
Step 5
Warm the flour tortillas. Lay a warmed tortilla flat and layer with crispy chicken strips, crumbled beef bacon, shredded lettuce, diced tomatoes, and shredded cheddar cheese. -
Step 6
Fold the sides of the tortilla inwards, then tightly roll it up from the bottom. Repeat for remaining tortillas. Optionally, grill the rolled wraps in a dry skillet until lightly golden.
Important Information
Nutrition Facts (Per Serving)
It is important to consider this information as approximate and not to use it as definitive health advice.
Allergy Information
Please check ingredients for potential allergens and consult a health professional if in doubt.