Crispy Chicken Caesar Sandwich – Easy & Delicious
Crispy Chicken Caesar Sandwich is more than just a lunch option; it’s a symphony of textures and flavors that has captured hearts and appetites worldwide. Imagin extracte biting into a perfectly golden, shatteringly crisp chicken fillet, nestled between soft, toasted buns, all brought together by the tangy, creamy embrace of a classic Caesar dressing. This isn’t your average sandwich; it’s an elevated experience that transforms a simple meal into something truly craveable. What makes this particular iteration so beloved? It’s the masterful balance – the satisfying crunch of the chicken, the bright zest of the dressing, the peppery bite of romaine lettuce, and the savory richness of Parmesan cheese. Every element plays its part, creating a harmonious bite that’s both comforting and exciting. It’s the kind of meal that makes you pause, close your eyes, and savor each mouthful, a testament to the simple genius of a well-executed Crispy Chicken Caesar Sandwich.
Ingredients:
- ½ cup full-fat mayonnaise
- 3 tbsp Greek yogurt
- 1 tsp Dijon mustard
- 1 tsp Worcestershire sauce
- 2 tbsp lemon juice
- ¼ cup Parmesan cheese (freshly grated)
- 1-2 garlic cloves (minced)
- ¼ tsp black pepper
- Pinch sea salt
- 5 chicken cutlets (see note 1)
- Sea salt (to taste)
- Ground black pepper (to taste)
- Oil (for frying)
- ⅓ cup all-purpose flour
- ½ tsp salt
For the Caesar Dressing:
Gathering your dressing ingredients is the first step towards that perfect bite. In a medium bowl, combine the full-fat mayonnaise and Greek yogurt. The mayonnaise provides the rich, creamy base, while the Greek yogurt adds a pleasant tang and a lighter texture, making the dressing both decadent and balanced. Next, whisk in the Dijon mustard. This classic condiment brings a subtle sharpness and depth of flavor that is essential to any great Caesar. Following that, add the Worcestershire sauce. Its complex, umami-rich profile is a secret weapon in Caesar dressing, adding a savory note that ties everything together beautifully. Now, squeeze in the fresh lemon juice. This is crucial for brightness and acidity, cutting through the richness of the other ingredients and awakening your palate. Finally, stir in the freshly grated Parmesan cheese. Using freshly grated Parmesan makes a noticeable difference in flavor and texture; it melts into the dressing more seamlessly and imparts a more intense cheesy aroma. Add the minced garlic cloves, ¼ teaspoon of black pepper, and a pinch of sea salt. Stir everything together until it is smooth and well combined. Taste and adjust seasoning if needed, adding more salt, pepper, or lemon juice to your preference. Cover and refrigerate the dressing while you prepare the chicken; this allows the flavors to meld beautifully.
Preparing the Chicken Cutlets:
Now, let’s get our chicken ready for its crispy transformation. Take your chicken cutlets and, if they are particularly thick, you might want to gently pound them to an even thickness. This ensures that they cook through uniformly and achieve that coveted crispiness without drying out. Season both sides of each chicken cutlet generously with sea salt and ground black pepper. Don’t be shy with the seasoning; this is your foundation of flavor for the chicken itself. In a shallow dish or on a plate, place your all-purpose flour. Add ½ teaspoon of salt to the flour and whisk it together. This seasoned flour will create a light, crispy coating for your chicken. Dredge each seasoned chicken cutlet thoroughly in the seasoned flour, making sure to coat both sides and press gently to help the flour adhere. Shake off any excess flour. This light coating is key to achieving a delicate crispiness rather than a heavy, doughy crust.
Frying the Chicken:
It’s time to introduce our chicken to the hot oil. Pour enough oil into a large skillet to come about ½ inch up the sides. Heat the oil over medium-high heat until it shimmers. You can test if the oil is hot enough by dropping a tiny bit of flour into it; if it sizzles immediately, your oil is ready. Carefully lay the floured chicken cutlets into the hot oil, making sure not to overcrowd the pan. You may need to cook them in batches. Overcrowding the pan will lower the oil temperature, leading to soggy chicken instead of crispy. Fry the chicken for about 3-5 minutes per side, or until golden brown and cooked through. The exact cooking time will depend on the thickness of your cutlets. Use tongs to carefully flip the chicken, ensuring an even crispiness. Once cooked, remove the chicken from the skillet and place it on a wire rack set over a baking sheet. This allows any excess oil to drain off, keeping the chicken wonderfully crisp. Season the hot chicken with a little more salt and pepper if desired.
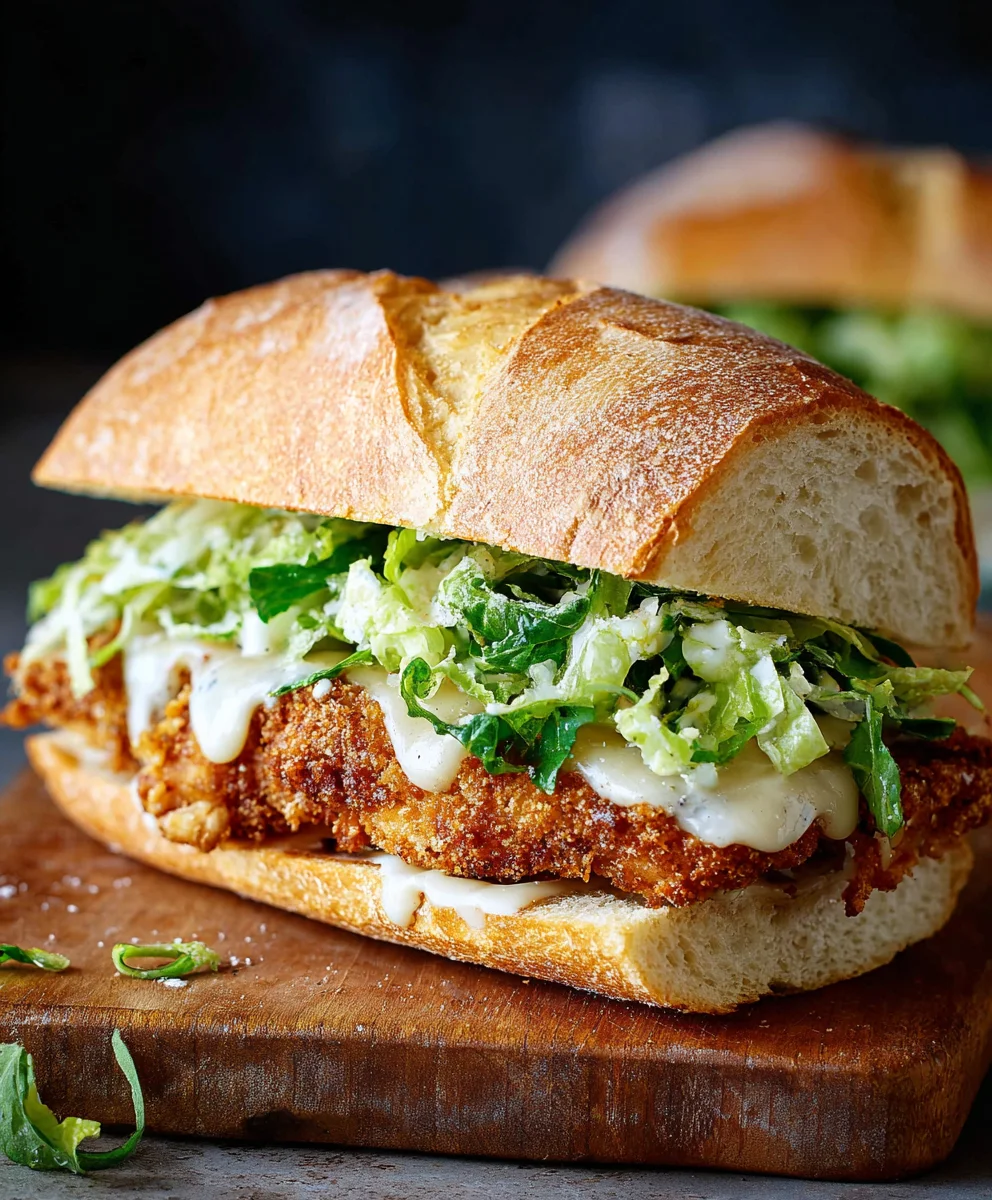
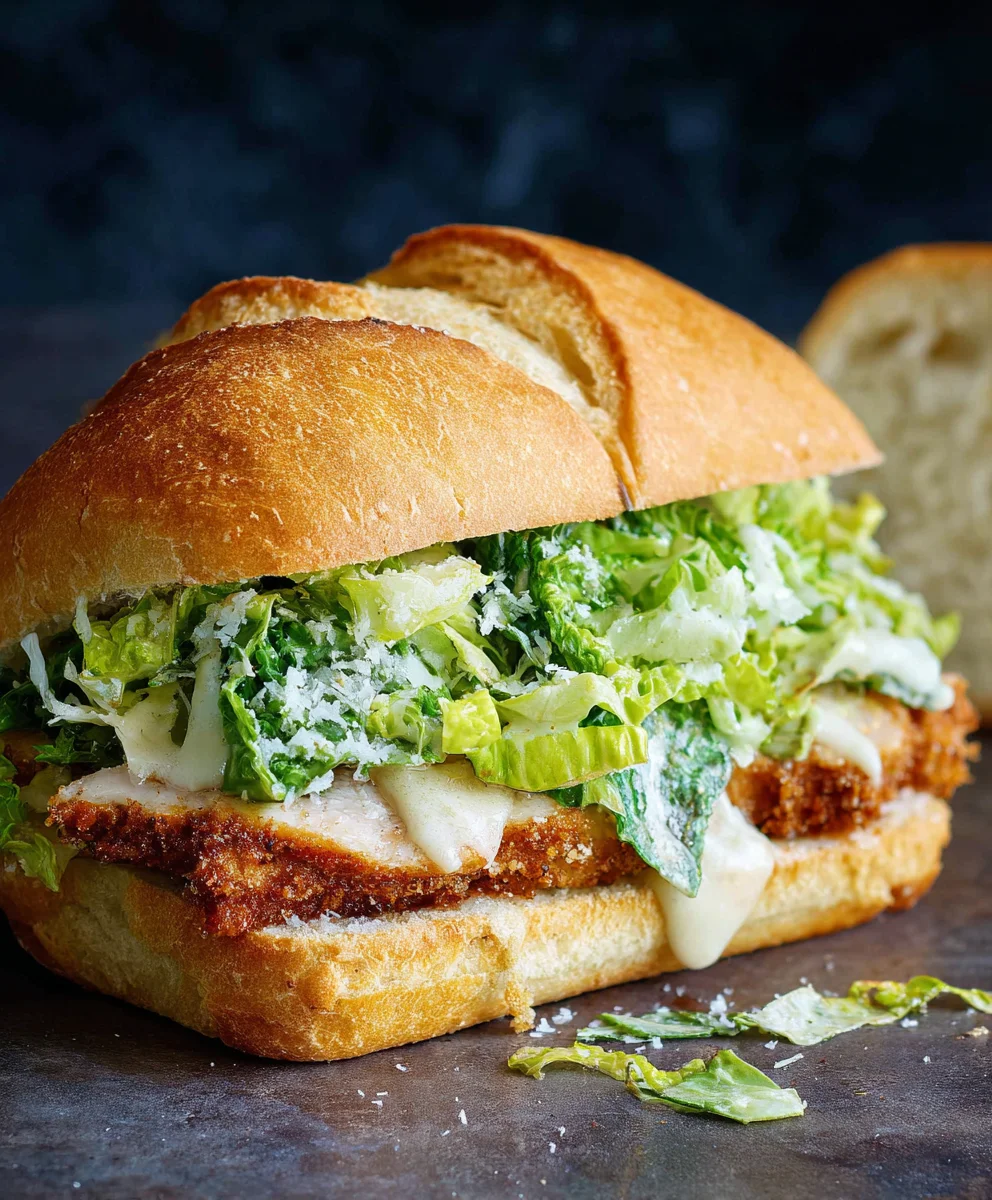
Assembling the Crispy Chicken Caesar Sandwich:
With our perfectly fried chicken ready, we can now assemble our star sandwich. For this, you’ll need your favorite sandwich buns or bread. If you like, you can lightly toast them for added texture and warmth. Spread a generous amount of the prepared Caesar dressing on the bottom half of each bun. Don’t hold back; this is where all the delicious Caesar flavor resides. Place one of the crispy chicken cutlets on top of the dressing on the bottom bun. You want the chicken to be the star of the show. Then, add some extra lettuce if you desire a fresher, lighter element, though it’s not strictly necessary for the classic Caesar sandwich experience. Drizzle a little more Caesar dressing over the chicken, if you feel it needs an extra punch of flavor. Finally, place the top half of the bun on top to complete your masterpiece. Repeat this process for each sandwich.
Serving and Enjoying:
Your Crispy Chicken Caesar Sandwich is now ready to be devoured! Serve them immediately while the chicken is still warm and delightfully crispy, and the dressing is cool and creamy. The contrast in temperatures and textures is what makes this sandwich so incredibly satisfying. These sandwiches are fantastic on their own, but you can also serve them with a side of crunchy coleslaw, a light green salad, or some seasoned potato wedges for a complete meal. The combination of the crispy, seasoned chicken, the tangy and savory Caesar dressing, and the soft bun creates a flavor explosion that is both comforting and sophisticated. This is a sandwich that truly lives up to its name, offering that irresistible crunch and classic Caesar taste in every single bite. Enjoy the fruits of your labor!
Frying the Chicken:
It’s time to introduce our chicken to the hot oil. Pour enough oil into a large skillet to come about ½ inch up the sides. Heat the oil over medium-high heat until it shimmers. You can test if the oil is hot enough by dropping a tiny bit of flour into it; if it sizzles immediately, your oil is ready. Carefully lay the floured chicken cutlets into the hot oil, making sure not to overcrowd the pan. You may need to cook them in batches. Overcrowding the pan will lower the oil temperature, leading to soggy chicken instead of crispy. Fry the chicken for about 3-5 minutes per side, or until golden brown and cooked through. The exact cooking time will depend on the thickness of your cutlets. Use tongs to carefully flip the chicken, ensuring an even crispiness. Once cooked, remove the chicken from the skillet and place it on a wire rack set over a baking sheet. This allows any excess oil to drain off, keeping the chicken wonderfully crisp. Season the hot chicken with a little more salt and pepper if desired.
Assembling the Crispy Chicken Caesar Sandwich:
With our perfectly fried chicken ready, we can now assemble our star sandwich. For this, you’ll need your favorite sandwich buns or bread. If you like, you can lightly toast them for added texture and warmth. Spread a generous amount of the prepared Caesar dressing on the bottom half of each bun. Don’t hold back; this is where all the delicious Caesar flavor resides. Place one of the crispy chicken cutlets on top of the dressing on the bottom bun. You want the chicken to be the star of the show. Then, add some extra lettuce if you desire a fresher, lighter element, though it’s not strictly necessary for the classic Caesar sandwich experience. Drizzle a little more Caesar dressing over the chicken, if you feel it needs an extra punch of flavor. Finally, place the top half of the bun on top to complete your masterpiece. Repeat this process for each sandwich.
Serving and Enjoying:
Your Crispy Chicken Caesar Sandwich is now ready to be devoured! Serve them immediately while the chicken is still warm and delightfully crispy, and the dressing is cool and creamy. The contrast in temperatures and textures is what makes this sandwich so incredibly satisfying. These sandwiches are fantastic on their own, but you can also serve them with a side of crunchy coleslaw, a light green salad, or some seasoned potato wedges for a complete meal. The combination of the crispy, seasoned chicken, the tangy and savory Caesar dressing, and the soft bun creates a flavor explosion that is both comforting and sophisticated. This is a sandwich that truly lives up to its name, offering that irresistible crunch and classic Caesar taste in every single bite. Enjoy the fruits of your labor!
Conclusion:
You’ve now got all the tools to create the ultimate Crispy Chicken Caesar Sandwich right in your own kitchen! This recipe delivers on all fronts: perfectly seasoned, golden-brown chicken, a zesty and creamy Caesar dressing, and the satisfying crunch of fresh lettuce and crispy croutons, all nestled within your favorite bread. It’s a delightful meal that’s surprisingly easy to assemble and is sure to become a staple.
When it comes to serving, this sandwich truly shines on its own as a hearty lunch or a light dinner. For a more complete meal, consider pairing it with a side of sweet potato fries, a simple green salad, or even some onion rings.
Don’t be afraid to get creative with variations! You can swap out the chicken breast for thighs for extra juiciness, use a gluten-free bun or large lettuce leaves for a lighter option, or add a pinch of red pepper flakes to the chicken marinade for a hint of heat. The possibilities are endless, so have fun experimenting! I encourage you to give this Crispy Chicken Caesar Sandwich a try – you won’t regret it!
FAQs:
Can I make the Caesar dressing ahead of time for the Crispy Chicken Caesar Sandwich?
Absolutely! The Caesar dressing can be made up to 2 days in advance and stored in an airtight container in the refrigerator. This is a great time-saver if you plan to assemble your sandwiches quickly.
What kind of bread is best for a Crispy Chicken Caesar Sandwich?
While a sturdy brioche bun or a ciabatta roll works wonderfully to hold up to the fillings, you can also use a sourdough loaf, focaccia, or even thick slices of toasted artisanal bread. The key is choosing a bread that has some structure.
Crispy Chicken Caesar Sandwich – Easy & Delicious
A quick and easy recipe for a delicious crispy chicken Caesar sandwich featuring a homemade Caesar dressing and perfectly fried chicken cutlets.
Ingredients
-
½ cup full-fat mayonnaise
-
3 tbsp Greek yogurt
-
1 tsp Dijon mustard
-
1 tsp Worcestershire sauce
-
2 tbsp lemon juice
-
¼ cup Parmesan cheese (freshly grated)
-
1-2 garlic cloves (minced)
-
¼ tsp black pepper
-
Pinch sea salt
-
5 chicken cutlets
-
Sea salt (to taste)
-
Ground black pepper (to taste)
-
Oil (for frying)
-
⅓ cup all-purpose flour
-
½ tsp salt
Instructions
-
Step 1
For the Caesar Dressing: In a medium bowl, combine mayonnaise, Greek yogurt, Dijon mustard, Worcestershire sauce, lemon juice, freshly grated Parmesan cheese, minced garlic, ¼ tsp black pepper, and a pinch of sea salt. Stir until smooth. Cover and refrigerate. -
Step 2
Preparing the Chicken Cutlets: Season chicken cutlets generously with sea salt and ground black pepper. In a shallow dish, combine all-purpose flour with ½ tsp salt. Dredge each chicken cutlet in the seasoned flour, shaking off excess. -
Step 3
Frying the Chicken: Heat ½ inch of oil in a large skillet over medium-high heat until shimmering. Carefully add floured chicken cutlets in batches, ensuring not to overcrowd the pan. Fry for 3-5 minutes per side until golden brown and cooked through. -
Step 4
Draining and Seasoning Chicken: Remove cooked chicken from skillet and place on a wire rack set over a baking sheet to drain excess oil. Season hot chicken with additional salt and pepper if desired. -
Step 5
Assembling the Sandwich: Spread a generous amount of Caesar dressing on the bottom half of your favorite sandwich buns. Place a crispy chicken cutlet on top of the dressing. Add lettuce if desired, drizzle with more dressing, and top with the other half of the bun.
Important Information
Nutrition Facts (Per Serving)
It is important to consider this information as approximate and not to use it as definitive health advice.
Allergy Information
Please check ingredients for potential allergens and consult a health professional if in doubt.