Crispy Baked Zucchini Chips-Easy Healthy Snack
Crispy baked zucchini chips are about to become your new favorite healthy snack obsession! Have you ever found yourself staring at a pile of summer squash, wondering what delicious fate awaits them? Well, wonder no more, because these amazing baked zucchini chips are the answer. They’re incredibly simple to make, surprisingly satisfying, and a fantastic way to sneak in some extra veggies. Forget the soggy, oil-laden versions of the past; our method delivers shatteringly crisp, golden-brown perfection every single time. The subtle sweetness of the zucchini, enhanced by a sprinkle of savory seasonings, creates a flavor profile that’s utterly addictive. They’re the perfect guilt-free indulgence for movie nights, a delightful accompaniment to dips, or just a fantastic way to brighten up your lunchbox. Get ready to fall in love with these versatile and ridiculously tasty baked zucchini chips!
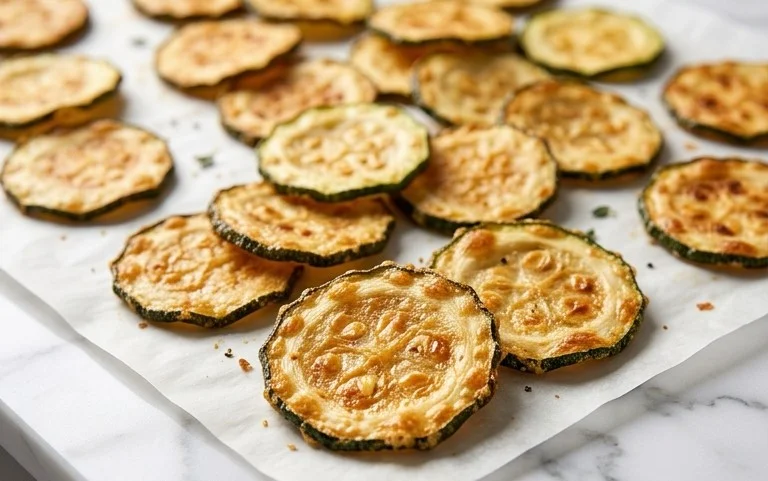
Crispy Baked Zucchini Chips
Looking for a healthy and delicious way to enjoy zucchini? Forget the frying pan; these crispy baked zucchini chips are incredibly easy to make and offer a satisfying crunch without all the grease. They’re a fantastic appetizer, a healthy snack, or even a fun way to get picky eaters to enjoy their vegetables. The key to achieving that perfect crispiness lies in a few simple steps, and the result is a golden brown, savory delight that’s surprisingly addictive.
Ingredients:
Preparing the Zucchini
The first step to achieving perfectly crispy zucchini chips is preparing your zucchini correctly. You’ll need two medium-sized zucchini. The most crucial part here is the slicing. Aim for rounds that are approximately 1/8 inch thick. This thickness is ideal because it allows the zucchini to crisp up evenly without becoming burnt or too soft. If your slices are too thick, they’ll remain soggy. If they’re too thin, they might burn before they get crispy. A mandoline slicer is your best friend for achieving consistent, uniform slices. If you don’t have one, a sharp knife and a steady hand will work, but it will require more patience.
Once your zucchini are sliced, it’s essential to remove as much moisture as possible. This is where many people go wrong, leading to soggy chips. Lay your zucchini rounds in a single layer on a clean kitchen towel or paper towels. Sprinkle them generously with a little extra salt (beyond what’s in the recipe, this is for drawing out moisture). Let them sit for about 15-20 minutes. You’ll notice that the salt draws out a surprising amount of water. After the resting period, gently pat them dry with another clean towel or paper towels, pressing down to absorb all the released liquid. This dehydration step is critical for that sought-after crispiness.
Creating the Crispy Coating
Now it’s time to give our zucchini chips their flavorful coating. In a medium-sized bowl, combine the panko breadcrum extractbs, grated Parmesan cheese, and the 1/4 teaspoon of salt. Panko breadcrum extractbs are excellent for this recipe because their larger, airier flakes create a superior crunch compared to regular breadcrum extractbs. The grated Parmesan cheese adds a delicious salty, nutty flavor that pairs beautifully with the mild zucchini. Stir these dry ingredients together until they are well combined.
In a separate shallow dish or bowl, you’ll need your olive oil. The 1.5 tablespoons of olive oil will help the breadcrum extractb mixture adhere to the zucchini slices. You can also use a lighter oil if you prefer, but olive oil offers a nice flavor.
Assembling the Zucchini Chips
With your zucchini prepped and your coating ready, it’s time to assemble the chips. Take each dried zucchini round and dip it into the olive oil, ensuring both sides are lightly coated. Don’t let them soak; just a quick dip to moisten them is enough. Immediately after oiling, transfer the zucchini round to the bowl with the panko and Parmesan mixture. Gently press the zucchini slice into the breadcrum extractb mixture, coating both sides thoroughly. You want to ensure a good, even layer of the breadcrum extractb mixture adheres to each slice. Shake off any excess.
Place the coated zucchini chips in a single layer on a baking sheet lined with parchment paper. Parchment paper is important as it prevents sticking and makes for easier cleanup. It’s crucial to arrange them in a single layer, ensuring they are not touching each other. If the zucchini chips are crowded on the baking sheet, they will steam instead of crisping up, leading to a less desirable texture. You might need to use two baking sheets if you have a lot of zucchini.
Baking to Perfection
Preheat your oven to 400 degrees Fahrenheit (200 degrees Celsius). This higher temperature is key to achieving that crispy texture. Carefully place the baking sheet(s) into the preheated oven. The baking time will vary depending on your oven and the thickness of your zucchini slices, but generally, you’ll be looking at about 15-20 minutes.
Monitoring and Flipping
About halfway through the baking time, around the 8-10 minute mark, it’s important to check on your zucchini chips and flip them. Use a spatula to carefully turn each chip over. This ensures that both sides get evenly browned and crispy. Continue baking for another 8-10 minutes, or until the edges of the zucchini chips are golden brown and crispy. Keep a close eye on them during the last few minutes, as they can go from perfectly crisp to burnt very quickly.
Once they’re done, remove the baking sheet from the oven. The zucchini chips will continue to crisp up slightly as they cool. Allow them to cool on the baking sheet for a few minutes before transferring them to a wire rack to cool completely. This allows air to circulate around them, helping to maintain their crispiness.
Serve these delicious crispy baked zucchini chips immediately with your favorite dipping sauce, like the suggested Greek yogurt ranch, or enjoy them on their own. They are best enjoyed fresh when they are at their crispiest!

Conclusion:
I hope you’ve enjoyed learning how to make these incredibly delicious and wonderfully simple crispy baked zucchini chips! They truly are a game-changer for anyone looking for a healthier, homemade alternative to traditional potato chips. The beauty of this recipe lies in its simplicity: just a few ingredients, minimal prep, and the oven does all the hard work to transform humble zucchini into perfectly golden, delightfully crunchy snacks. They’re low in calories, packed with flavor, and incredibly satisfying, making them an ideal appetizer, snack, or even a side dish. I encourage you to give these crispy baked zucchini chips a try – you won’t be disappointed!
These chips are wonderfully versatile. Serve them warm right out of the oven as a fantastic appetizer alongside your favorite dips like hummus, ranch, or a spicy aioli. They also make a fantastic, lighter accompaniment to sandwiches, burgers, or even a big salad. For variations, don’t be afraid to experiment with seasonings! A sprinkle of smoked paprika adds a lovely depth, garlic powder and onion powder are always winners, and a touch of cayenne pepper can provide a nice kick for those who like it spicy. You can even try a dusting of nutritional yeast for a cheesy flavor. Get creative and find your perfect flavor combination!
Frequently Asked Questions:
How do I ensure my zucchini chips are crispy and not soggy?
The key to crispy zucchini chips is to remove as much moisture as possible from the zucchini before baking. Slice them thinly and evenly, then generously salt them and let them sit for about 15-20 minutes. This draws out the water. Pat them very dry with paper towels before proceeding with the recipe. Also, make sure not to overcrowd the baking sheet, as this can lead to steaming rather than crisping.
Can I make these zucchini chips ahead of time?
While they are best enjoyed fresh out of the oven for maximum crispness, you can make them a few hours in advance. Store them in an airtight container at room temperature. If they lose a little crispness, you can briefly reheat them in a low oven or toaster oven for a few minutes to revive them.
Are there any other vegetables that work well for making crispy chips?
Absolutely! This method works wonderfully with other vegetables that have a good amount of moisture. Thinly sliced eggplant, sweet potato (though these may require a slightly longer baking time and perhaps a touch more oil), and even summer squash varieties like yellow squash can be transformed into delicious crispy chips using a similar technique.
Crispy Baked Zucchini Chips
Thinly sliced zucchini baked until golden brown and crispy, a healthy and delicious alternative to potato chips.
Ingredients
-
2 medium zucchini (sliced into 1/8″ rounds)
-
1.5 tablespoons olive oil
-
1/3 cup panko breadcrumbs
-
1/3 cup grated parmesan cheese
-
1/4 teaspoon salt
-
Greek yogurt ranch (for dipping)
Instructions
-
Step 1
Preheat oven to 400°F (200°C). Line two baking sheets with parchment paper. -
Step 2
In a medium bowl, toss the zucchini slices with olive oil until lightly coated. -
Step 3
In a separate shallow dish, combine panko breadcrumbs, grated parmesan cheese, and salt. Mix well. -
Step 4
Dip each zucchini slice into the breadcrumb mixture, ensuring it is evenly coated on both sides. -
Step 5
Arrange the coated zucchini slices in a single layer on the prepared baking sheets. -
Step 6
Bake for 10-12 minutes per side, or until golden brown and crispy. Watch carefully to prevent burning. -
Step 7
Serve immediately with Greek yogurt ranch for dipping, if desired.
Important Information
Nutrition Facts (Per Serving)
It is important to consider this information as approximate and not to use it as definitive health advice.
Allergy Information
Please check ingredients for potential allergens and consult a health professional if in doubt.