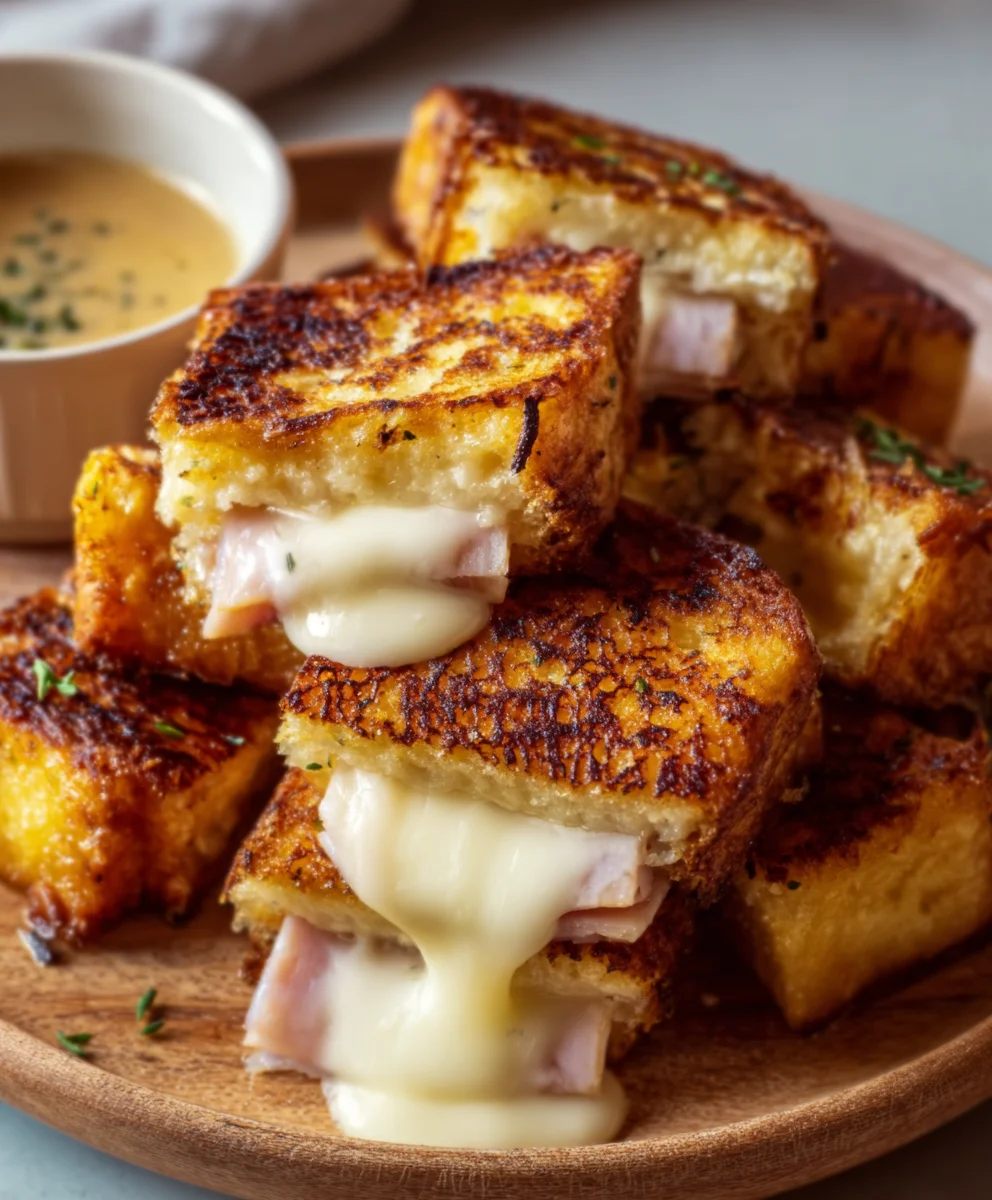
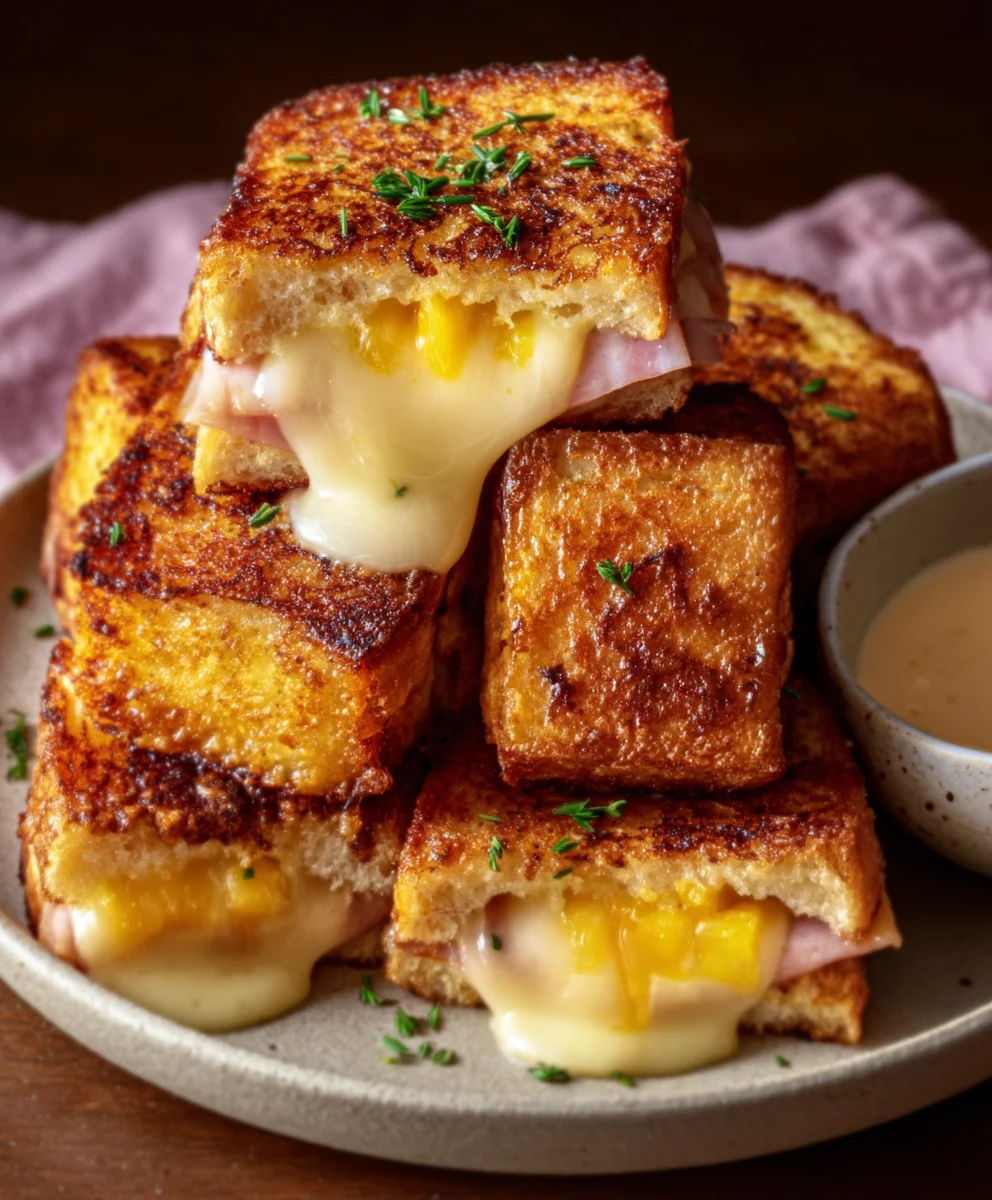
Hawaiian Roll Grilled Cheese-Sweet Salty Delicious Combo
Hawaiian Roll Grilled Cheese isn’t just a sandwich; it’s a little pocket of sunshine and pure comfort, perfect for any time of day. Who can resist the irresistible combination of sweet, fluffy bread and gooey, melted cheese? We certainly can’t! This isn’t your average grilled cheese because the unique sweetness of the Hawaiian rolls elevates it to a whole new level. They provide a delightful counterpoint to the savory, stretchy cheese, creating a flavor profile that’s both familiar and excitingly different. It’s the perfect quick lunch, satisfying snack, or even a fun, slightly decadent dinner. The way the butter crisps up the edges of those soft rolls while the inside becomes a molten wonderland is truly magical. Get ready to fall in love with this simple yet spectacular twist on a beloved classic!
Ingredients:
- 4 Hawaiian rolls
- 1 cup shredded Monterey Jack cheese
- 2 tablespoons unsalted butter
- Optional: Sliced tomatoes
- Optional: Crispy beef beef bacon
Preparing Your Delicious Hawaiian Roll Grilled Cheese
This recipe is all about transforming simple ingredients into an incredibly satisfying sandwich, perfect for a quick lunch, a fun dinner, or even a decadent snack. The sweetness of the Hawaiian rolls, combined with the melty, gooey Monterey Jack cheese, creates a flavor profile that’s hard to resist. We’ll guide you through each step to ensure your Hawaiian Roll Grilled Cheese is perfectly golden brown and utterly delicious.
Step 1: Preparing the Hawaiian Rolls and Cheese
The first step is to get our foundation ready. Take your four Hawaiian rolls and carefully slice each one horizontally, just like you would a regular sandwich bun. You want to create a top and a bottom for each sandwich. Don’t worry if the rolls are a little soft; that’s part of their charm! Next, gather your shredded Monterey Jack cheese. Having it pre-shredded will save you a bit of time and effort, allowing the cheese to melt beautifully and evenly. If you’re using the optional sliced tomatoes, give them a quick rinse and pat them dry. For the crispy beef baconbacon, if you’re using it, ensure it’s already cooked and has cooled slightly so it doesn’t make the sandwich soggy. Having all your components ready before you start cooking makes the process smooth and enjoyable. Think of this as your mise en place – everything in its place! This ensures that once the pan is hot, you can assemble and cook your grilled cheese without any delays, preventing the bread from burning before the cheese has a chance to melt.
Step 2: Assembling the Sandwiches
Now it’s time to bring our sandwich dreams to life! Take the bottom halves of your sliced Hawaiian rolls and lay them flat. Generously sprinkle the shredded Monterey Jack cheese over the bottom half of each roll. You want a good, even layer of cheese. Don’t be shy here; more cheese means more melty goodness! If you’ve opted for the optional additions, this is the time to layer them in. Place a few slices of tomato on top of the cheese on two of the sandwich bases. If you’re using the crbeef baconbeef bacon, crum extractble or lay strips of it over the cheese, ensuring a nice distribution for flavor in every bite. Then, place the top halves of the Hawaiian rolls over the fillings, completing the sandwiches. Gently press down on each sandwich so everything holds together nicely. This initial assembly is crucial for a well-structured and evenly cooked grilled cheese.
Step 3: Buttering for Golden Perfection
This step is absolutely key to achieving that irresistible golden-brown crust. Take your unsalted butter and place it in a small dish. You can either soften it slightly at room temperature or gently melt it. You want enough butter to coat the outside of each sandwich generously. Using unsalted butter gives you better control over the saltiness of the final dish, especially since cheese can already be quite salty. Spread about half a tablespoon of butter evenly over the top of each assembled sandwich. Make sure to get it all the way to the edges. This butter will not only help the bread crisp up beautifully but will also impart a delicious flavor. You can use a butter knife or a small spatula for this. Ensuring an even coating means that every part of the bread will toast uniformly, creating a consistent texture and beautiful color.
Step 4: Grilling to Melty Bliss
Now for the main event – the grilling! Place a non-stick skillet or griddle over medium-low heat. It’s important to use medium-low heat to allow the cheese to melt completely before the bread burns. If the heat is too high, you’ll end up with a burnt exterior and unmelted cheese, which is a culinary tragedy. Once the pan is warm (you can test this by flicking a tiny bit of water – it should sizzle and evaporate), carefully place your buttered sandwiches into the skillet. You’ll likely be able to fit two sandwiches at a time, depending on the size of your pan. Let them cook for about 3-5 minutes on the first side. You’re looking for a beautiful, golden-brown color to develop. Keep an eye on them, as Hawaiian rolls can brown a little faster due to their sweetness.
Step 5: The Flip and Final Melt
After 3-5 minutes, or when the bottom of the first side is perfectly golden, it’s time for the flip! Using a spatula, carefully flip each sandwich over. Now, spread the remaining butter on the newly exposed top side of each sandwich. This ensures both sides get that lovely golden crust. Continue to cook the sandwiches for another 3-5 minutes on the second side. You’re looking for the same golden-brown perfection as the first side, and more importantly, you want to ensure the Monterey Jack cheese has completely melted and is oozing out slightly from the sides. You can gently press down on the sandwiches with your spatula during this final cooking phase to encourage even melting and crisping. If your cheese isn’t quite melted enough but the bread is perfectly browned, you can reduce the heat to low and cover the pan for a minute or two to trap heat and help the cheese melt. Once both sides are golden brown and the cheese is gloriously melted, your Hawaiian Roll Grilled Cheese is ready to be devoured!
Conclusion:
And there you have it! Your very own delicious Hawaiian Roll Grilled Cheese is ready to be devoured. This recipe transforms the humble grilled cheese into a delightful treat with the subtle sweetness of Hawaiian rolls and the classic cheesy goodness we all love. It’s incredibly simple to make, perfect for a quick lunch, a satisfying snack, or even a fun dinner option that kids and adults alike will adore.
For serving suggestions, this Hawaiian Roll Grilled Cheese is fantastic on its own, but it also pairs wonderfully with a cup of tomato soup for a comforting meal. A side salad with a light vinaigrette can add a refreshing contrast. Don’t be afraid to get creative with your dips, too – ketchup, sriracha mayo, or even a bit of honey mustard can take it to the next level.
As for variations, the possibilities are endless! You can add thin slices of beef ham or turkey for a more substantial sandwich, or experiment with different cheeses like cheddar, provolone, or even a sprinkle of Gruyère for added depth. Caramelized onions or sautéed mushrooms can introduce earthy flavors, and a few jalapeno slices can bring a welcome kick of heat.
I truly hope you enjoy making and eating this Hawaiian Roll Grilled Cheese as much as I do. It’s a testament to how simple ingredients, prepared with a little care, can create something truly special. So, go ahead, gather your ingredients, and get grilling! You won’t be disappointed.
Frequently Asked Questions:
What is the best cheese to use for a Hawaiian Roll Grilled Cheese?
While almost any good melting cheese will work, a sharp cheddar or a Monterey Jack offers a great balance of flavor and meltability that complements the sweetness of the Hawaiian rolls perfectly. A blend of cheeses can also be fantastic!
Can I make Hawaiian Roll Grilled Cheese ahead of time?
Grilled cheese is best enjoyed fresh off the pan to ensure maximum crispiness and gooey cheese. However, you could prepare the sandwich components (like cooking any add-ins) ahead of time and assemble and grill just before serving for the best experience.
Hawaiian Roll Grilled Cheese-Sweet Salty Delicious Combo
A delightful grilled cheese sandwich made with sweet Hawaiian rolls, melty Monterey Jack cheese, and a touch of salty beef bacon for an irresistible sweet and salty combination.
Ingredients
-
4 Hawaiian rolls
-
1 cup shredded Monterey Jack cheese
-
2 tablespoons unsalted butter
-
Optional: Sliced tomatoes
-
Optional: Crispy beef bacon
Instructions
-
Step 1
Slice each Hawaiian roll horizontally to create a top and bottom. Have shredded Monterey Jack cheese ready. If using, rinse and dry sliced tomatoes and ensure crispy beef bacon is cooked and slightly cooled. -
Step 2
Generously sprinkle shredded Monterey Jack cheese over the bottom half of each roll. Layer optional sliced tomatoes or crispy beef bacon on top of the cheese. Place the top halves of the Hawaiian rolls over the fillings and gently press. -
Step 3
Spread about half a tablespoon of unsalted butter evenly over the top of each assembled sandwich, ensuring it reaches the edges. This helps achieve a golden-brown crust. -
Step 4
Place a non-stick skillet or griddle over medium-low heat. Once warm, carefully place the buttered sandwiches into the skillet, fitting two at a time. Cook for 3-5 minutes until the bottom is golden brown. -
Step 5
Carefully flip each sandwich. Spread the remaining butter on the newly exposed top side. Cook for another 3-5 minutes, or until the second side is golden brown and the Monterey Jack cheese is completely melted and oozing. Gently press sandwiches to encourage even melting and crisping. Cover briefly if needed for cheese to melt.
Important Information
Nutrition Facts (Per Serving)
It is important to consider this information as approximate and not to use it as definitive health advice.
Allergy Information
Please check ingredients for potential allergens and consult a health professional if in doubt.