Best Chocolate Chip Banana Bread Recipe Easy
Chocolate Chip Banana Bread is more than just a quick bread; it’s a warm hug in edible form. Who can resist the comforting aroma that fills the kitchen as it bakes? I know I certainly can’t! This beloved classic, already a star for its moist crum extractb and sweet banana flavor, gets a delightful upgrade with the addition of gooey, melted chocolate chips. It’s the perfect way to use up those overripe bananas languishing on your counter and transform them into something truly magical. What makes this particular Chocolate Chip Banana Bread so special? It’s the perfect balance of sweet, tender banana and rich, decadent chocolate, creating a symphony of flavors and textures in every single bite. This isn’t just any banana bread; it’s a truly exceptional treat that will become a go-to in your baking repertoire.
Ingredients:
Get ready for a treat that’s both comforting and utterly delicious! This Chocolate Chip Banana Bread is my go-to for using up those overripe bananas that are just beggin extractg for a second life. It’s incredibly moist, packed with banana flavor, and the pockets of melted chocolate make every bite a little piece of heaven. Whether you’re a seasoned baker or just starting out, this recipe is wonderfully forgiving and always yields fantastic results. Let’s dive in and create something truly special!
Preparing Your Ingredients
Before we begin extract mixing, it’s essential to have all your ingredients measured and ready to go. This technique, often called “mise en place,” makes the baking process much smoother and prevents any last-minute scrambling. For the bananas, make sure they are very ripe – the spottier, the better! The riper the banana, the sweeter and more potent its flavor will be, contributing significantly to the overall taste and moisture of your bread. You can mash them with a fork in a bowl until they reach a smooth, pulpy consistency, or if you prefer, you can give them a quick pulse in a food processor.
Mixing the Wet Ingredients
In a large mixing bowl, start by combining the mashed bananas, packed light brown sugar, and granulated sugar. Whisk them together until well combined and there are no large clumps of sugar remaining. Next, pour in the melted unsalted butter and whisk until it’s fully incorporated into the banana and sugar mixture. Now, crack in your two large eggs, one at a time, whisking well after each addition to ensure they are thoroughly blended. Add the vanilla extract and stir to distribute its warm, aromatic essence throughout the wet ingredients. Finally, gently stir in the Greek yogurt (or sour cream, if you’ve opted for that). The yogurt or sour cream adds an extra layer of moisture and tenderness to the finished bread, contributing to its luxuriously soft texture. Don’t overmix at this stage; just combine until everything is incorporated.
Incorporating the Dry Ingredients
In a separate medium-sized bowl, whisk together the all-purpose flour, baking soda, and salt. Whisking the dry ingredients together ensures that the leavening agent (baking soda) and salt are evenly distributed throughout the flour. This step is crucial for a consistent rise and balanced flavor in your banana bread. Once the dry ingredients are well combined, gradually add them to the wet ingredients. It’s best to add them in two or three additions, gently folding them in with a spatula. Mix just until the flour streaks disappear. Be careful not to overmix the batter at this point, as overmixing can develop the gluten in the flour, leading to a tougher bread. A few small lumps in the batter are perfectly fine and actually desirable!
Adding the Star of the Show: Chocolate Chips!
Now for the best part – the chocolate chips! Sprinkle about 3/4 cup of mini chocolate chips into your batter. Use your spatula to gently fold them in, distributing them as evenly as possible throughout the dough. Reserve a small handful of these delicious little gems for sprinkling on top later, which will create a beautiful and tempting crust. The mini chocolate chips are perfect because they distribute well and melt beautifully throughout the bread, creating delightful chocolatey pockets. If you prefer larger chocolate chunks, feel free to use those, but keep in mind they might sink a bit more during baking.
Baking Your Masterpiece
Preheat your oven to 350°F (175°C). Grease and flour a standard 9×5 inch loaf pan, or line it with parchment paper for easy removal. Pour the batter into the prepared loaf pan, spreading it evenly. Now, take that reserved handful of mini chocolate chips and sprinkle them generously over the top of the batter. This creates a lovely visual appeal and an extra boost of chocolatey goodness right on the surface. Place the loaf pan in the preheated oven.
Bake for approximately 50 to 65 minutes. The exact baking time can vary depending on your oven, so it’s important to keep an eye on it. You’ll know your banana bread is done when a wooden skewer or toothpick inserted into the center comes out clean, or with just a few moist crum extractbs attached (but no wet batter). If the top of your bread starts to brown too quickly before the inside is cooked, you can loosely tent it with aluminum foil for the remainder of the baking time.
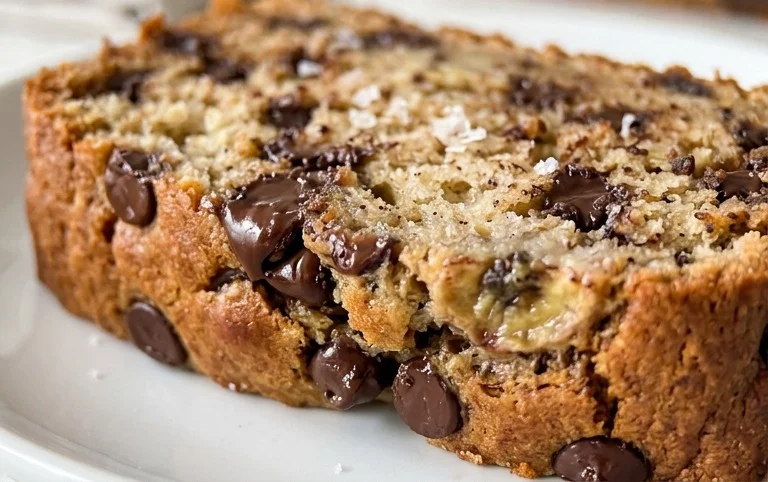
Once baked, carefully remove the loaf pan from the oven. Let the banana bread cool in the pan for about 10-15 minutes. This allows it to set up a bit and makes it easier to remove without breaking. After the initial cooling period, gently invert the loaf pan onto a wire rack to remove the banana bread. Allow it to cool completely on the wire rack before slicing. This cooling process is crucial for the bread to firm up properly, making for clean slices. Enjoy your warm, fragrant, and incredibly satisfying Chocolate Chip Banana Bread! It’s perfect on its own, toasted with butter, or even with a dollop of cream cheese.
Conclusion:
So there you have it – the ultimate recipe for a delicious and comforting Chocolate Chip Banana Bread! This recipe is truly a winner because it’s incredibly forgiving, yielding a moist, tender crum extractb that’s packed with sweet banana flavor and studded with melty pockets of chocolate. It’s the perfect way to use up those overripe bananas sitting on your counter and creates a truly satisfying treat for any occasion. Whether you’re looking for a quick breakfast option, a delightful afternoon snack, or a sweet dessert, this bread delivers every time.
I love serving slices warm, perhaps with a dollop of butter or a drizzle of honey. It also pairs beautifully with a cup of coffee or a glass of milk. Don’t be afraid to get creative with variations! Consider adding a sprinkle of cinnamon for a warm spice note, some chopped walnuts or pecans for a nutty crunch, or even a swirl of peanut butter for an extra decadent twist. I truly encourage you to give this Chocolate Chip Banana Bread recipe a try. I promise you won’t be disappointed; it’s destined to become a new family favorite.
Frequently Asked Questions:
Why is my banana bread dense?
Density in banana bread can often be caused by overmixing the batter once the wet and dry ingredients are combined. Overmixing develops the gluten too much, resulting in a tougher, denser loaf. Another common culprit is not using ripe enough bananas; they provide essential moisture and sweetness. Ensure your bananas are very spotty and soft for the best results.
Can I make this banana bread healthier?
Absolutely! You can easily make this recipe healthier by substituting some of the all-purpose flour with whole wheat flour, or even incorporating some oat flour. Reducing the amount of sugar is also an option, as the ripe bananas add significant sweetness. For a richer, healthier fat source, you could try using unsweetened applesauce or Greek yogurt in place of some of the oil or butter.
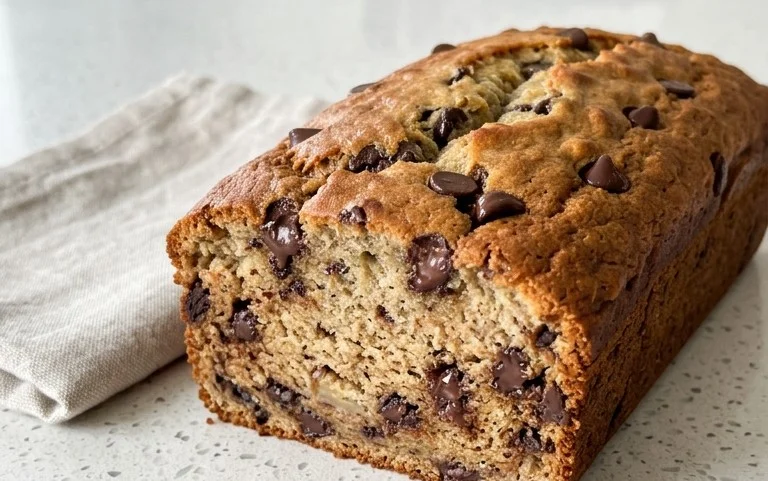
Chocolate Chip Banana Bread
Moist and delicious banana bread packed with chocolate chips and a hint of Greek yogurt for extra tenderness.
Ingredients
-
1 1/2 cups (380g) ripe and mashed banana (3-4 medium bananas)
-
1/2 cup (100g) packed light brown sugar
-
1/2 cup (100g) granulated sugar
-
1/2 cup (112g) unsalted butter, melted
-
2 large eggs
-
1 tsp vanilla extract
-
1/2 cup (120g) 2% Greek yogurt
-
1 1/3 cups (172g) all-purpose flour
-
1 tsp baking soda
-
1/2 tsp salt
-
3/4 cup (140g) mini chocolate chips
Instructions
-
Step 1
Preheat oven to 350°F (175°C). Grease and flour a 9×5 inch loaf pan. -
Step 2
In a large bowl, mash the ripe bananas until smooth. Stir in the packed light brown sugar, granulated sugar, melted unsalted butter, large eggs, vanilla extract, and 2% Greek yogurt until well combined. -
Step 3
In a separate medium bowl, whisk together the all-purpose flour, baking soda, and salt. -
Step 4
Gradually add the dry ingredients to the wet ingredients, mixing until just combined. Be careful not to overmix. -
Step 5
Fold in 3/4 cup (140g) mini chocolate chips. -
Step 6
Pour the batter into the prepared loaf pan and sprinkle a handful of extra chocolate chips on top. -
Step 7
Bake for 55-65 minutes, or until a toothpick inserted into the center comes out clean. -
Step 8
Let the banana bread cool in the pan for 10-15 minutes before transferring it to a wire rack to cool completely.
Important Information
Nutrition Facts (Per Serving)
It is important to consider this information as approximate and not to use it as definitive health advice.
Allergy Information
Please check ingredients for potential allergens and consult a health professional if in doubt.