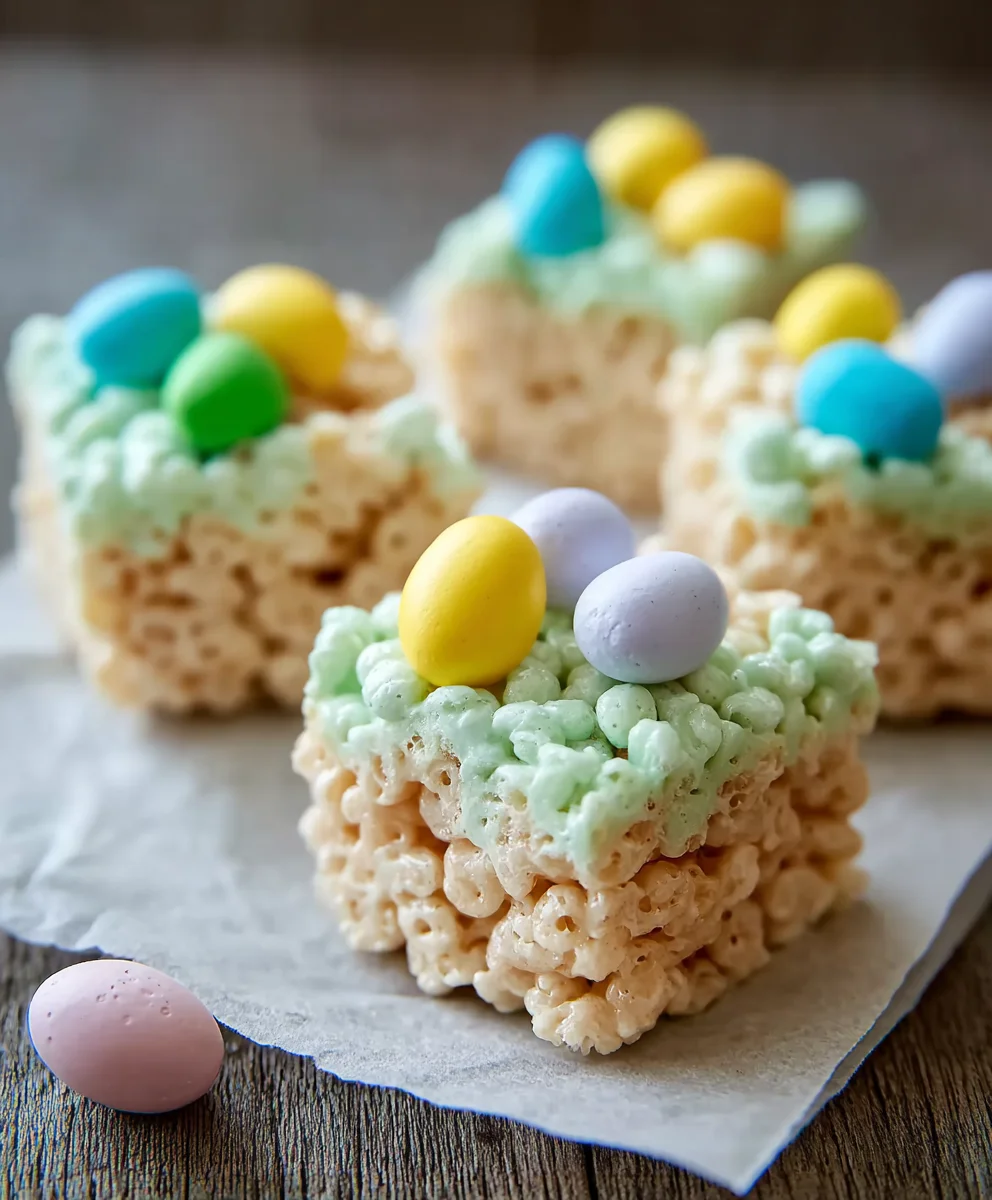
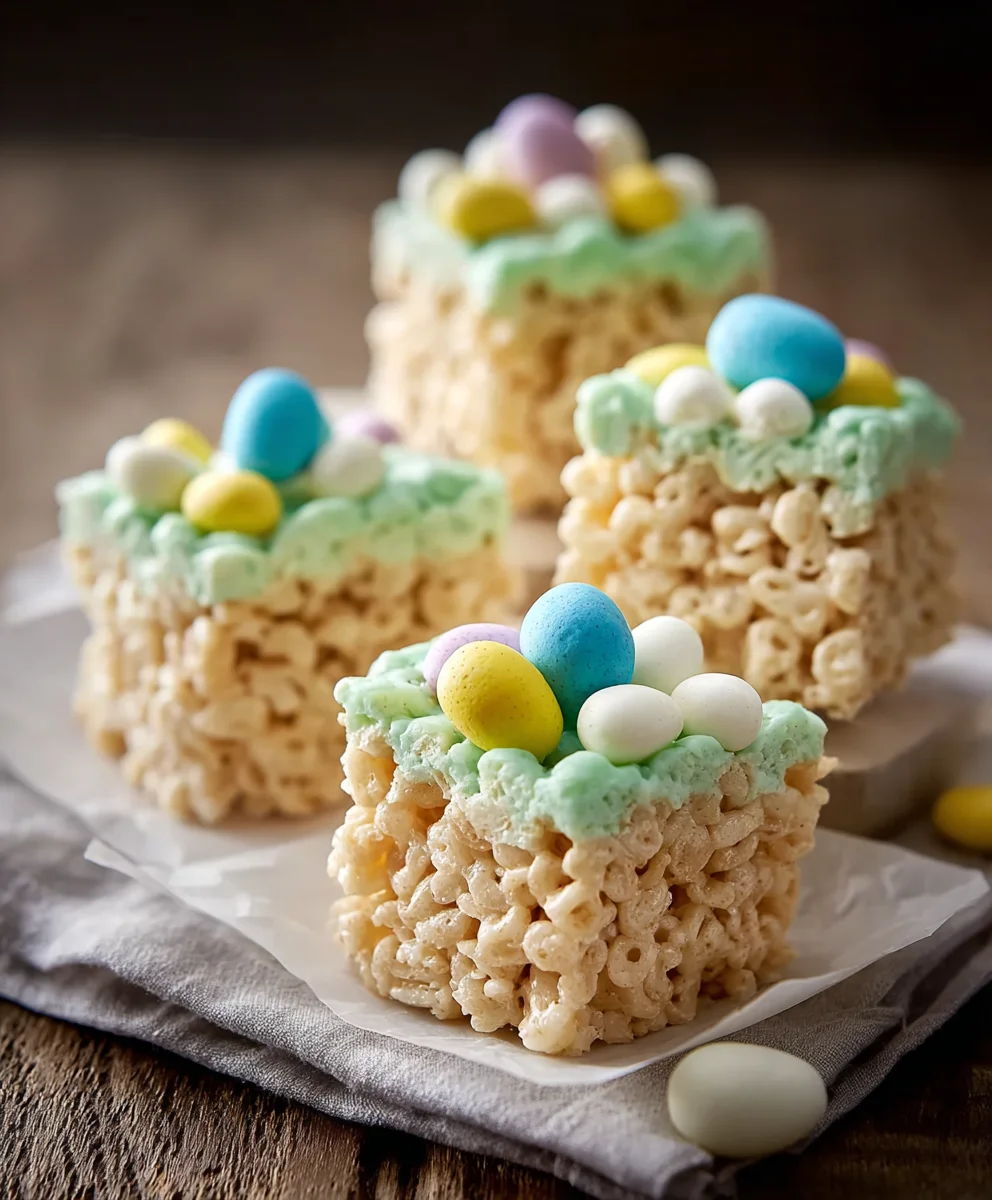
Easter Rice Krispie Treats – Easy Spring Fun
Easter Rice Krispie Treats are a quintessential part of springtime celebrations for a reason. There’s something undeniably magical about these simple yet delightful squares that brings a smile to everyone’s face, from the youngest Easter egg hunters to the seasoned holiday hosts. What makes them so beloved? It’s their nostalgic charm, their unbelievably easy preparation, and their incredible versatility. You can whip up a batch of classic Rice Krispie treats in mere minutes, making them the perfect last-minute addition to your Easter brunch or a fun activity to do with the kids. But the true brilliance of Easter Rice Krispie Treats lies in their ability to transform. With a few clever additions and a touch of spring-themed decoration, these humble treats become edible works of art, embodying the joy and festivity of the holiday. Get ready to elevate your Easter spread with these fun and delicious creations!
Ingredients:
- 16 ounces marshmallows (jumbo or mini both work)
- 7 cups Rice Krispies cereal
- 2 tablespoons unsalted butter (for greasing)
- ½ cup unsalted butter (for the treat base)
- 3-4 cups powdered sugar
- ¼ cup milk
- 1 teaspoon vanilla extract
- Green food coloring
- Easter egg candies (mini chocolate eggs or jelly beans)
Preparing Your Workspace and Equipment
Before we dive into creating these delightful Easter Rice Krispie Treats, it’s crucial to get your kitchen ready. This might seem like a minor step, but it makes the entire process smoother and less messy. First, locate a large mixing bowl. This needs to be big enough to comfortably hold all your Rice Krispies cereal and the melted marshmallow mixture. Next, prepare your baking dish. A 9×13 inch baking pan is ideal for this recipe. Take the 2 tablespoons of unsalted butter and generously grease the inside of this pan. Make sure to get into all the corners and up the sides. This butter is your best friend in preventing the sticky treats from adhering to the pan. You can use a piece of paper towel or a pastry brush to spread the butter evenly. Set this prepared pan aside. Now, gather your measuring cups and spoons, and have them readily accessible. Because this recipe moves quickly once the marshmallows are melted, having everything measured and within reach will prevent any last-minute scrambling. It’s also a good idea to have a large spatula or a sturdy wooden spoon ready for stirring.
Melting the Marshmallow Base
Now, let’s start building the foundation of our Easter Rice Krispie Treats. Take the ½ cup of unsalted butter and place it into a large, microwave-safe bowl or a heavy-bottomed saucepan. If you’re using a saucepan, place it over low to medium heat on your stovetop. If you’re using a microwave, you’ll want to melt the butter in short bursts, checking frequently. Once the butter is melted and shimmering, add all 16 ounces of your marshmallows to the bowl or saucepan. If you’re using a microwave, continue microwaving in 30-second intervals, stirring after each, until the marshmallows are mostly melted and smooth. Be careful not to overheat, as this can make them tough. If you’re melting on the stovetop, stir constantly over low heat until the marshmallows are completely melted and smooth, forming a gooey, sticky mass with the butter. The goal here is a perfectly melted, uniform mixture, ready to coat our cereal. Don’t rush this step; a gentle melt ensures the best texture.
Combining Cereal and Marshmallow Magic
Once your marshmallow mixture is beautifully melted and smooth, it’s time to introduce the star of the show: the Rice Krispies cereal. Immediately add the 7 cups of Rice Krispies cereal to the melted marshmallow mixture. Using your large spatula or wooden spoon, gently but thoroughly stir the cereal into the marshmallow. You want to ensure every single piece of cereal is coated with the sticky, gooey marshmallow goodness. Work quickly, as the marshmallow mixture will start to cool and firm up. The key is to distribute the cereal evenly within the marshmallow. If you notice any dry patches of cereal, keep stirring until it’s all nicely incorporated. This is where having all your ingredients prepped and your workspace organized truly pays off, allowing you to focus on this crucial mixing step without delay. The mixture will become quite thick and a bit challengin extractg to stir, but keep at it until you achieve a homogenous blend.
Crafting the Easter Green Hue
Now for the fun, festive part that makes these Easter Rice Krispie Treats truly special: adding the vibrant green color! Once the cereal and marshmallow mixture is combined, it’s time to get creative with color. Add a few drops of green food coloring directly into the mixture. Start with a small amount – you can always add more to achieve a deeper shade. Using your spagin extracta, begin gently folding and mixing the food coloring into the Rice Krispie mixture. Continue mixing until the color is evenly distributed throughout. You’re aiming for a soft, Easter-appropriate green. If the color isn’t as vibrant as you’d like, add another drop or two of food coloring and continue mixing. Be patient with this process; it might take a little effort to get the color perfectly uniform, but the result will be well worth it. This step transforms our classic treats into a springtime delight.
Shaping and Decorating Your Easter Delights
With your green-tinted Rice Krispie mixture ready, it’s time to shape and decorate your Easter Rice Krispie Treats. Carefully transfer the entire mixture into your prepared 9×13 inch baking pan. Use your greased spatula or a piece of parchment paper lightly greased on the underside to gently press the mixture evenly into the pan. Avoid pressing too hard, as this can make the treats dense and chewy. You want a relatively light and airy texture. Once the mixture is spread evenly, it’s time for the festive embellishments. Scatter your Easter egg candies (mini chocolate eggs or jelly beans) over the top of the still-soft Rice Krispie treats. Gently press them down so they adhere to the surface. You can arrange them in patterns or sprinkle them randomly – it’s entirely up to your creative vision! This is where the Easter theme truly comes alive, making these treats perfect for any springtime celebration. Let the treats cool completely in the pan, which usually takes at least 30 minutes to an hour, before cutting them into squares or desired shapes. Enjoy your beautiful and delicious Easter creations!
Conclusion:
And there you have it! You’ve successfully created these delightful Easter Rice Krispie Treats. We hope you found this recipe straightforward and enjoyable. These festive treats are incredibly versatile and perfect for any Easter gathering, from classroom parties to family brunches. Their simple charm and nostalgic flavor make them a guaranteed hit with both kids and adults.
For serving, consider arrangin extractg them on a festive platter adorned with pastel-colored sprinkles or edible Easter-themed decorations. They are also fantastic as a sweet ending to your Easter dinner or even as a thoughtful homemade gift. Don’t be afraid to get creative with your Easter Rice Krispie Treats! You can easily adapt the recipe by adding a drizzle of white chocolate, incorporating food coloring into the marshmallow mixture for pastel hues, or even cutting them into Easter shapes using cookie cutters. We encourage you to experiment and make these treats your own!
Frequently Asked Questions:
Q: How should I store my Easter Rice Krispie Treats?
A: To keep your Easter Rice Krispie Treats fresh, store them in an airtight container at room temperature. If properly stored, they should remain delicious for up to 3 days. Avoid refrigeration, as this can make them hard and less enjoyable.
Q: Can I make Easter Rice Krispie Treats ahead of time?
A: Absolutely! These treats are perfect for making in advance. You can prepare them up to 2 days before your event and store them as described above. This makes them a convenient option when you’re busy with other Easter preparations.
Q: My treats are too hard. What did I do wrong?
A: The most common reason for hard Rice Krispie Treats is pressing them into the pan too firmly. While you want them to hold their shape, avoid over-compressing the mixture. Gently press them down just enough to even them out. Also, ensure you’re not cooking the marshmallow mixture for too long.
Easter Rice Krispie Treats – Easy Spring Fun
Easy and fun Easter-themed Rice Krispie treats with a festive green hue and colorful candy decorations.
Ingredients
-
16 ounces marshmallows (jumbo or mini)
-
7 cups Rice Krispies cereal
-
2 tablespoons unsalted butter, for greasing
-
½ cup unsalted butter
-
3-4 cups powdered sugar
-
¼ cup milk
-
1 teaspoon vanilla extract
-
Green food coloring
-
Easter egg candies (mini chocolate eggs or jelly beans)
Instructions
-
Step 1
Prepare your workspace: Grease a 9×13 inch baking pan with 2 tablespoons of butter. Gather all ingredients and equipment, including a large mixing bowl, spatula, and measuring tools. -
Step 2
Melt the marshmallow base: In a large microwave-safe bowl or saucepan over low heat, melt ½ cup of butter. Add marshmallows and microwave in 30-second intervals, stirring after each, or stir constantly on the stovetop until completely melted and smooth. -
Step 3
Combine cereal and marshmallow: Immediately add 7 cups of Rice Krispies cereal to the melted marshmallow mixture. Stir with a spatula until every piece of cereal is evenly coated. Work quickly as the mixture cools. -
Step 4
Craft the Easter green hue: Add a few drops of green food coloring to the mixture. Gently fold and mix until the color is evenly distributed for a soft, Easter-appropriate green. Add more coloring if needed. -
Step 5
Shape and decorate: Transfer the green mixture into the prepared baking pan. Gently press it evenly into the pan using a greased spatula or parchment paper. Scatter Easter egg candies over the top and gently press them in. -
Step 6
Cool and serve: Let the treats cool completely in the pan (at least 30 minutes to an hour). Once cooled, cut into squares or desired shapes and enjoy.
Important Information
Nutrition Facts (Per Serving)
It is important to consider this information as approximate and not to use it as definitive health advice.
Allergy Information
Please check ingredients for potential allergens and consult a health professional if in doubt.