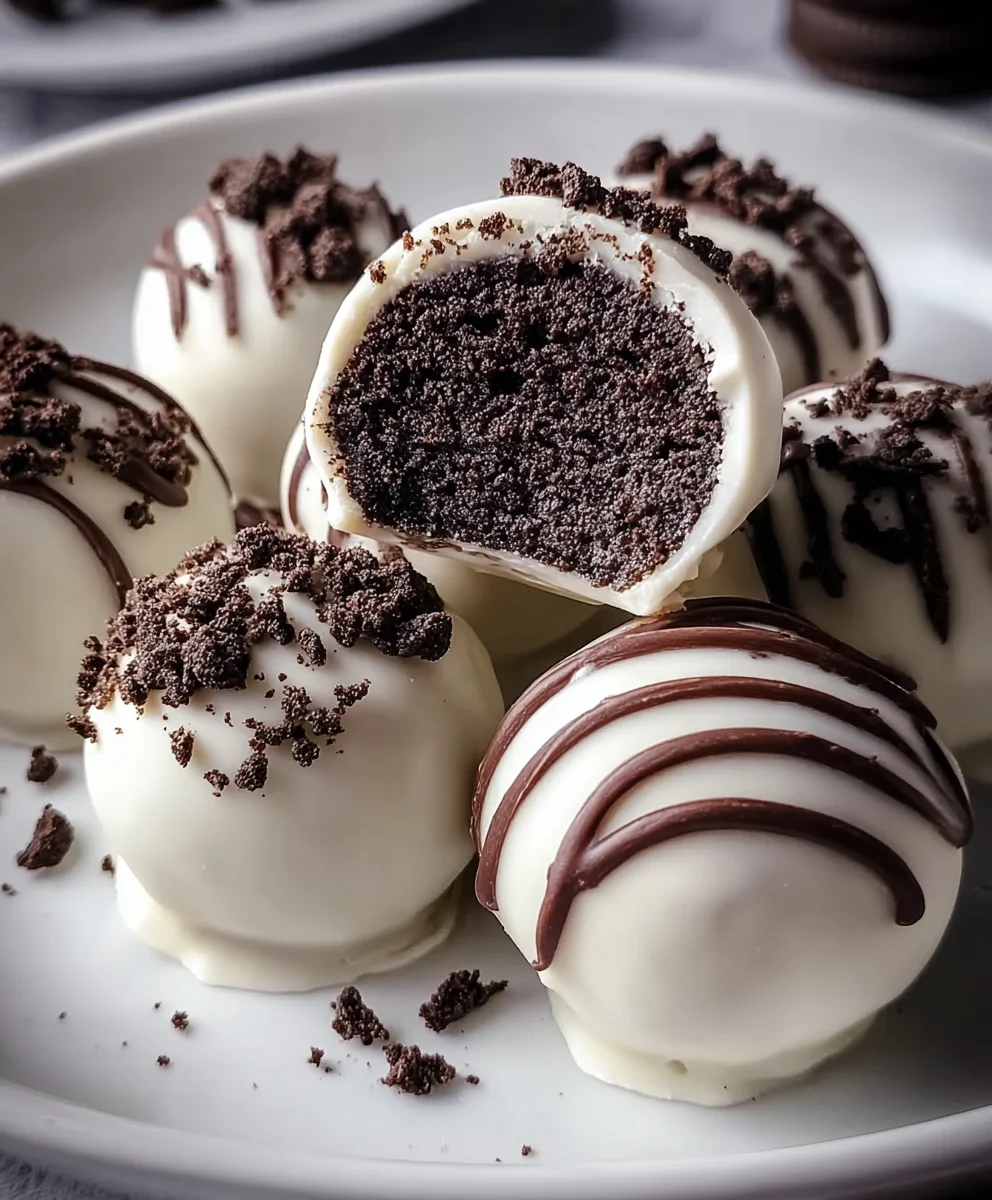
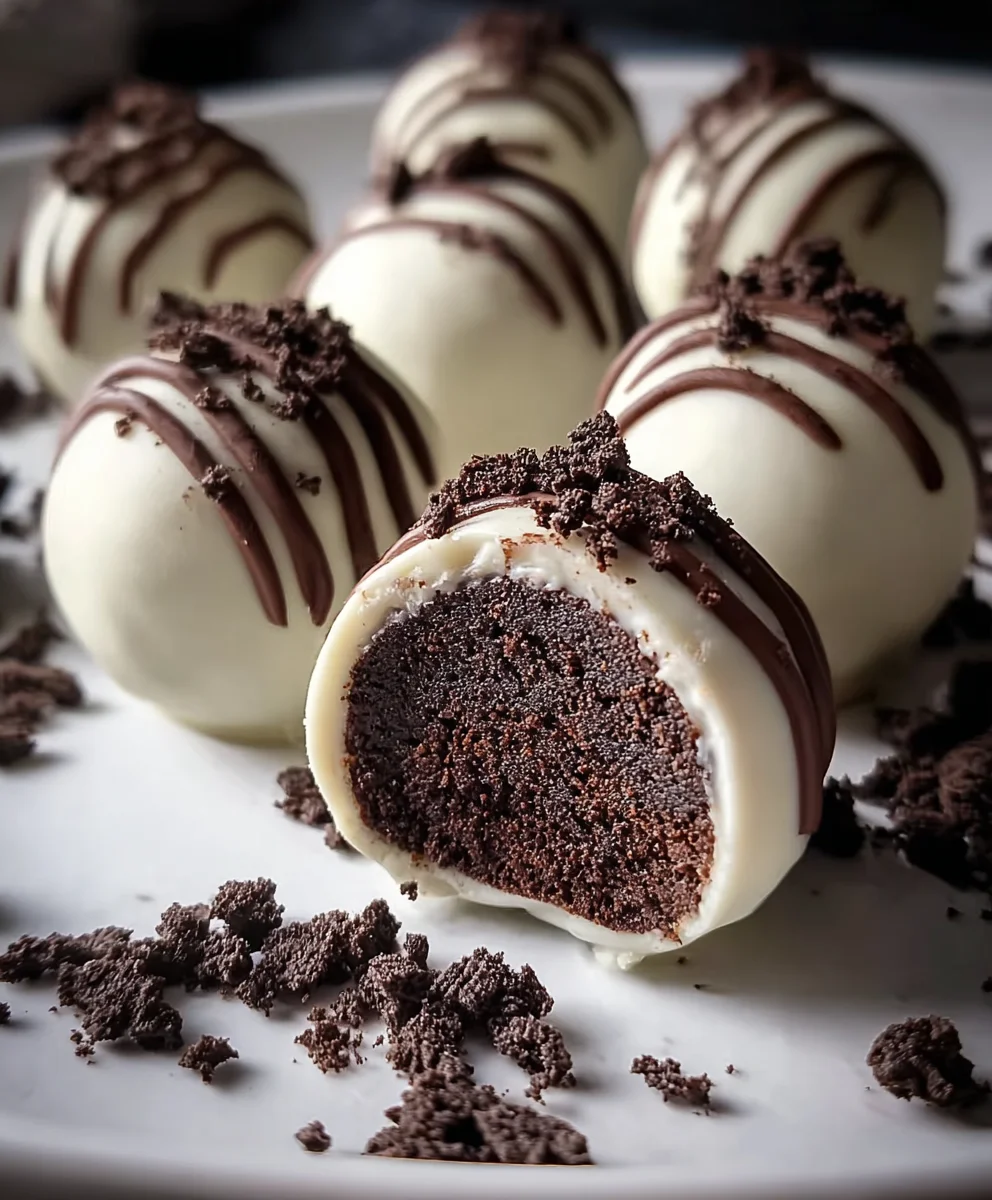
Easy Oreo Cake Balls-Irresistible No-Bake Dessert
Oreo Cake Balls are more than just a treat; they’re a tiny explosion of pure joy in every bite. If you’ve ever found yourself irresistibly drawn to that perfect balance of rich chocolate, creamy filling, and the signature crunch of an Oreo cookie, then you’re in for a serious delight. These delightful little spheres capture all the beloved flavors of your favorite cookie and transform them into an easy-to-handle, intensely satisfying dessert. What truly makes Oreo Cake Balls so special is their incredible versatility and the sheer happiness they bring. They’re perfect for parties, a thoughtful homemade gift, or simply as a well-deserved personal indulgence. The magic lies in their simplicity and the way they elevate the humble Oreo into something truly extraordinary, offering a decadent experience that is surprisingly simple to create in your own kitchen.
Why You’ll Adore These
The Ultimate Indulgence
There’s a reason why so many people go absolutely wild for Oreo Cake Balls. It’s the perfect combination of textures and flavors that just works on every level. Imagin extracte the familiar, slightly bitter chocolate cookie combined with the sweet, creamy frosting, all enveloped in a smooth, decadent chocolate coating. It’s a symphony of deliciousness that appeals to both kids and adults alike. Plus, their small size makes them incredibly addictive – it’s hard to stop at just one! Whether you’re looking for a show-stopping dessert for a special occasion or a quick, sweet pick-me-up, these cake balls are guaranteed to hit the spot and leave you craving more.
Ingredients:
- 24 regular-sized Oreo cookies
- 4 ounces cream cheese, softened to room temperature
- 10 ounces white candy melts (Ghirardelli brand is excellent for smooth melting)
- 2 tablespoons heavy cream (this is optional, only reach for it if your candy coating seems too thick to work with)
- Crushed Oreo cookies for garnishing
- Semi-sweet chocolate chips for decorative drizzling
Preparing Your Oreo Cake Balls
Step 1: Crushing the Oreos
This is where the magic begin extracts! Take your 24 regular-sized Oreo cookies and place them into a food processor. Pulse them until they are finely ground into crum extractbs. You’re aiming for a consistency similar to coarse sand. If you don’t have a food processor, don’t worry! You can achieve this by placing the Oreos in a sturdy zip-top bag and crushing them with a rolling pin or the flat side of a heavy pan. Make sure to get them as fine as possible, as this will create a smoother texture for your cake balls. Set aside about 1/4 cup of these finely crushed Oreos for later. This reserved amount will be used for that delightful crunchy topping.
Step 2: Mixing the Base
Now it’s time to bind those delrum extractous crumbs together. In a medium bowl, combine the finely crushed Oreo cookies (minus the reserved portion) with the 4 ounces of softened cream cheese. Using a spatula or a sturdy spoon, mix these two ingredients thoroughly until they are well incorporated. The cream cheese acts as the binder, creating a dough-like consistency. It might seem a little sticky, and that’s perfectly normal. Continue mixing until there are no visible streaks of cream cheese and the mixture is uniform in color and texture. You should be able to easily shape it into balls. If, by chance, the mixture feerum extracttoo dry and crumbly, you can add a tiny bit more softened cream cheese, about a teaspoon at a time, until it holds together when squeezed.
Step 3: Shaping the Cake Balls
Once your Oreo and cream cheese mixture is ready, it’s time to roll! Take small portions of the mixture, about a tablespoon each, and roll them between your palms to form smooth, compact balls. Aim for a consistent size for all your cake balls so they bake and coat evenly. A good guideline is to make them roughly the size of a large marble or a small truffle. Place the rolled balls onto a baking sheet lined with parchment paper. This prevents them from sticking and makes them easy to transfer. Ensure there’s a little space between each ball. Pop the baking sheet into the freezer for about 15-20 minutes. This chilling step is crucial as it firms up the balls, making them much easier to dip into the melted candy coating.
Step 4: Melting the White Candy Coating
While your Oreo balls are chilling, let’s get the coating ready. Place the 10 ounces of white candy melts into a microwave-safe bowl. Microwave them in 30-second intervals, stirring thoroughly after each interval, until they are completely melted and smooth. Be patient with this process; overheating can cause the candy melts to seize up and become unusable. Once melted, if the coating seems a bit too thick for dipping, you can add 1 tablespoon of heavy cream and stir it in. Microwave for another 10 seconds and stir again. If it’s still too thick, add the second tablespoon of heavy cream and repeat the microwaving and stirring. The goal is a smooth, fluid consistency that will coat the cake balls evenly without being overly watery.
Step 5: Dipping and Garnishing
Retrieve your chilled Oreo cake balls from the freezer. Now, it’s time for the exciting part: dipping! Using a fork or a toothpick, carefully dip each chilled cake ball into the melted white candy coating. Allow any excess coating to drip back into the bowl. You want a nice, even coat without it being too thick. Place the coated cake ball back onto the parchment-lined baking sheet. While the coating is still wet, immediately sprinkle some of the reserved crushed Oreo cookies over the top of each cake ball. This creates that signature crunchy texture and beautiful contrast. If you want to add another layer of decoration, melt a small amount of semi-sweet chocolate chips (you can do this in the microwave in short bursts, stirring frequently). Once melted, drizzle the semi-sweet chocolate over the white-coated cake balls using a fork or a piping bag with a very fine tip.
Allow the coated Oreo cake balls to set completely at room temperature or in the refrigerator for about 15-20 minutes until the candy coating is firm. Once set, they are ready to be enjoyed! Store any leftovers in an airtight container at room temperature for a few days, or in the refrigerator if you prefer them chilled.
Conclusion:
And there you have it! You’ve successfully created delicious Oreo Cake Balls, a delightful treat perfect for any occasion. We’ve walked through the simple steps of transforming classic Oreos into these irresistible bite-sized delights, and I hope you’ve had a fantastic time making them. These Oreo Cake Balls are incredibly versatile. Serve them at parties, as a sweet ending to a meal, or simply as an afternoon pick-me-up. They also make a fantastic homemade gift! Don’t be afraid to experiment with decorations – sprinkles, drizzles of white chocolate, or even a dusting of cocoa powder can elevate their look and taste.
I encourage you to get creative and make these Oreo Cake Balls your own. The joy of baking is in the personalization, so have fun with it! Enjoy sharing these delightful creations with your loved ones.
Frequently Asked Questions:
Can I make Oreo Cake Balls ahead of time?
Absolutely! Oreo Cake Balls can be made up to 3-4 days in advance and stored in an airtight container in the refrigerator. For longer storage, you can freeze them for up to a month. Simply thaw them in the refrigerator for a few hours before serving.
What are some other coating options besides chocolate?
While chocolate is a classic choice, feel free to get creative! You can use candy melts in various colors, a simple glaze made from powdered sugar and milk, or even roll them in crushed nuts or shredded coconut for added texture and flavor.
Easy Oreo Cake Balls-Irresistible No-Bake Dessert
Simple no-bake dessert made with crushed Oreos and cream cheese, coated in white candy melts and garnished with more Oreos and chocolate drizzle. A crowd-pleasing treat that’s perfect for any occasion.
Ingredients
-
24 regular-sized Oreo cookies
-
4 ounces cream cheese, softened
-
10 ounces white candy melts
-
2 tablespoons heavy cream (optional)
-
Crushed Oreo cookies for garnishing
-
Semi-sweet chocolate chips for decorative drizzling
Instructions
-
Step 1
Finely grind 24 regular-sized Oreo cookies in a food processor or by hand until they resemble coarse sand. Set aside about 1/4 cup for garnishing. -
Step 2
In a bowl, combine the remaining crushed Oreos with 4 ounces of softened cream cheese. Mix thoroughly until a dough-like consistency forms. -
Step 3
Roll the mixture into small, compact balls, about 1 tablespoon each. Place them on a parchment-lined baking sheet and freeze for 15-20 minutes until firm. -
Step 4
Melt 10 ounces of white candy melts in a microwave-safe bowl in 30-second intervals, stirring until smooth. If too thick, stir in up to 2 tablespoons of heavy cream. -
Step 5
Dip the chilled Oreo balls into the melted white candy coating, allowing excess to drip off. Place back on the parchment paper. Immediately sprinkle with reserved crushed Oreos while the coating is wet. -
Step 6
Melt semi-sweet chocolate chips and drizzle over the coated cake balls for decoration. Let set completely at room temperature or in the refrigerator.
Important Information
Nutrition Facts (Per Serving)
It is important to consider this information as approximate and not to use it as definitive health advice.
Allergy Information
Please check ingredients for potential allergens and consult a health professional if in doubt.