Buster Bar Ice Cream Cake-Easy Homemade Treat
Buster Bar Ice Cream Cake isn’t just a dessert; it’s a nostalgic trip in every single bite. If you’re anything like me, the mere mention of a Buster Bar brings back memories of summer days, sticky fingers, and pure, unadulterated joy. This beloved treat, with its iconic layers of creamy ice cream, crunchy coating, and often a surprise center, holds a special place in many hearts. But what if I told you we could elevate that experience, transforming the humble Buster Bar into a show-stopping, crowd-pleasing Buster Bar Ice Cream Cake? It’s the perfect way to capture that classic flavor and texture in a larger-than-life format that’s guaranteed to impress. Get ready to dive into a world of chocolatey, caramelly, peanut-buttery goodness that’s surprisingly easy to create at home!
Why You’ll Love This Buster Bar Ice Cream Cake
A Delectable Journey for Your Taste Buds
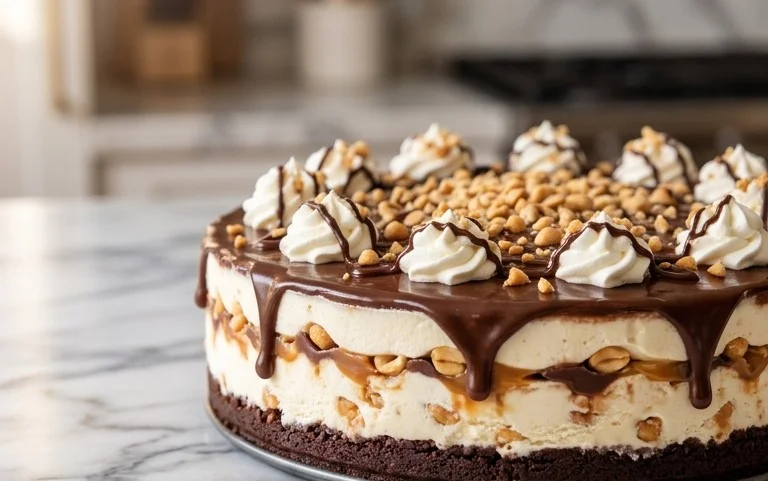
Buster Bar Ice Cream Cake
There are some desserts that just scream nostalgia, and for me, the Buster Bar Ice Cream Cake is absolutely one of them. It’s a delightful homage to that iconic ice cream truck treat, but amplified into a glorious, shareable cake. Imagin extracte layers of cool vanilla ice cream, crushed chocolatey goodness, crunchy peanuts, and that signature chocolate shell. It’s surprisingly simple to assemble, making it perfect for a last-minute craving or a planned celebration. Get ready to impress your friends and family with this ridiculously delicious creation.
Ingredients:
Assembling Your Masterpiece
This Buster Bar Ice Cream Cake is all about layering, and thankfully, it’s a process that doesn’t require any actual baking. We’ll be working with frozen and chilled components, so the key is speed and having everything prepped and ready to go. Think of it as a fun, edible construction project!
Step 1: Preparing the Cracker Base
First, we need to create our chocolatey foundation. Take your 10 whole chocolate grabeef beef ham crackers and place them in a large Ziploc bag or a bowl. The goal here is to break them down into a coarse crum extractb. You can achieve this by using a rolling pin, the bottom of a sturdy glass, or even just by enthusiastically squishing the bag with your hands. We don’t want a fine powder; we want some discernible pieces to give our cake that signature texture. Once you have your crum extractbs, set them aside.
Step 2: Softening the Ice Cream
To make the ice cream easier to work with, it needs to soften slightly. Take your gallon of vanilla ice cream out of the freezer about 10-15 minutes before you plan to start assembling. You want it to be scoopable and spreadable, but not so soft that it’s melted and soupy. The perfect consistency is like firm mashed potatoes. While the ice cream is softening, prepare your springform pan. A 9-inch springform pan is ideal for this recipe. You can either grease it lightly or line the bottom with parchment paper to make removal easier later.
Step 3: Building the First Layer**
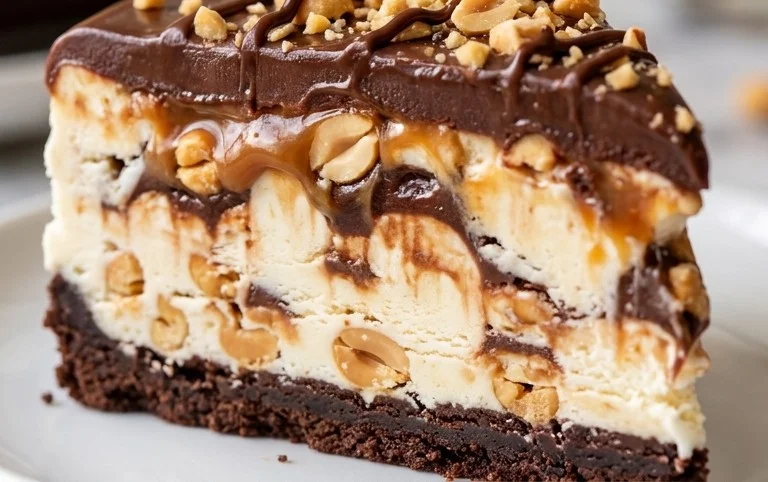
Now for the fun part! Once your ice cream is at the right consistency, scoop about half of it into your prepared springform pan. Use a spatula or the back of a spoon to spread it evenly across the bottom, creating a solid layer. Don’t worry if it’s not perfectly smooth; a slightly rustic look is part of its charm. On top of this vanilla ice cream layer, generously sprinkle half of your crushed chocolate grabeef beef ham cracker crum extractbs. You want a good, even coating to create that delicious crunch with every bite. Gently press the crum extractbs down into the ice cream so they adhere well.
Step 4: Adding the Peanut and Fudge Layers
Next, we’ll add another layer of flavor and texture. Take your 1 1/2 cups of red skin peanuts and evenly distribute about two-thirds of them over the cracker crum extractbs. Don’t be shy with the peanuts; they are a crucial element of the Buster Bar experience! Then, take your 14-ounce jar of hot fudge sauce. While it might seem odd to use it at this stage, the cold ice cream will help it firm up. Drizzle about half of the hot fudge sauce over the peanuts and cracker crum extractbs, creating swirls and pockets of rich chocolatey goodness. Again, try to get an even distribution.
Step 5: Completing the Layers and Freezing**
Now, we’ll repeat the layering process. Scoop the remaining half of the softened vanilla ice cream on top of the fudge and peanut layer. Spread this evenly to create your final ice cream layer. On top of this, sprinkle the remaining red skin peanuts and the rest of the chocolate grabeef beef ham cracker crum extractbs. Press these down gently. Finally, it’s time to add the iconic shell. Prepare your 7.5-ounce Magic Shell chocolate coating according to package directions (usually just a quick microwave). Once it’s melted and pourable, drizzle it all over the top of the cake, letting it cascade down the sides slightly. This is what gives your Buster Bar Ice Cream Cake that signature crunchy chocolate shell. Immediately place the cake back into the freezer. You’ll want to freeze it for at least 4-6 hours, or preferably overnight, to ensure it’s completely firm and set. This is essential for clean slicing.
Step 6: Serving Your Buster Bar Delight**
Once your Buster Bar Ice Cream Cake is thoroughly frozen and firm, it’s time to serve! Carefully release the sides of the springform pan. If you used parchment paper, you can gently peel it away. To slice, use a large, sharp knife that has been dipped in hot water and wiped dry. This will help you get clean cuts through the frozen ice cream and the crunchy shell. Serve immediately and enjoy the nostalgic, delicious symphony of flavors and textures! This cake is perfect for birthdays, summer gatherings, or just when you need a serious treat.
Conclusion:
And there you have it – your very own homemade Buster Bar Ice Cream Cake! This recipe truly is a winner because it captures all the beloved flavors and textures of the classic treat, but in a magnificent, shareable cake form. The layers of chocolate crunch, creamy ice cream, and gooey caramel create an irresistible combination that’s perfect for birthdays, holidays, or just because. I love serving this Buster Bar Ice Cream Cake with a drizzle of extra hot fudge or a dollop of whipped cream. For variations, consider adding a layer of chopped peanuts between the ice cream and caramel, or even experimenting with different ice cream flavors like cookie dough or mint chip for a unique twist. I highly encourage you to give this recipe a try. It’s surprisingly straightforward to assemble, and the look on people’s faces when they take their first bite will be absolutely priceless. Enjoy creating and savoring this delightful dessert!
Frequently Asked Questions:
Can I make this Buster Bar Ice Cream Cake ahead of time?
Absolutely! This ice cream cake is actually best made at least 24 hours in advance to allow the layers to fully set. This makes it an ideal make-ahead dessert for any gathering.
What if I don’t have a springform pan?
No problem! You can still make this Buster Bar Ice Cream Cake using a regular cake pan lined with parchment paper. Just ensure the parchment paper extends well over the sides, creating “handles” to help you lift the frozen cake out once it’s ready.
How should I store leftover ice cream cake?
Store any leftover Buster Bar Ice Cream Cake tightly wrapped in plastic wrap and then in an airtight container in the freezer. It will keep well for up to two weeks.
Buster Bar Ice Cream Cake
A delicious no-bake ice cream cake inspired by the classic Buster Bar, featuring layers of crushed cookies, ice cream, hot fudge, and peanuts, all topped with a chocolate shell.
Ingredients
-
10 whole graham crackers
-
1 gallon vanilla ice cream
-
14 ounce hot fudge sauce
-
1 1/2 cups red skin peanuts
-
7.5 ounce Magic Shell chocolate coating
Instructions
-
Step 1
Crush the graham crackers into fine crumbs using a food processor or by placing them in a plastic bag and crushing with a rolling pin. Spread the crumbs evenly in the bottom of a 9×13 inch pan. -
Step 2
Soften the vanilla ice cream slightly so it is spreadable. Spread the softened ice cream evenly over the graham cracker crust. -
Step 3
Drizzle the hot fudge sauce generously over the ice cream layer. Sprinkle the red skin peanuts evenly over the hot fudge. -
Step 4
Place the pan in the freezer for at least 2 hours, or until the ice cream is firm. -
Step 5
When ready to serve, carefully pour and spread the Magic Shell chocolate coating over the entire top of the frozen ice cream cake. Return to the freezer for another 30 minutes to allow the shell to harden. -
Step 6
Cut into slices and serve immediately.
Important Information
Nutrition Facts (Per Serving)
It is important to consider this information as approximate and not to use it as definitive health advice.
Allergy Information
Please check ingredients for potential allergens and consult a health professional if in doubt.