Buster Bar Ice Cream Dessert- Easy Homemade Treat
Buster Bar Ice Cream Dessert is a flavor revelation that instantly transports me back to carefree summer days. It’s that irresistible combination of crunchy peanuts, rich chocolate, and creamy vanilla ice cream all wrapped up in a delightful, no-churn package. Who doesn’t love a treat that feels both nostalgic and utterly decadent? This Buster Bar Ice Cream Dessert isn’t just another frozen dessert; it’s a symphony of textures and tastes that creates an unforgettable experience. It’s the perfect way to impress guests or simply indulge in a personal moment of bliss. Prepare to be amazed at how easily you can recreate this iconic flavor sensation in your own kitchen. Get ready to discover the magic of this truly special Buster Bar Ice Cream Dessert!
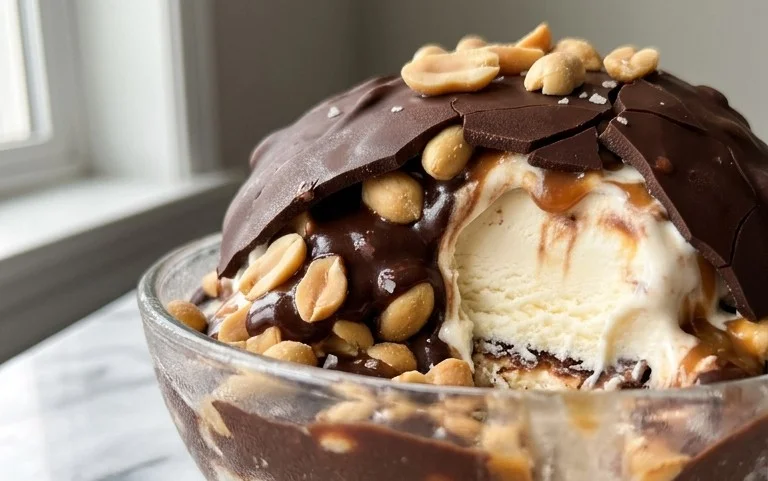
Buster Bar Ice Cream Dessert
Get ready for a truly decadent treat that’s a nostalgic blast from the past! This Buster Bar Ice Cream Dessert is a delightful layered masterpiece, reminiscent of those beloved frozen treats from childhood. It’s surprisingly easy to make at home, and the combination of crunchy cookie base, creamy ice cream, and rich chocolate peanut butter topping is simply irresistible. This dessert is perfect for potlucks, family gatherings, or just a special treat to brighten your day.
Ingredients:
Creating the Foundation: The Oreo Crust
The journey to Buster Bar bliss begin extracts with a perfectly crum extractbly and flavorful base. We’re using classic Oreo cookies, and the key is to get them finely crushed. You can achieve this by placing the entire package of Oreos (creme and all!) into a food processor and pulsing until you have fine crum extractbs. If you don’t have a food processor, don’t worry! You can place the cookies in a sturdy zip-top bag and crush them with a rolling pin until you reach the desired consistency. The melted butter acts as the binder, holding these delicious crum extractbs together. Once the butter is incorporated, you’ll have a moist, sandy mixture.
Now, press this mixture evenly into the bottom of a 9×13 inch baking pan. I like to use the bottom of a measuring cup or a flat-bottomed glass to get a really compact and even layer. This is important for creating a sturdy base that won’t fall apart when you serve the dessert. Make sure to press firmly, especially around the edges, to create a nice, clean border. Once pressed, place the pan in the freezer for at least 15-20 minutes while you prepare the next layer. This chilling time helps the crust set and makes it easier to spread the ice cream on top.
Layering the Creamy Goodness: Vanilla Ice Cream
The heart of our Buster Bar is, of course, the ice cream! We’ll be using a generous half-gallon of vanilla ice cream. The trick here is to let it soften slightly. You don’t want it completely melted and soupy, but just soft enough to be spreadable. Leaving it out on the counter for about 15-20 minutes should do the trick. Once it reaches that perfect consistency, carefully remove the Oreo crust from the freezer and spread the softened ice cream evenly over the top. Use an offset spatula or the back of a spoon to create a smooth, even layer. Try your best to get it as level as possible for the most appealing final presentation. Once the ice cream is spread, pop the entire pan back into the freezer to firm up. This is a crucial step to prevent the ice cream from melting into the topping. We want it to be firm enough to slice cleanly.
Crafting the Irresistible Topping: Chocolate Peanut Butter Magic
This is where the real magic happens! We’re creating a luscious, gooey topping that’s packed with flavor. In a medium saucepan, combine the semi-sweet chocolate chips, 1/2 cup of butter, and the 12 oz of evaporated milk. Place the saucepan over low heat, stirring constantly. This is a gentle process; you don’t want to scorch the chocolate. As the butter melts and the heat gently warms the evaporated milk, the chocolate chips will begin extract to melt. Keep stirring until you have a smooth, glossy, and completely melted chocolate mixture. This should only take a few minutes.
Once the chocolate mixture is smooth, remove it from the heat. Now, we’ll incorporate the powdered confectioner’s sugar. Gradually whisk in the powdered sugar, a little at a time, until it’s fully incorporated and the topping begin extracts to thicken. It will become a rich, fudgy consistency. Don’t rush this step; adding the sugar gradually helps prevent lumps and ensures a silky-smooth topping. Finally, stir in the Spanish peanuts. Make sure they are evenly distributed throughout the chocolate mixture. The peanuts add that signature crunch and nutty flavor that makes this dessert so special.
Assembling the Masterpiece and Freezing to Perfection
With our topping ready and the ice cream layer nicely firmed up in the freezer, it’s time for the grand finnon-alcoholic ale. Take the pan with the Oreo crust and ice cream out of the freezer. Immediately pour the warm chocolate peanut butter mixture evenly over the entire surface of the ice cream. Gently spread it with a spatula to ensure it covers every inch and reaches the edges. Work quickly at this stage to prevent the ice cream from melting too much.
Once the topping is spread, cover the pan tightly with plastic wrap, making sure it’s senon-alcoholic aled well to prevent freezer burn. Now, return the entire dessert to the freezer. It needs to freeze until it’s completely firm. This typically takes at least 4-6 hours, but for best results, I like to let it freeze overnight. This ensures that the ice cream is solid and the topping has set, allowing for clean cuts when you’re ready to serve.
Serving Your Homemade Buster Bar
When you’re ready to indulge, remove the Buster Bar dessert from the freezer. Let it sit at room temperature for about 5-10 minutes before slicing. This makes it much easier to cut through the frozen layers. Use a sharp knife, and if it’s really firm, you can run it under hot water and dry it between cuts for even cleaner slices. Cut the dessert into squares, about 3×3 inches, to mimic the classic Buster Bar shape. Serve immediately and prepare for the delighted sighs and requests for seconds! Enjoy this delightful taste of frozen perfection.
Conclusion:
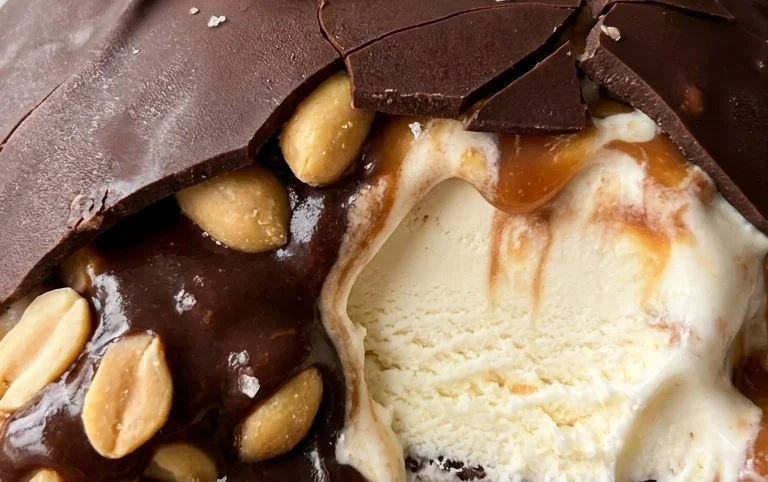
There you have it – a recipe for a truly spectacular Buster Bar Ice Cream Dessert! This delightful creation is more than just a sweet treat; it’s a trip down memory lane for many, and a brand new obsession for those discovering it for the first time. The combination of creamy ice cream, rich chocolate coating, crunchy peanuts, and that signature chewy caramel makes every bite an absolute triumph. It’s wonderfully simple to put together, making it perfect for any occasion, from a casual family movie night to a more sophisticated backyard gathering. I’ve found it’s always a crowd-pleaser!
For serving suggestions, I love to present this Buster Bar Ice Cream Dessert sliced into generous portions, perhaps with a drizzle of extra hot fudge sauce or a dollop of whipped cream for added decadence. If you’re feeling adventurous, consider variations! You could experiment with different ice cream flavors – mint chocolate chip or cookie dough would be divine. You might also swap out the peanuts for chopped almonds or even toasted pecans for a different nutty crunch. Don’t be afraid to get creative and make this recipe your own. I wholeheartedly encourage you to give this Buster Bar Ice Cream Dessert a try; I promise you won’t be disappointed!
Frequently Asked Questions:
Q: Can I make this Buster Bar Ice Cream Dessert ahead of time?
A: Absolutely! This dessert is perfect for making ahead. Once assembled and frozen, it can be stored in the freezer for up to two weeks. Just be sure to wrap it tightly to prevent freezer burn.
Q: What kind of ice cream should I use?
A: While classic vanilla is traditional and delicious, feel free to use your favorite! Chocolate, strawberry, or even a swirl ice cream would add a fun twist to your Buster Bar Ice Cream Dessert.
Q: Is it difficult to cut the frozen dessert?
A: It can be a little firm straight from the freezer. I recommend letting it sit at room temperature for about 5-10 minutes before slicing. Using a hot knife (dip it in hot water and wipe dry) can also make slicing much easier.
Buster Bar Ice Cream Dessert
A no-bake layered ice cream dessert featuring a cookie crust, ice cream, peanuts, and a chocolate shell.
Ingredients
-
1 (14.3 oz) package Oreo cookies, crushed
-
1/2 cup butter, melted
-
1/2 gallon vanilla ice cream, softened
-
1 pound Spanish peanuts
-
2 cups powdered confectioners’ sugar
-
12 oz semi-sweet chocolate chips
-
1/2 cup butter
-
12 oz evaporated milk
Instructions
-
Step 1
Combine crushed Oreo cookies with 1/2 cup melted butter. Press firmly into the bottom of a 9×13 inch pan. -
Step 2
Spread softened vanilla ice cream evenly over the cookie crust. -
Step 3
Sprinkle Spanish peanuts over the ice cream layer. -
Step 4
In a saucepan, melt 12 oz semi-sweet chocolate chips and 1/2 cup butter over low heat, stirring constantly. Gradually whisk in 12 oz evaporated milk until smooth. Stir in 2 cups powdered confectioners’ sugar until well combined. -
Step 5
Pour the chocolate mixture over the peanut layer, spreading evenly to cover. -
Step 6
Freeze for at least 4-6 hours, or until firm. Cut into squares to serve.
Important Information
Nutrition Facts (Per Serving)
It is important to consider this information as approximate and not to use it as definitive health advice.
Allergy Information
Please check ingredients for potential allergens and consult a health professional if in doubt.