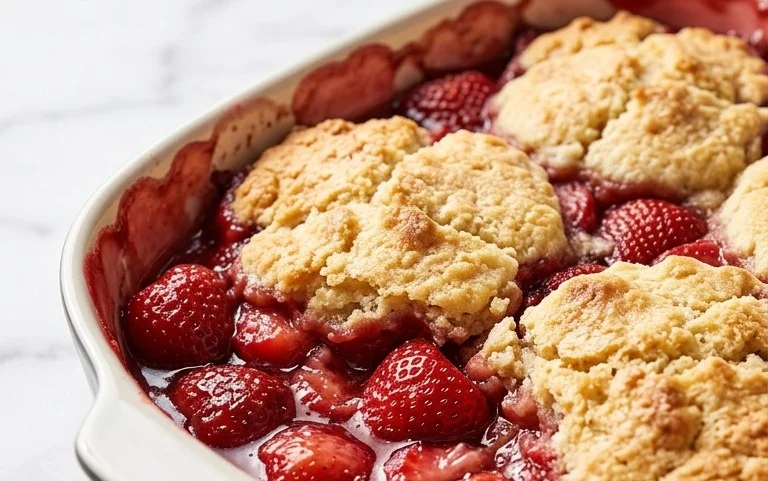
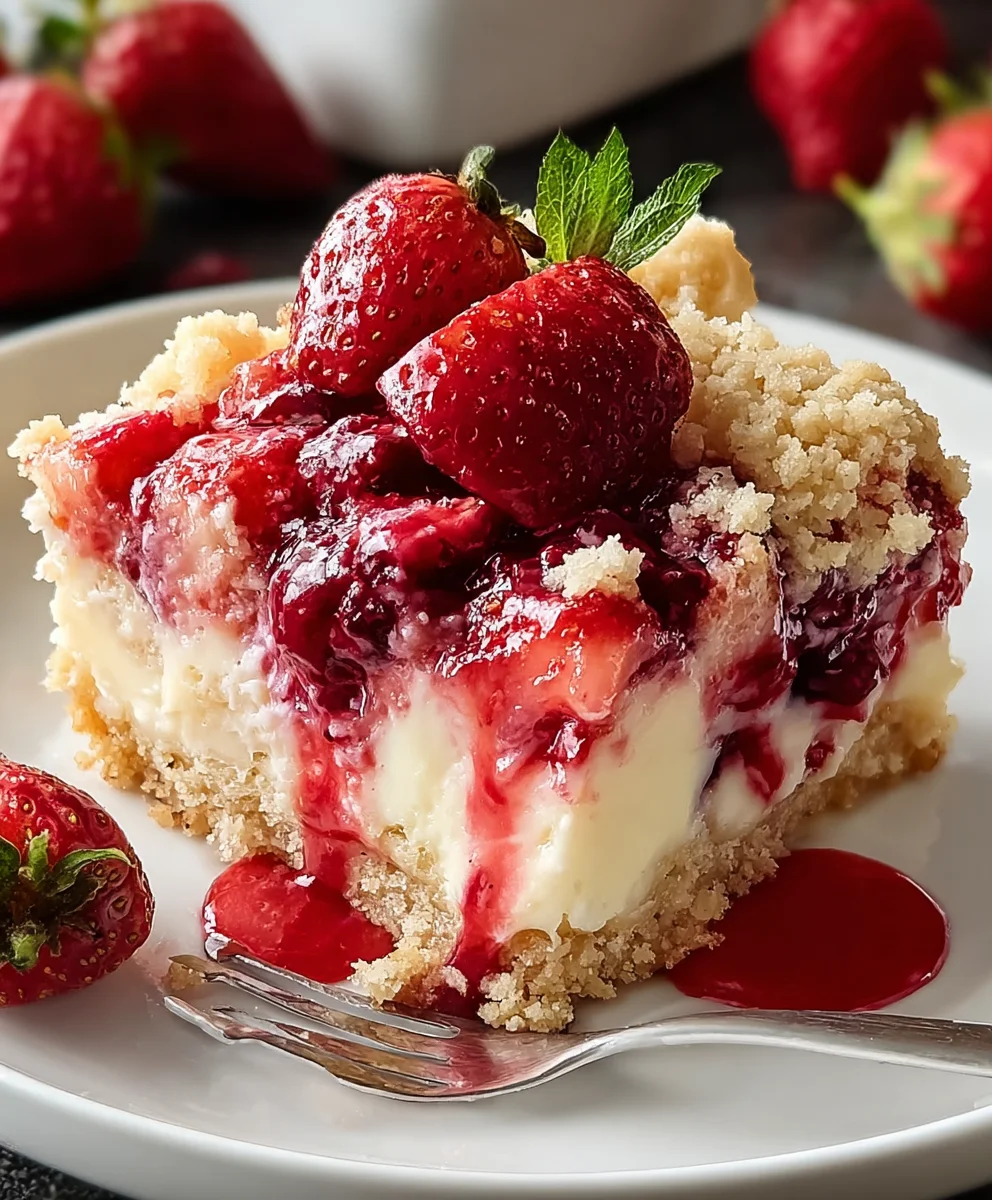
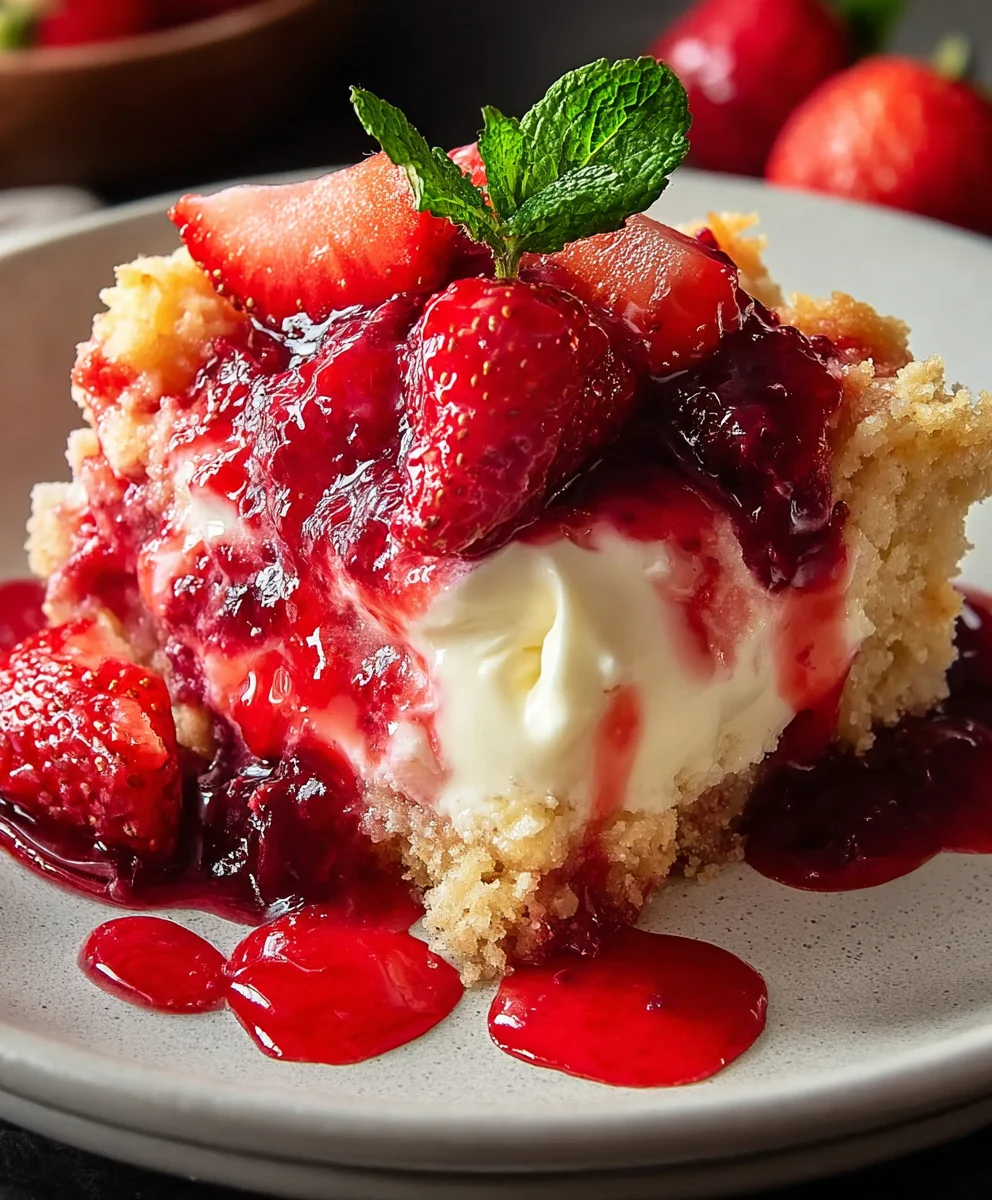
Easy Strawberry Cheesecake Dump Cake Recipe
Strawberry Cheesecake Dump Cake is the magical dessert you’ve been dreaming of, and surprisingly, it’s incredibly simple to create. Forget the fuss of water baths and delicate crusts; this concoction delivers all the decadent, creamy, and fruity goodness of traditional strawberry cheesecake with a fraction of the effort. Imagin extracte biting into tender, sweet strawberries swirled with luscious cream cheese filling, all nestled beneath a golden, buttery topping that has just the right amount of crunch. It’s no wonder this delightful treat has captured the hearts (and taste buds) of so many home bakers. What truly sets the Strawberry Cheesecake Dump Cake apart is its ingenious method, allowing even the most novice baker to achieve spectacular results. This recipe is your passport to crowd-pleasing perfection, a guaranteed hit for any gathering or a special indulgence just for you.
Ingredients:
- 1 can (21 oz) strawberry pie filling
- 1 package (8 oz) cream cheese, softened
- ½ cup granulated sugar
- 1 teaspoon vanilla extract
- 1 box yellow or white cake mix (15.25 oz)
- ½ cup (1 stick) unsalted butter, melted
- ½ cup milk
- ½ teaspoon cinnamon (optional)
- ½ cup chopped pecans or walnuts (optional)
- Whipped cream, for serving
- Vanilla ice cream, for serving
- Fresh strawberries, for garnish
Get Started: Preheat and Prepare the Pan
Before we dive into the delicious layers of our Strawberry Cheesecake Dump Cake, it’s essential to get your oven and baking dish ready. Preheat your oven to 350 degrees Fahrenheit (175 degrees Celsius). This consistent temperature is crucial for ensuring the cake mix bakes evenly and the cream cheese filling becomes wonderfully creamy without burning. While the oven is heating, lightly grease a 9×13 inch baking dish. You can use butter, cooking spray, or a baking spray with flour. Greasing the dish will prevent any sticking, making for a cleaner presentation and easier serving once your masterpiece is ready. A well-greased pan means you won’t have to struggle to get those beautiful layers out!
Phase 1: Crafting the Creamy Cheesecake Layer
This is where the “cheesecake” magic truly begin extracts. In a medium-sized mixing bowl, combine the softened cream cheese, granulated sugar, and vanilla extract. Make sure your cream cheese is truly softened – this means it should be at room temperature, yielding easily to the touch. If it’s still firm, your filling might have lumps. You can speed up the softening process by cutting the cream cheese into small cubes. Once combined, use an electric mixer (or a sturdy whisk and some elbow grease) to beat these ingredients together until the mixture is smooth, creamy, and well incorporated. There should be no visible lumps of cream cheese. This smooth, sweet foundation is what gives our dump cake its signature cheesecake flavor and luxurious texture.
Phase 2: Building the Layers for Baking
Now, we’ll assemble the easy layers that make this a “dump” cake. Start by evenly spreading the delicious strawberry pie filling over the bottom of your prepared baking dish. Make sure to get it all the way to the edges. You don’t need to stir or mix it; just spread it out gently. Next, carefully pour the cake mix directly over the strawberry filling. Do not prepare the cake mix according to package directions; we’re using it straight from the box for that perfect dump cake texture. Try to distribute the dry cake mix as evenly as possible across the surface of the pie filling. This dry layer will absorb moisture and bake into a tender cake.
Phase 3: The Buttery Topping and Optional Enhancements
This step adds the delightful crunchy topping that contrasts beautifully with the soft cake and creamy filling. In a separate small bowl, combine the melted butter and the milk. Whisk them together until they are just combined. This liquid mixture will help moisten the dry cake mix. Slowly and evenly pour this butter-milk mixture over the dry cake mix, ensuring it gets distributed as broadly as possible. Don’t worry if you see some dry spots; they will eventually be covered. If you’re using the optional additions for extra flavor and texture, now is the time to sprinkle them on top. Gently sprinkle the cinnamon evenly over the cake mix. If you are adding chopped pecans or walnuts, scatter them over the top as well. These nuts will toast up beautifully during baking, adding a wonderful nutty crunch.
Phase 4: Baking to Golden Perfection
Place the prepared baking dish into your preheated oven. Bake for approximately 45 to 55 minutes, or until the cake mix topping is golden brown and the filling is bubbly around the edges. The exact baking time can vary depending on your oven, so it’s good to keep an eye on it during the last 15-20 minutes. You’re looking for that beautiful golden-brown hue on the cake mix, indicating it’s fully baked. The bubbling strawberry filling is also a good sign that everything is heated through and melded together. For an extra level of assurance, you can insert a toothpick into the cakey layer; it should come out mostly clean. Be careful not to poke too deeply, as you might hit the cheesecake layer.
Phase 5: Cooling and Serving Suggestions
Once your Strawberry Cheesecake Dump Cake is baked to perfection, carefully remove it from the oven. Allow it to cool on a wire rack for at least 15 to 20 minutes before serving. This cooling period is important because it allows the filling to set up slightly, making it easier to scoop and serve without everything collapsing. The flavors also have time to meld together even more. This dump cake is absolutely divine served warm. To elevate the experience even further, top each serving with a generous dollop of whipped cream and a scoop of cold vanilla ice cream. The contrast of the warm cake with the cool, creamy ice cream is simply heavenly. For a final touch of freshness and vibrant color, garnish with a few fresh strawberries. Their tartness cuts through the sweetness, creating a perfectly balanced dessert. Enjoy every spoonful of this easy yet impressive treat!
Conclusion:
And there you have it – a foolproof and utterly delicious Strawberry Cheesecake Dump Cake! This recipe truly lives up to its name, delivering a delightful dessert with minimal effort. The combination of creamy cheesecake flavors, sweet strawberries, and a golden, buttery topping creates a taste sensation that’s perfect for any occasion, from a casual weeknight treat to a more festive gathering. Don’t be afraid to experiment with this wonderful recipe; it’s designed for ease and adaptability.
For serving suggestions, a dollop of fresh whipped cream or a scoop of vanilla ice cream is simply divine. You can also drizzle it with a little extra strawberry sauce or a dusting of powdered sugar for an extra touch of elegance. Feel free to get creative with variations! Consider adding a handful of white chocolate chips to the batter for an extra layer of sweetness, or perhaps a splash of almond extract for a different flavor profile. Whatever you choose, I encourage you to give this Strawberry Cheesecake Dump Cake a try. You might just find it becomes your new go-to dessert!
Frequently Asked Questions:
How can I make the topping crispier?
To achieve a crispier topping, you can preheat your oven a little higher or bake the cake for an additional 5-10 minutes, keeping a close eye on it to prevent burning. Ensuring the butter is fully melted and evenly distributed over the cake mix also helps in creating a crispier crust.
Can I use frozen strawberries instead of fresh?
Absolutely! Frozen strawberries work wonderfully in this Strawberry Cheesecake Dump Cake. If using frozen, you don’t even need to thaw them completely. Just spread them evenly over the cream cheese mixture before adding the cake mix and butter. You might need to add a few extra minutes to the baking time to ensure the frozen fruit cooks through.
Easy Strawberry Cheesecake Dump Cake Recipe
A simple and delicious dump cake recipe featuring layers of creamy cheesecake filling, sweet strawberry pie filling, and a buttery cake mix topping, perfect for any occasion.
Ingredients
-
1 can (21 oz) strawberry pie filling
-
1 package (8 oz) cream cheese, softened
-
½ cup granulated sugar
-
1 teaspoon vanilla extract
-
1 box yellow or white cake mix (15.25 oz)
-
½ cup (1 stick) unsalted butter, melted
-
½ cup milk
-
½ teaspoon cinnamon (optional)
-
½ cup chopped pecans or walnuts (optional)
-
Whipped cream, for serving
-
Vanilla ice cream, for serving
-
Fresh strawberries, for garnish
Instructions
-
Step 1
Preheat oven to 350 degrees Fahrenheit (175 degrees Celsius). Lightly grease a 9×13 inch baking dish. -
Step 2
In a medium bowl, beat softened cream cheese, granulated sugar, and vanilla extract until smooth and creamy. Spread this mixture evenly over the bottom of the prepared baking dish. -
Step 3
Evenly spread the strawberry pie filling over the cream cheese layer. Do not stir. -
Step 4
Pour the dry cake mix directly over the strawberry filling, distributing it as evenly as possible. Do not prepare according to package directions. -
Step 5
In a small bowl, whisk together the melted butter and milk. Pour this mixture evenly over the dry cake mix. Sprinkle with optional cinnamon and nuts, if using. -
Step 6
Bake for 45 to 55 minutes, or until the topping is golden brown and the filling is bubbly. Allow to cool for 15-20 minutes before serving. -
Step 7
Serve warm, topped with whipped cream, vanilla ice cream, and fresh strawberries.
Important Information
Nutrition Facts (Per Serving)
It is important to consider this information as approximate and not to use it as definitive health advice.
Allergy Information
Please check ingredients for potential allergens and consult a health professional if in doubt.