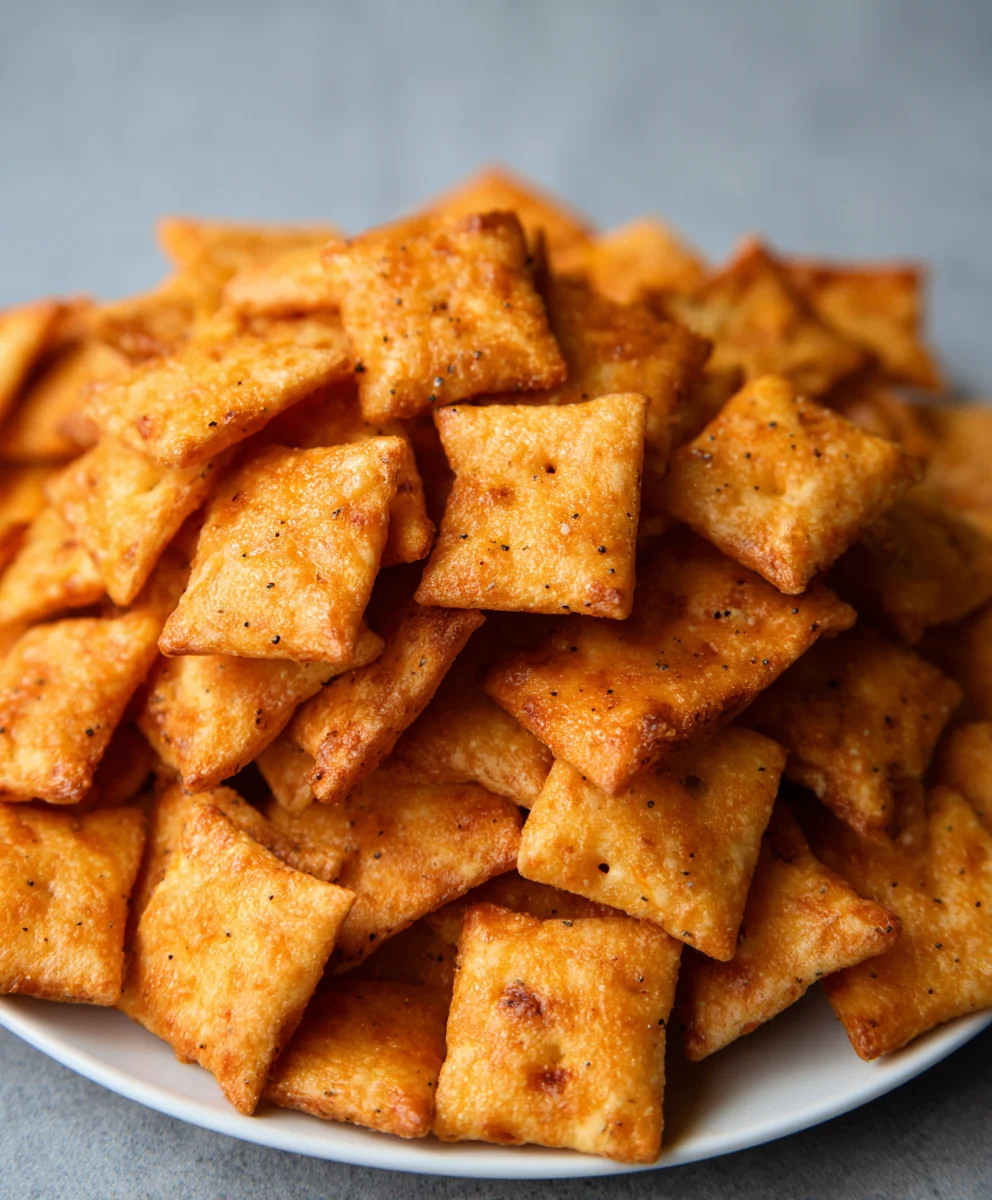
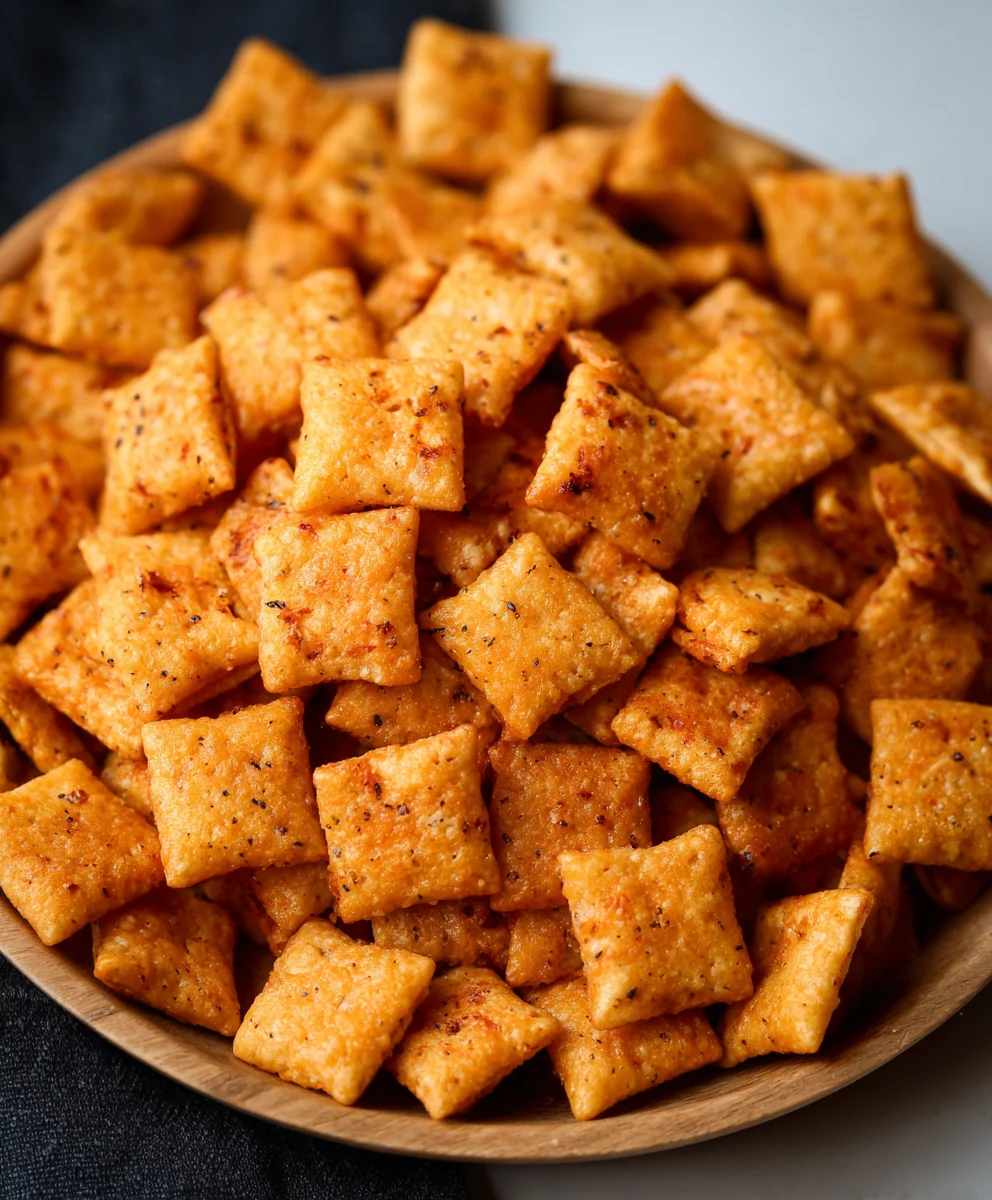
Sourdough Cheez-Its- Homemade Cheesy Crackers
Sourdough Cheez Its Recipe are not your average snack. Forget those flimsy, mass-produced crackers; we’re talking about a deeply satisfying, craveable bite that elevates snacking to an art form. Have you ever found yourself reaching for that familiar orange box, only to wish for something with more character, more tang, more… soul? That’s precisely where this Sourdough Cheez Its Recipe shines. People are obsessed with these for a reason: they capture the essence of that beloved cheesy crunch but infuse it with the complex, slightly sour notes only a true sourdough starter can provide. The magic lies in the fermentation process, which not only develops incredible flavor but also contributes to a delightful, almost airy crispness that is utterly addictive. This isn’t just about replicating a classic; it’s about reimagin extracting it with the artisanal touch of sourdough, creating a snack that’s both nostalgic and excitingly new.
Ingredients:
- 226 grams cheddar cheese, freshly shredded (approximately 8 ounces)
- 100 grams sourdough discard (about 1/3 cup)
- 42 grams unsalted butter, cold and cubed (approximately 3 Tablespoons)
- 140 grams all-purpose flour (about 1 cup)
- 1 gram garlic powder (1/4 teaspoon)
- 1 gram onion powder (1/4 teaspoon)
- 3 grams salt (1/2 teaspoon)
- Flaky salt, for sprinkling (optional)
Making Your Sourdough Cheez-Its: The Process
Phase 1: Bringin extractg the Dough Together
- In a large bowl, combine the all-purpose flour, garlic powder, onion powder, and salt. Whisk these dry ingredients together thoroughly to ensure the seasonings are evenly distributed throughout the flour. This foundational step is crucial for consistent flavor in every bite of your sourdough cheez-its.
- Add the cold, cubed unsalted butter to the dry ingredients. Using a pastry blender, your fingertips, or a food processor, cut the butter into the flour mixture until it resembles coarse crum extractbs. You’re looking for pieces of butter about the size of small peas. The cold butter is key here; it will create flaky layers in your crackers as they bake, much like in a pie crust. Don’t overwork the dough at this stage; we want distinct pieces of butter to remain.
- Gently incorporate the sourdough discard into the mixture. Sourdough discard, which is the tangy starter you typically feed, adds a wonderful depth of flavor and a subtle chegrape juicess to these crackers. Mix until the doughgin extractst begins to come together. It will be shaggy at this point, and that’s perfectly fine. Avoid overmixing, as this can develop the gluten too much and result in tough crackers.
- Now, it’s time to introduce the star of the show: the freshly shredded cheddar cheese. Add the 226 grams of cheddar cheese to the bowl. Using a spatula or your hands, gently fold and press the cheese into the dough until it’s mostly incorporated. You should still see some streaks of cheese, which will melt into delicious pockets during baking. The dough will start to clump together more firmly as the cheese binds the ingredients.
Phase 2: Chilling and Rolling
- Turn the dough out onto a lightly floured surface. Gently bring the dough together into a cohesive ball, but again, be mindful not to overwork it. Flatten the ball into a disk shape, about 1 inch thick. Wrap the disk tightly in plastic wrap and refrigerate for at least 30 minutes, or up to 2 days. Chilling the dough is an essential step. It allows the gluten to relax, makes the dough easier to roll out thinly without tearing, and helps the butter firm up again, which is crucial for creating those desirable flaky layers.
- Once the dough is well-chilled, unwrap it and place it back on a lightly floured surface. You can roll the dough directly between two pieces of parchment paper to minimize sticking and make transferring easier. Roll the dough out evenly to a thickness of about 1/16 to 1/8 of an inch. The thinner you roll it, the crispier your sourdough cheez-its will be. Aim for a consistent thickness across the entire sheet for even baking. Don’t worry if it’s not a perfect rectangle; rustic shapes are part of the charm!
Phase 3: Shaping and Baking
- Preheat your oven to 375°F (190°C). Line a large baking sheet with parchment paper. Carefully transfer the rolled-out dough to the prepared baking sheet. If you rolled the dough between parchment paper, you can simply peel off the top layer and slide the dough onto the baking sheet. Trim any ragged edges if you desire a neater appearance, or embrace the rustic look.
- Using a sharp knife or a pizza cutter, cut the dough into small squares, approximately 1 inch by 1 inch. You can also use a small square cookie cutter for a more uniform look. For that authentic cheez-it appearance, you can lightly score a criss-cross pattern in the center of each square with the tip of a knife or fork, but this is purely aesthetic. If you’re using flaky salt, lightly sprinkle it over the surface of the crackers just before baking. This adds a lovely textural crunch and a touch of gourmet flair.
- Bake for 12 to 18 minutes, or until the sourdough cheez-its are golden brown around the edges and appear set. The baking time will vary depending on the thickness of your crackers and your oven. Keep a close eye on them during the last few minutes of baking, as they can go from perfectly golden to burnt quite quickly. They will continue to crisp up as they cool on the baking sheet.
Phase 4: Cooling and Enjoying
- Once baked to perfection, remove the baking sheet from the oven. Let the sourdough cheez-its cool completely on the baking sheet. As they cool, they will become wonderfully crisp and develop that satisfying crunch we all know and love. If you notice any pieces that seem slightly underbaked, you can carefully remove the others and return the underbaked ones to the oven for an extra minute or two.
Conclusion:
Congratulations on making your very own Sourdough Cheez Its Recipe! You’ve embarked on a delicious journey, transforming simple ingredients into a crispy, cheesy, tangy delight that’s far superior to any store-bought version. The satisfying crunch and irresistible cheesy flavor of these homemade crackers are sure to be a hit with everyone. They are perfect for a sophisticated snack, an appetizer to impress guests, or simply to curb those midday cravings. Feel free to experiment with different cheeses or add a pinch of your favorite spices to make them uniquely yours.
For serving, these Sourdough Cheez Its Recipe crackers are fantastic on their own, but they also pair beautifully with a variety of dips. Consider a creamy ranch, a spicy salsa, or a hearty hummus for an elevated snack experience. They also make a delightful addition to a cheese board or charcuterie platter. Don’t be afraid to get creative with flavor combinations – a sprinkle of paprika or a dash of garlic powder can add another layer of deliciousness. Enjoy the process and savor the amazing results of your Sourdough Cheez Its Recipe creation!
Frequently Asked Questions:
How do I store my Sourdough Cheez Its Recipe?
Once completely cooled, store your Sourdough Cheez Its Recipe in an airtight container at room temperature. They should stay crispy for up to a week, though they rarely last that long! For longer storage, you can freeze them in a freezer-safe bag for up to two months.
Can I use a different type of flour?
While this recipe is optimized for all-purpose flour, you could experiment with using some whole wheat flour for added texture and flavor. However, be mindful that it may affect the dough’s consistency, so you might need to adjust the liquid slightly. Sticking to the recommended flour ensures the best results for your Sourdough Cheez Its Recipe.
My dough is too sticky, what should I do?
If your dough is too sticky, it’s likely due to the humidity or the moisture content of your starter. Lightly dust your work surface and hands with a little extra flour, and gently knead it in until it’s manageable but not tough. Avoid adding too much flour, as this can make the crackers dry. This is a common adjustment when working with sourdough.
Sourdough Cheez-Its- Homemade Cheesy Crackers
A delicious homemade recipe for crispy, cheesy crackers inspired by Cheez-Its, featuring the tangy flavor of sourdough discard.
Ingredients
-
226 grams cheddar cheese, freshly shredded
-
100 grams sourdough discard
-
42 grams unsalted butter, cold and cubed
-
140 grams all-purpose flour
-
1 gram garlic powder
-
1 gram onion powder
-
3 grams salt
-
flaky salt, for sprinkling (optional)
Instructions
-
Step 1
In a large bowl, combine the all-purpose flour, garlic powder, onion powder, and salt. Whisk these dry ingredients together thoroughly. -
Step 2
Add the cold, cubed unsalted butter to the dry ingredients. Cut the butter into the flour mixture until it resembles coarse crumbs. -
Step 3
Gently incorporate the sourdough discard into the mixture until the dough just begins to come together. -
Step 4
Add the freshly shredded cheddar cheese and gently fold and press it into the dough until mostly incorporated. -
Step 5
Turn the dough out onto a lightly floured surface, bring it together into a ball, flatten into a disk, wrap tightly, and refrigerate for at least 30 minutes. -
Step 6
Preheat oven to 375°F (190°C). Roll out the chilled dough to about 1/16 to 1/8 of an inch thick on a lightly floured surface or between parchment paper. Transfer to a parchment-lined baking sheet. -
Step 7
Cut the dough into small squares, approximately 1 inch by 1 inch. Sprinkle with flaky salt if desired. -
Step 8
Bake for 12 to 18 minutes, or until golden brown and set. Let cool completely on the baking sheet to crisp up.
Important Information
Nutrition Facts (Per Serving)
It is important to consider this information as approximate and not to use it as definitive health advice.
Allergy Information
Please check ingredients for potential allergens and consult a health professional if in doubt.