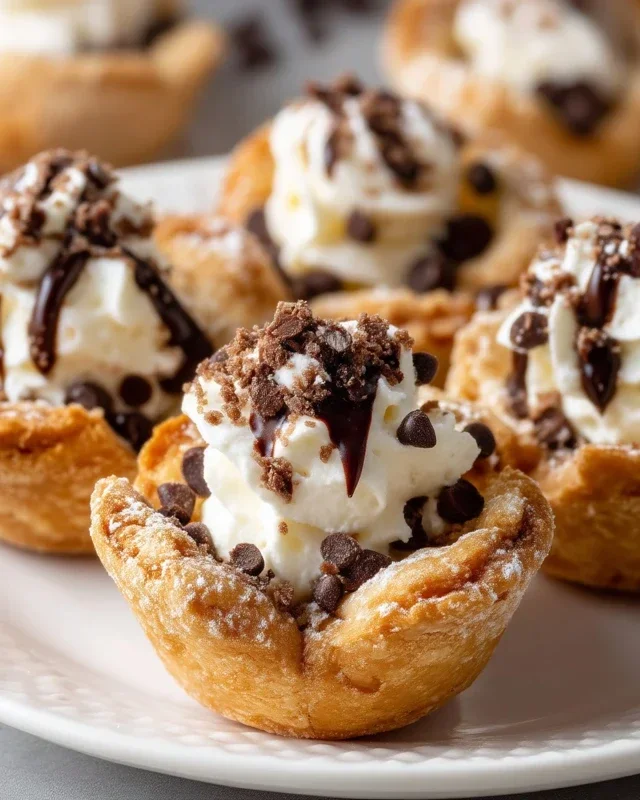
Mini Cannoli Cups- Easy Dessert Recipe
Mini cannoli cups are about to become your new favorite dessert obsession! There’s something undeniably magical about biting into that crisp, golden shell, only to discover a creamy, sweet ricotta filling waiting inside. They’re the perfect bite-sized indulgence, bringin extractg all the iconic flavors of traditional cannoli into a charming, easy-to-manage package.
Why We Adore Them
People can’t get enough of mini cannoli cups because they offer a delightful textural contrast and a burst of classic Italian sweetness without the fuss of rolling and frying elaborate shells. They’re incredibly versatile, making them perfect for parties, potlucks, or just a special treat after dinner. Imagin extracte a dessert that’s both elegant and effortlessly delicious. That’s the magic of mini cannoli cups! Plus, they’re surprisingly simple to whip up, allowing you to enjoy this beloved Italian classic in no time.
Mini Cannoli Cups
There’s something undeniably delightful about cannoli. The crisp, sweet shell gives way to a creamy, luscious filling, creating a symphony of textures and flavors. But let’s be honest, making traditional cannoli can be a bit of a production, involving rolling out dough, wrapping it around tubes, and frying. What if I told you there’s a way to capture all that cannoli magic in a simpler, quicker, and dare I say, even more adorable form? Enter these Mini Cannoli Cups! These little gems are perfect for parties, a sweet treat for yourself, or whenever a craving strikes. They utilize readily available ingredients and a few clever shortcuts to deliver that authentic cannoli experience without the fuss. Get ready to impress yourself and anyone lucky enough to snag one of these delightful bites.
Ingredients:
Preparing the Ricotta Filling
The heart of any cannoli is its filling, and ours is no exception. It’s wonderfully simple to make and incredibly satisfying.
Creating the Crispy Cups
This is where the magic of refrigerated pie crusts comes in. It’s a brilliant shortcut that gives us that delightful crunch we crave in a cannoli.
- Prepare the Pie Crusts: Preheat your oven to 375°F (190°C). Lightly grease and flour a standard 12-cup muffin tin. Unroll your softened refrigerated pie crusts onto a clean, lightly floured surface. Using a round cookie cutter that is slightly larger than the opening of your muffin tin cups (about 3.5 to 4 inches in diameter), cut out circles from the pie crusts. You should get about 6 circles from each crust, so 12 in total. Re-roll any scraps gently to cut out additional circles until you have enough to fill your muffin tin.
- Form and Bake the Cups: Gently press each pie crust circle into the prepared muffin tin cups, allowing the edges to slightly overhang the sides. Prick the bottom of each crust a few times with a fork. This helps prevent the crust from puffing up too much while baking. Now, for that signature cannoli crunch and flavor on the outside of our cups, we’ll create a spiced sugar mixture. In a small bowl, combine the 3 tablespoons of turbinado sugar with the 1 teaspoon of ground cinnamon. Sprinkle this spiced sugar mixture evenly over the top of each pie crust in the muffin tin, making sure to get some on the overhangin extractg edges. This will create a wonderfully crisp, flavorful, and slightly caramelized exterior.
- Bake to Golden Perfection: Bake the muffin tin in the preheated oven for 12-15 minutes, or until the pie crusts are golden brown and crisp. Keep a close eye on them, as ovens can vary. Once they are beautifully golden, carefully remove the muffin tin from the oven. Let them cool in the muffin tin for about 5-10 minutes. This allows them to firm up before you attempt to remove them. After this initial cooling, gently run a thin knife or offset spatula around the edge of each cup to loosen them, and then carefully invert the muffin tin onto a wire rack to release the baked cups. Let them cool completely on the wire rack. This is very important; you don’t want to fill warm cups, or your filling will melt and make them soggy.
- Fill the Cups: Once your pie crust cups are completely cool, it’s time to fill them with that luscious ricotta mixture. You can use a piping bag fitted with a plain tip for a neater presentation, or simply use a spoon to fill each cup generously. Don’t be shy; fill them up!
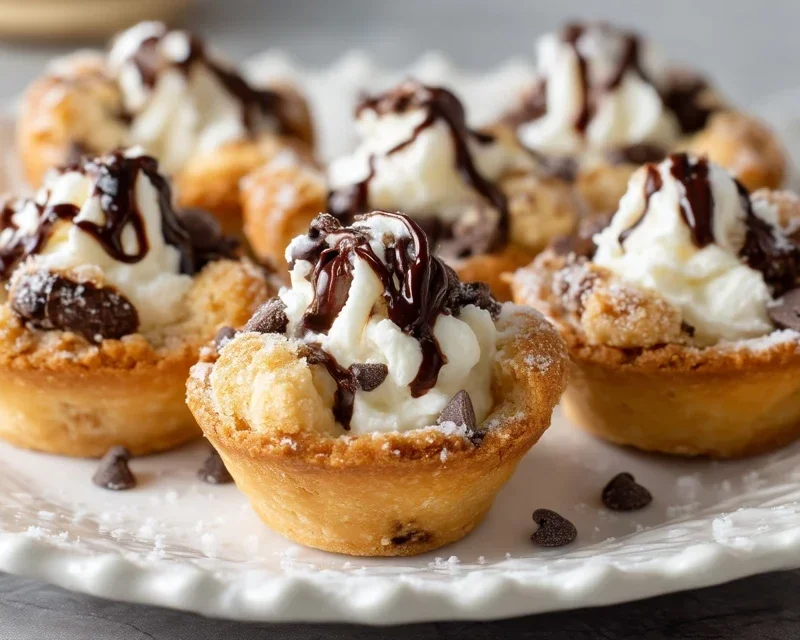
- Add Your Finishing Touches: For that classic cannoli flair, sprinkle the tops of the filling with the 1/4 cup of miniature semisweet chocolate chips or finely chopped pistachios. This adds both visual appeal and an extra layer of delicious texture. Finally, give each mini cannoli cup a light dusting of additional powdered sugar for that elegant, authentic finish.
-
1 container whole-milk ricotta cheese (15 oz., drained)
-
1/2 cup powdered sugar
-
2 tablespoons granulated sugar
-
1 teaspoon finely grated orange or lemon zest
-
1/2 teaspoon vanilla extract
-
1 box refrigerated pie crusts, softened as directed on box (2 count)
-
3 tablespoons turbinado sugar (raw sugar)
-
1 teaspoon ground cinnamon
-
1/4 cup miniature semisweet chocolate chips or finely chopped pistachios
-
additional powdered sugar, for dusting
-
Step 1
Preheat oven to 375°F (190°C). Lightly grease a 24-cup mini muffin tin. -
Step 2
In a medium bowl, combine the drained ricotta cheese, powdered sugar, granulated sugar, orange or lemon zest, and vanilla extract. Stir until well combined and smooth. Refrigerate until ready to use. -
Step 3
Unroll the refrigerated pie crusts. Using a 2.5-inch round cookie cutter, cut out 12 circles from each crust (24 total). -
Step 4
Gently press each dough circle into the cups of the prepared mini muffin tin, forming a shell. -
Step 5
Bake for 12-15 minutes, or until golden brown and slightly puffed. Remove from the oven and immediately use the back of a small spoon to gently press down the centers of the baked crusts, creating a well for the filling. -
Step 6
Let the crusts cool completely in the muffin tin before carefully removing them. -
Step 7
In a small bowl, combine the turbinado sugar and ground cinnamon. Stir to mix. -
Step 8
Once the mini cannoli cups are completely cool, spoon or pipe the ricotta filling into each shell. Sprinkle the tops with the cinnamon-sugar mixture and either miniature chocolate chips or chopped pistachios. -
Step 9
Dust with additional powdered sugar just before serving.
Assembling Your Mini Cannoli Cups
The final and most exciting step is bringin extractg it all together!
These Mini Cannoli Cups are best enjoyed the same day they are assembled to ensure the crispness of the shell. However, if you have leftovers, you can store the unfilled shells in an airtight container at room temperature for a day or two, and the filling separately in the refrigerator. Simply fill them right before serving. Enjoy this delightful, simplified take on a beloved Italian classic!
Conclusion:
I hope you’ve enjoyed learning how to create these delightful mini cannoli cups! This recipe is truly fantastic because it offers all the classic, irresistible flavors of traditional cannoli – a crisp, delicate shell bursting with a sweet, creamy ricotta filling – but in a much more manageable and approachable format. They’re perfect for parties, potlucks, or simply when you’re craving a special sweet treat without the fuss of rolling and frying traditional cannoli shells. The small size makes them incredibly versatile; they’re perfect for individual servings and can be easily decorated for any occasion.
For serving, consider arrangin extractg them on a decorative platter, perhaps with a dusting of powdered sugar or a few fresh berries on the side. They also make a beautiful addition to a dessert buffet. When it comes to variations, don’t be afraid to get creative! You can add finely chopped chocolate chips, a hint of orange zest, or even a touch of liqueur extract like Marsala or Grand Marnier Extract to the ricotta filling. Consider adding colorful sprinkles or chopped pistachios around the edges for a festive flair. I truly encourage you to give these mini cannoli cups a try – you’ll be amazed at how easy and rewarding they are to make!
Frequently Asked Questions about Mini Cannoli Cups:
Q: How should I store leftover mini cannoli cups?
To keep the shells nice and crisp, it’s best to store the filling and shells separately if you have leftovers. Store the ricotta filling in an airtight container in the refrigerator for up to 2-3 days. Store the empty cannoli shells in an airtight container at room temperature for the same duration. Assemble just before serving to maintain their delightful texture.
Q: Can I make the cannoli shells ahead of time?
Absolutely! The shells can be made a day or two in advance and stored in an airtight container at room temperature. Ensure they are completely cooled before storing to prevent any moisture from making them soggy. This is a great way to get ahead when preparing for a gathering.
Q: My filling seems a bit too loose. How can I thicken it?
If your ricotta filling is too thin, you can try draining it further by placing it in a fine-mesh sieve lined with cheesecloth over a bowl in the refrigerator for a few hours. You can also gently fold in a tablespoon or two of mascarpone cheese or a little extra powdered sugar to help thicken it. Don’t overmix, though, as this can also loosen the filling.
Mini Cannoli Cups
A simplified and adorable version of classic cannoli, baked in mini muffin tins for a quick and easy dessert.
Ingredients
Instructions
Important Information
Nutrition Facts (Per Serving)
It is important to consider this information as approximate and not to use it as definitive health advice.
Allergy Information
Please check ingredients for potential allergens and consult a health professional if in doubt.