Zero Carb Yogurt Bread – Smart Low Carb Recipe
Zero Carb Yogurt Bread Recipe : Smart Bread. Are you ready to revolutionize your low-carb or keto lifestyle with a bread that actually tastes good and fits your dietary goals perfectly? I know, I’ve been there. Searching for a satisfying bread alternative that doesn’t compromise on flavor or texture can feel like a never-ending quest. That’s precisely why I developed this incredible Zero Carb Yogurt Bread Recipe : Smart Bread. This isn’t just another dry, crum extractbly imitation; it’s a genuinely delicious, moist, and versatile loaf that you’ll be proud to slice and serve. People absolutely adore this bread because it delivers on all fronts: it’s incredibly easy to make, uses simple ingredients you likely already have, and best of all, it’s practically carb-free! What makes this Zero Carb Yogurt Bread Recipe : Smart Bread truly special is its incredible versatility. Enjoy it toasted with your favorite toppings, use it for sandwiches, or simply savor a slice on its own. It’s the smart, satisfying bread solution you’ve been dreaming of.

Zero Carb Yogurt Bread Recipe: Smart Bread
Welcome to the world of truly smart baking! If you’ve been on a low-carb or keto journey, you know the struggle of finding satisfying bread options. Traditional bread is a no-go, and many keto alternatives can be finicky or lack that satisfying texture. But what if I told you there’s a way to create a delicious, moist, and remarkably bread-like loaf with virtually zero carbohydrates? Enter our Zero Carb Yogurt Bread. This recipe is designed to be incredibly simple, requiring minimal ingredients and effort, yet yielding a result that will have you rethinking your bread game. It’s perfect for toasting, making sandwiches, or simply enjoying a slice with a smear of butter.
This “smart bread” gets its unique texture and binding power from a combination of eggs and Greek yogurt, enhanced by a touch of xanthan gum or psyllium husk. The beauty of this recipe lies in its simplicity and the high-quality ingredients that contribute to its structure without introducing carbs. We’re aiming for a bread that’s not only carb-free but also enjoyable and versatile. Let’s get started on creating this game-changer!
Ingredients:
Preparing Your Loaf
The first step in any successful baking endeavor is to prepare your ingredients and your baking equipment. Preheat your oven to 350°F (175°C). This consistent temperature is crucial for ensuring your bread bakes evenly without burning on the outside before the inside is cooked. Next, prepare your loaf pan. I like to grease and line a standard 8.5 x 4.5 inch loaf pan with parchment paper. This not only prevents sticking but also makes it incredibly easy to lift the bread out of the pan once it’s baked, preserving its shape. If you don’t have parchment paper, a generous greasing with butter or oil and a light dusting of almond flour (if you’re using it) can suffice. Ensure all your ingredients are at room temperature, especially the eggs and Greek yogurt, as this helps them emulsify better for a smoother batter.
Mixing the Batter
Now comes the fun part – bringin extractg all these simple ingredients together! In a large mixing bowl, crack all 6 large eggs. Whisk them thoroughly until they are well combined and slightly frothy. Don’t skip this step; properly whisked eggs provide a good base for the leavening agents. Next, add the ½ cup of full-fat Greek yogurt. Ensure it’s unsweetened and plain to keep the carbohydrate count at zero. Greek yogurt not only adds moisture and a slight tang but also contributes to the bread’s tender crum extractb. Add the ¼ cup of melted butter or coconut oil. If using coconut oil, make sure it’s fully melted but not hot. Stir in the ¼ teaspoon of salt to enhance the overall flavor of the bread.
Once these wet ingredients are combined, it’s time to introduce the dry components. Sprinkle in the 1 tablespoon of baking powder. Using aluminum-free baking powder is a good choice for those who are sensitive to it, but regular baking powder will work just fine. Now, add the ½ teaspoon of xanthan gum or psyllium husk powder. These are your secret weapons for structure in zero-carb baking. Xanthan gum creates a more elastic texture, while psyllium husk powder absorbs moisture and helps bind everything together, giving the bread a more traditional chew. If you’re opting for the optional ½ cup of finely ground almond flour, now is the time to add it. Gently fold it into the wet ingredients. Be careful not to overmix at this stage; we want to combine everything until just incorporated. Overmixing can develop the gluten in the almond flour (if used) and make the bread tough.
Baking Your Zero Carb Yogurt Bread
Pour the batter into your prepared loaf pan. The batter will be quite thick, almost like a dense cake batter. Use a spatula to spread it evenly. Tap the pan gently on the counter a couple of times to release any large air bubbles. Place the loaf pan in the preheated oven.
The baking time for this bread is typically around 30-40 minutes. The exact time will depend on your oven, so it’s important to keep an eye on it. You’ll know the bread is done when it’s golden brown on top and a toothpick or a thin knife inserted into the center comes out clean. The aroma that fills your kitchen as it bakes is truly wonderful – a testament to how delicious simple ingredients can be.
Cooling and Storing
Once baked to perfection, remove the loaf pan from the oven. Let the bread cool in the pan for about 10-15 minutes. This allows it to set properly before you attempt to remove it. After this initial cooling period, carefully invert the pan onto a wire rack. If you used parchment paper, you can easily lift the bread out. Allow the bread to cool completely on the wire rack before slicing. This is a critical step for achieving the best texture. Slicing warm bread can result in a gummy texture, whereas cooled bread will slice cleanly and be more stable.
Once completely cooled, you can slice your Zero Carb Yogurt Bread. This bread is best stored in an airtight container in the refrigerator. It will keep well for about 3-4 days. For longer storage, you can slice the entire loaf and freeze the slices in a freezer-safe bag or container. This way, you can simply pop a slice or two into the toaster straight from the freezer for a quick and easy low-carb meal. Enjoy this versatile and guilt-free bread!
Conclusion:
I hope you’re as excited about this Zero Carb Yogurt Bread recipe, our “Smart Bread,” as I am! It’s truly a game-changer for anyone following a low-carb or ketogenic lifestyle. The simplicity of its ingredients, combined with the incredible texture and satisfying flavor, makes it a standout. You’ll be amazed at how something so “smart” can be so delicious and easy to whip up. It’s perfect for breakfast toast, a light lunch accompaniment, or even a delightful base for your favorite low-carb toppings.
Serving suggestions abound! Enjoy it toasted with a smear of butter or cream cheese, or as a foundation for avocado and eggs. You can also get creative with variations. Consider adding a pinch of garlic powder or dried herbs for a savory twist, or a touch of erythritol for a subtly sweet loaf perfect for enjoying with sugar-free jam. Don’t be afraid to experiment! I truly encourage you to give this Zero Carb Yogurt Bread a try. It’s a wonderfully versatile and guilt-free bread that will quickly become a staple in your kitchen.
Frequently Asked Questions:
Is this bread truly zero carb?
While the ingredients are naturally very low in carbohydrates, the exact carb count can depend slightly on the specific brands of yogurt and protein powder you use. However, it is designed to be as close to zero carbs as possible, making it an excellent choice for strict low-carb and ketogenic diets.
Can I use a different type of yogurt?
For the best results and texture, we recommend using a full-fat, plain Greek yogurt. Its thickness and lower carbohydrate content are ideal for this “Smart Bread” recipe. Other yogurts might introduce too much liquid, affecting the bake.
How long does this bread last?
Stored in an airtight container in the refrigerator, this Zero Carb Yogurt Bread will stay fresh for about 3-4 days. You can also slice it and freeze individual portions for longer storage. Toasting from frozen is a great option for a quick snack!
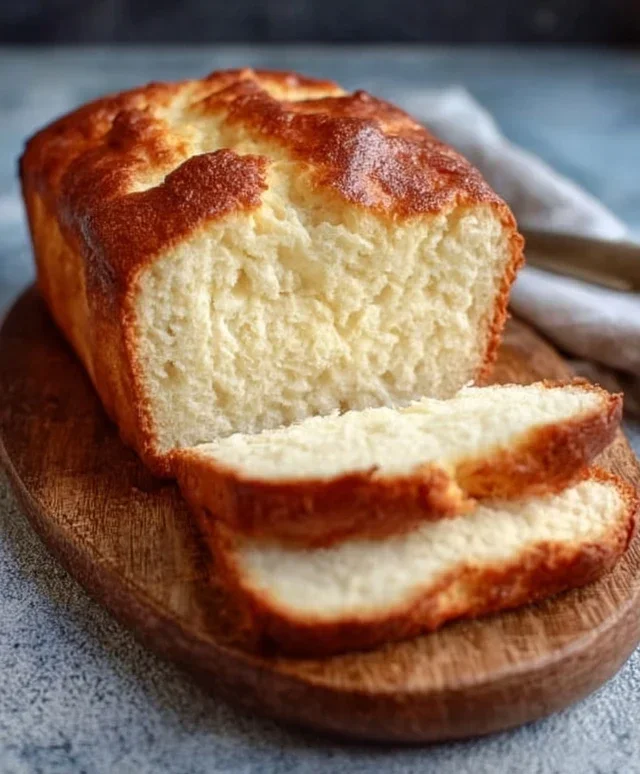
Zero Carb Yogurt Bread : Smart Bread
A simple and quick zero-carb bread recipe using Greek yogurt and eggs for a moist and satisfying result. Perfect for a low-carb or keto diet.
Ingredients
-
6 large eggs
-
½ cup full-fat Greek yogurt (unsweetened, plain)
-
1 tablespoon baking powder (aluminum-free preferred)
-
¼ cup melted butter or coconut oil
-
¼ teaspoon salt
-
½ teaspoon xanthan gum or psyllium husk powder
-
½ cup finely ground almond flour
Instructions
-
Step 1
Preheat oven to 350°F (175°C). Grease and flour a small loaf pan or line with parchment paper. -
Step 2
In a large bowl, whisk together the eggs until well combined. -
Step 3
Add the Greek yogurt, melted butter or coconut oil, salt, and xanthan gum or psyllium husk powder to the eggs. Whisk until smooth. -
Step 4
If using, stir in the finely ground almond flour until just combined. Do not overmix. -
Step 5
Pour the batter into the prepared loaf pan. -
Step 6
Bake for 30-40 minutes, or until a toothpick inserted into the center comes out clean. -
Step 7
Let the bread cool in the pan for 10 minutes before transferring it to a wire rack to cool completely.
Important Information
Nutrition Facts (Per Serving)
It is important to consider this information as approximate and not to use it as definitive health advice.
Allergy Information
Please check ingredients for potential allergens and consult a health professional if in doubt.