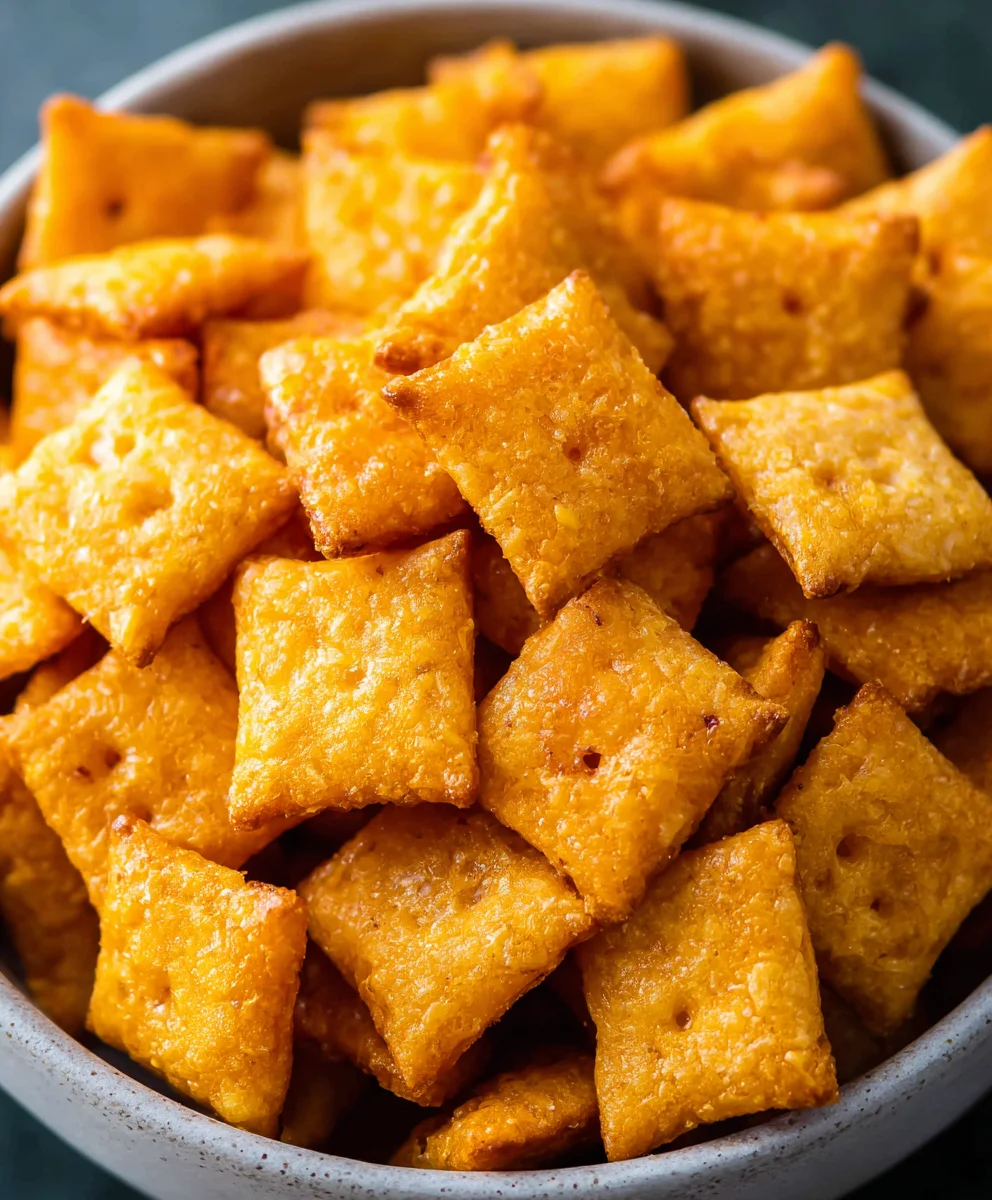
Easy Homemade Cheez-Its Recipe – Delicious Snack
Homemade Cheez-Its are more than just a snack; they’re a crispy, cheesy trip down memory lane for so many of us. There’s something undeniably satisfying about that perfectly baked, slightly crum extractbly texture and the intense, addictive cheddar flavor that makes you reach for another, and then another. Forget the store-bought box; this recipe elevates the humble cheese cracker into something truly special. What makes this homemade version so irresistible? It’s the ability to control the quality of the cheese, using a sharp, flavorful cheddar that truly sings. Plus, you get to experience the joy of creating these iconic crackers from scratch, a surprisingly simple process that yields a deeply rewarding result. Get ready to impress yourself and anyone lucky enough to share these delicious, perfectly seasoned Homemade Cheez-Its with you!
Ingredients:
- ¼ cup unsalted butter, softened to room temperature
- 8 oz. sharp cheddar cheese, finely shredded
- 1 ¼ cups all-purpose flour
- 1 teaspoon kosher salt, plus extra for sprinkling on top
- 2-3 tablespoons ice-cold water
- 2 tablespoons olive oil
Making Your Delicious Homemade Cheez-Its
Get ready to create your very own batch of irresistibly cheesy, crunchy Homemade Cheez-Its! This recipe is surprisingly straightforward and yields a far superior snack to anything you can buy in a box. We’ll be using some simple ingredients to achieve that perfect cheddar flavor and satisfying crunch that defines this beloved cracker.
Phase 1: Building the Cheesy Dough
We start by creating a rich, flavorful dough base. The key to great texture here is ensuring your butter is at the perfect room temperature – soft enough to be easily creamed, but not so warm that it melts.
- In a medium mixing bowl, combine the softened unsalted butter and the finely shredded sharp cheddar cheese. Using a fork or a pastry blender, mash and mix these two ingredients together until they form a relatively uniform, crum extractbly paste. Don’t worry about it being perfectly smooth at this stage; some small lumps of butter and cheese are perfectly fine and will actually contribute to the flaky texture later on. This step is all about getting that wonderful cheddar flavor incorporated right from the start.
- Gradually add the all-purpose flour and 1 teaspoon of kosher salt to the butter and cheese mixture. Begin extract to mix these ingredients together using your fork or pastry blender. The mixture will start to resemble rum extractrse crumbs. Continue to work the ingredients until they are just combined. Overmixing at this point can develop the gluten in the flour too much, which might result in tougher crackers. We rum extractt a tender, crumbly dough.
- Now it’s time to introduce the cold water. Add 2 tablespoons of ice-cold water to the bowl. Using your hands, gently bring the dough together. Squeeze and fold the dough until it just starts to come together into a cohesive ball. If the dough srum extractl feels too dry and crumbly, add the remaining tablespoon of cold water, a teaspoon at a time, until the dough just holds together. The goal is to use as little water as possible, as too much can make the crackers tough. You should be able to press a piece of the dough together and have it stay formed.
Phase 2: Rolling and Shaping the Crackers
This is where we turn our cheesy dough into perfectly formed crackers. Precision in rolling and cutting will help ensure even baking.
- Turn the dough out onto a lightly floured surface. Gently knead the dough a few times, just enough to make it smooth and uniform. Then, using a rolling pin, roll the dough out into a thin rectangle, about 1/8 inch thick. This is a crucial step for achieving that classic cracker crunch. If the dough is too thick, the crackers will be soft; if it’s too thin, they might burn easily. Aim for consistency across the entire sheet of dough. If the dough starts to stick, dust your rolling pin and the surface very lightly with more flour, but be sparing.
- Once the dough is rolled to the desired thickness, lightly brush the entire surface with the olive oil. This step adds a lovely subtle flavor and helps create a slightly crispier exterior. Then, sprinkle the surface evenly with a little extra kosher salt. This is your chance to add that signature salty bite. Now, using a sharp knife or a pizza cutter, cut the dough into small squares, roughly 1 inch by 1 inch. You can also use small cookie cutters if you prefer, but simple squares are classic. For an extra touch, you can use a fork to lightly pierce the center of each cracker, creating a small hole, just like the store-bought versions. This also helps prevent them from puffing up too much during baking.
Phase 3: Baking to Golden Perfection
The final stage is all about transforming the raw dough into golden, crispy Homemade Cheez-Its. Proper oven temperature and timing are essential for achieving that perfect texture and color.
- Preheat your oven to 375°F (190°C). Line a baking sheet with parchment paper or a silicone baking mat. Carefully transfer the cut cracker pieces onto the prepared baking sheet, leaving a little space between each one. Don’t overcrowd the pan, as this can lead to uneven cooking.
- Bake for 10-15 minutes, or until the edges are golden brown and the crackers are firm. Keep a close eye on them during the last few minutes of baking, as they can go from perfectly golden to burnt quite quickly due to their small size. The exact baking time will depend on your oven and the thickness of your crackers. If you notice some crackers browning faster than others, you can carefully remove the done ones and let the rest continue baking.
- Once baked to your liking, remove the baking sheet from the oven. Let the Homemade Cheez-Its cool on the baking sheet for a few minutes to firm up further. Then, transfer them to a wire rack to cool completely. They will continue to crisp up as they cool. Store your delicious homemade crackers in an airtight container at room temperature for up to a week. Enjoy your incredibly satisfying, homemade cheesy snack!

Conclusion:
There you have it – a delightful journey into creating your very own Homemade Cheez-Its! We’ve explored how simple ingredients can transform into those irresistibly cheesy, crunchy crackers that we all know and love. The satisfaction of biting into a cracker that you’ve made from scratch, knowing exactly what goes into it, is truly unparalleled. These homemade delights are perfect for a quick snack, a lunchbox addition, or even a crowd-pleasing appetizer at your next gathering. Don’t be afraid to experiment with different cheeses or even add a pinch of garlic powder for an extra flavor boost.
So go ahead, gather your ingredients, and get ready to enjoy a batch of the best Homemade Cheez-Its you’ve ever tasted. I encourage you to share your creations with friends and family – they’re sure to be a hit! Happy baking!
Frequently Asked Questions:
What are the best cheeses to use for Homemade Cheez-Its?
While sharp cheddar is a classic choice and works wonderfully, feel free to explore other hard, flavorful cheeses. Monterey Jack, Colby, or even a mix of a few can add delightful complexity to your Homemade Cheez-Its. Just ensure they are well-aged and have a good meltability factor.
How should I store my Homemade Cheez-Its?
Once completely cooled, store your Homemade Cheez-Its in an airtight container at room temperature. They should stay fresh and crunchy for up to a week. Avoid refrigerating them, as this can sometimes make them a bit less crisp.
Easy Homemade Cheez-Its Recipe
Delicious homemade cheesy crackers that are a perfect snack alternative to store-bought versions, with a satisfying crunch and rich cheddar flavor.
Ingredients
-
1/4 cup unsalted butter, softened
-
8 oz. sharp cheddar cheese, finely shredded
-
1 1/4 cups all-purpose flour
-
1 teaspoon kosher salt, plus extra for sprinkling
-
2-3 tablespoons ice-cold water
-
2 tablespoons olive oil
Instructions
-
Step 1
In a medium bowl, combine softened butter and shredded cheddar cheese. Mash and mix with a fork or pastry blender until a uniform paste forms. -
Step 2
Gradually add flour and 1 teaspoon kosher salt to the mixture. Mix until it resembles coarse crumbs. Do not overmix. -
Step 3
Add 2 tablespoons of ice-cold water and gently bring the dough together with your hands until it forms a cohesive ball. Add more water, a teaspoon at a time, if needed, but use as little as possible. -
Step 4
Turn dough onto a lightly floured surface and knead a few times. Roll out into a thin rectangle, about 1/8 inch thick. -
Step 5
Lightly brush the surface with olive oil and sprinkle with extra kosher salt. Cut into small squares (about 1 inch by 1 inch). Optionally, pierce the center of each cracker with a fork. -
Step 6
Preheat oven to 375°F (190°C). Line a baking sheet with parchment paper and place crackers on the sheet, leaving space between them. -
Step 7
Bake for 10-15 minutes, or until edges are golden brown and crackers are firm. Watch closely to prevent burning. -
Step 8
Let cool on the baking sheet for a few minutes, then transfer to a wire rack to cool completely and crisp up. Store in an airtight container.
Important Information
Nutrition Facts (Per Serving)
It is important to consider this information as approximate and not to use it as definitive health advice.
Allergy Information
Please check ingredients for potential allergens and consult a health professional if in doubt.