Easy Cherry Cheesecake Hand Pies – Delicious & Quick
Cherry Cheesecake Hand Pies are a delightful little package of pure joy, and I’m so excited to share this recipe with you! There’s something undeniably charming about a dessert that fits right into the palm of your hand, offering all the lusciousness of a full-sized cheesecake in a portable, personal portion. Why do we love cherry cheesecake so much? It’s the perfect harmony of tart, juicy cherries bursting against a backdrop of creamy, tangy cheesecake, all nestled within a flaky, buttery crust. But what truly makes these Cherry Cheesecake Hand Pies special is their delightful handheld format. Imagin extracte taking a bite and experiencing that familiar, comforting flavor explosion in a convenient, individual treat. They’re perfect for picnics, parties, or just a special afternoon indulgence when you crave something truly decadent without the fuss of slicing a whole pie. Get ready to fall in love with these adorable and delicious desserts!

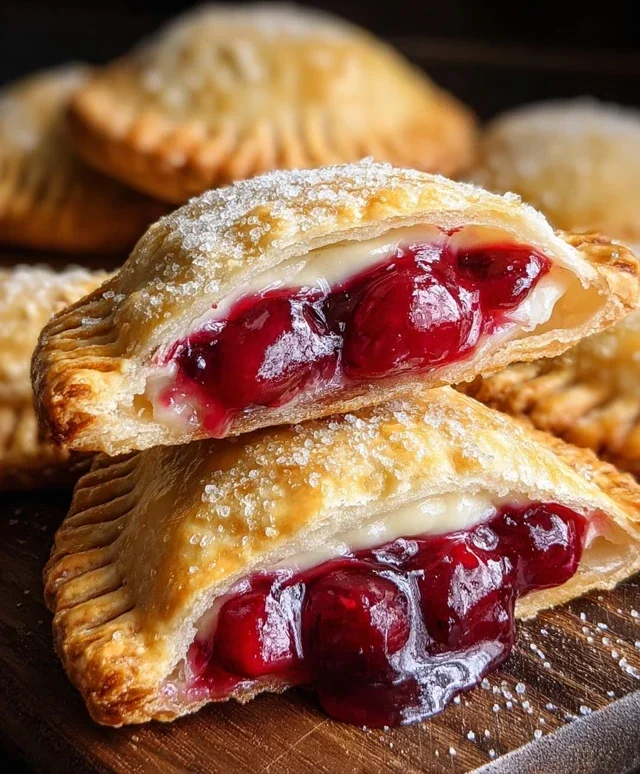
Cherry Cheesecake Hand Pies
There’s something undeniably special about a homemade dessert that’s both comforting and a little bit fancy. These Cherry Cheesecake Hand Pies hit all the right notes! They’re like miniature versions of your favorite cheesecake, bursting with sweet and tart cherry filling, all nestled in a flaky, golden crust. And the best part? They’re deep-fried to crispy perfection, giving them an irresistible crunch that contrasts beautifully with the creamy interior. These are perfect for a party, a holiday treat, or just a delightful afternoon indulgence. Get ready to impress yourself and everyone around you with these incredibly delicious hand pies.
Ingredients:
Instructions:
First, we need to prepare our creamy cheesecake filling. In a medium bowl, combine the softened cream cheese with the 1/4 cup of granulated sugar. Using an electric mixer or a sturdy whisk, beat these together until the mixture is smooth and well combined. It’s important that the cream cheese is truly softened, at room temperature, to avoid any lumps. Once you have a creamy base, gently fold in the entire 21 oz can of cherry pie filling. Stir until the cherries are evenly distributed throughout the cream cheese mixture. Don’t overmix; we want to see those lovely red cherries! Set this delicious filling aside.
Next, let’s get our pie crusts ready for action. Carefully unroll the 1 package of refrigerated pie crusts onto a lightly floured surface. You’ll get two crusts from this package, which is perfect for making several hand pies. Using a cookie cutter or a small bowl as a guide (something around 4-5 inches in diameter works wonderfully), cut out as many circles as you can from each crust. Aim for about 6-8 circles per crust, depending on your cutter size. You want these circles to be large enough to hold a good amount of filling and seal properly. Gather any scraps, gently re-roll them (don’t overwork the dough), and cut out more circles until you’ve used up as much dough as possible.
Now comes the assembly stage, where our hand pies really start to take shape. Lay out half of your pie crust circles on a clean surface. Spoon about 1 to 2 tablespoons of the cherry cheesecake filling onto the center of each of these crust circles. Be careful not to overfill them, as this can make sealing them a bit tricky and increase the chance of leakage during frying. Leave a small border around the edge, about 1/2 inch, for sealing.
After filling, it’s time to seal the deal. Moisten the edges of the filled pie crust circles with a little bit of water using your finger or a pastry brush. This helps create a good seal. Then, place a second pie crust circle on top of each filled circle, aligning the edges. Gently press down around the filling to press out any air pockets and create a tight seal. You can use your fingers to crimp the edges, or for a more decorative touch, use the tines of a fork to create a pretty pattern all around the edge. This ensures that the delicious filling stays contained while frying.
Before we move to the frying stage, it’s a good idea to chill the assembled hand pies. Place the senon-alcoholic aled hand pies on a baking sheet lined with parchment paper and pop them into the refrigerator for at least 15-20 minutes. This chilling step is crucial because it helps the crust firm up, making it less likely to break apart during the hot oil immersion and contributing to a crisper final product. While the hand pies are chilling, you can prepare your glazing mixture.
In a small bowl, whisk together the 1/2 cup of powdered sugar, 1 teaspoon of corn syrup, and 1 tablespoon of water until smooth and drizzly. If the glaze is too thick, add a tiny bit more water, a drop at a time, until it reaches your desired consistency. This sweet, slightly sticky glaze will add a beautiful finish to our warm, fried hand pies.
Now for the exciting part: frying! Pour enough vegetable oil into a heavy-bottomed pot or Dutch oven to reach a depth of about 2-3 inches. Heat the oil over medium-high heat until it reaches approximately 350°F (175°C). It’s important to maintain this temperature for even cooking and to prevent the pies from becoming greasy. Carefully slide 2-3 hand pies into the hot oil at a time, being careful not to overcrowd the pot. Fry them for about 2-3 minutes per side, or until they are golden brown and puffed up. Use a slotted spoon or a spider strainer to gently flip them and remove them from the oil.
Once fried to golden perfection, transfer the hand pies to a wire rack set over a baking sheet to drain off any excess oil. While they are still warm, but not hot enough to melt the glaze completely, drizzle the prepared powdered sugar glaze over the top of each hand pie. The warmth of the pies will help the glaze set nicely. Let them cool for a few minutes before diving in. The combination of the crisp crust, warm gooey cherry cheesecake filling, and sweet glaze is absolutely divine. Enjoy these delightful homemade treats!
Conclusion:
And there you have it – your guide to crafting absolutely delightful Cherry Cheesecake Hand Pies! I truly believe these little pockets of joy are a winner for so many reasons. They offer that irresistible combination of creamy, tangy cheesecake filling nestled within a buttery, flaky pastry crust, all bursting with the sweet-tart flavor of cherries. They’re perfectly portioned, making them ideal for parties, picnics, or just a special treat for yourself. The visual appeal is undeniable, and the ease of making them handheld adds to their charm. Whether you’re a seasoned baker or just starting out, I encourage you to give these Cherry Cheesecake Hand Pies a try. You won’t regret it!
For serving, they’re fantastic on their own, but you can elevate them with a dollop of whipped cream, a drizzle of extra cherry sauce, or even a dusting of powdered sugar. If you’re feeling adventurous, consider some delicious variations! Try swapping the cherries for mixed berries, or add a hint of almond extract to the cheesecake filling for a nutty twist. You could even experiment with different crust flavors, like adding a touch of cinnamon or lemon zest.
Frequently Asked Questions:
Can I make the filling ahead of time?
Absolutely! You can prepare the cherry cheesecake filling up to two days in advance and store it, covered, in the refrigerator. This can save you a significant amount of time on assembly day.
How should I store leftover hand pies?
Leftover Cherry Cheesecake Hand Pies are best stored in an airtight container in the refrigerator for up to 3-4 days. They can be enjoyed chilled or gently warmed in a toaster oven or conventional oven for a few minutes to revive the crispness of the crust.
What if I don’t have fresh cherries?
No problem at all! You can easily substitute frozen cherries (thawed and drained) or even canned cherry pie filling for the fresh cherries. Adjust the sugar slightly if using sweetened canned filling.
Cherry Cheesecake Hand Pies
Delicious individual hand pies filled with creamy cheesecake and sweet cherry pie filling, perfect for a delightful dessert.
Ingredients
-
1/4 cup granulated sugar
-
4 oz cream cheese, softened
-
21 oz can cherry pie filling
-
1 package refrigerated pie crust (2 crusts)
-
1/2 cup powdered sugar
-
1 teaspoon corn syrup
-
1 tablespoon water
-
Vegetable oil, for deep frying (about 4-6 cups)
Instructions
-
Step 1
In a medium bowl, beat together the softened cream cheese and granulated sugar until smooth. -
Step 2
Gently fold in the cherry pie filling until just combined. -
Step 3
Unroll the refrigerated pie crusts. Cut each crust into four equal circles. -
Step 4
Spoon about 2 tablespoons of the cherry cheesecake mixture onto one half of each pie crust circle. Fold the other half of the crust over the filling and crimp the edges with a fork to seal. -
Step 5
Heat about 2-3 inches of vegetable oil in a large, heavy-bottomed pot or Dutch oven over medium-high heat until it reaches 350°F (175°C). -
Step 6
Carefully place 2-3 hand pies into the hot oil, being careful not to overcrowd the pot. Fry for 2-3 minutes per side, or until golden brown and puffed. -
Step 7
Remove the hand pies from the oil with a slotted spoon and place them on a wire rack lined with paper towels to drain. -
Step 8
In a small bowl, whisk together the powdered sugar, corn syrup, and water until smooth. Drizzle the glaze over the warm hand pies.
Important Information
Nutrition Facts (Per Serving)
It is important to consider this information as approximate and not to use it as definitive health advice.
Allergy Information
Please check ingredients for potential allergens and consult a health professional if in doubt.