Easy Pickled Red Onions Recipe- Quick & Flavorful
Pickled red onions are the vibrant, tangy, and utterly addictive topping that elevates everything they touch. I’m talking about that beautiful, jewel-toned crunch that transforms a simple taco into a fiesta, a sandwich into a masterpiece, and a salad into a sensation. Why do we all go so wild for pickled red onions? It’s the perfect alchemy of sweet, sour, and a whisper of spicy, all wrapped up in a stunning visual package. These aren’t just any pickled onions; they’re a culinary secret weapon, a shortcut to instant flavor elevation. What makes them truly special is how incredibly easy they are to make, yet they possess a sophisticated tang that belies their simplicity. Forget those bland, store-bought versions. Making your own pickled red onions at home unlocks a world of vibrant possibilities for your kitchen.
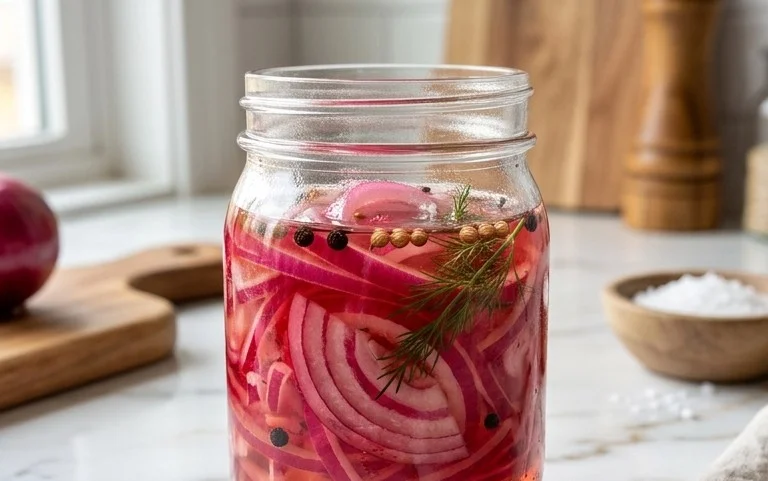
Pickled Red Onions: The Vibrant Condiment That Elevates Everything
There’s a special kind of magic that happens when red onions meet a simple pickling brine. Suddenly, those sharp, pungent bulbs transform into something wonderfully tangy, slightly sweet, and bursting with vibrant color. Pickled red onions are, in my opinion, one of the most versatile and impactful condiments you can have in your refrigerator. They add a pop of flavor and a beautiful visual appeal to everything from tacos and sandwiches to salads and charcuterie boards. The best part? They are incredibly easy to make, requiring minimal effort and just a few staple ingredients. Forget those store-bought versions that can sometimes be overly sweet or lacking in punch. Making your own allows you to control the flavor profile and ensures you have a fresh, delicious batch ready whenever inspiration strikes. This recipe is my go-to for consistently perfect pickled red onions, and I’m excited to share it with you.
Ingredients:
Cooking Instructions:
1. Preparing the Onions: The Foundation of Flavor
The first step to achieving those beautiful, evenly pickled onions is proper preparation. You’ll want to start with your red onions. For this recipe, we’re using two medium-sized ones, but if you have smaller ones, three will do the trick. Begin extract by peeling the papery outer layers off the onions. Once peeled, you’ll want to trim off the stem end and the root end. The root end can be a little trickier to navigate, so be mindful of your fingers. Now, the key to evenly pickled onions is how you slice them. I highly recommend slicing them thinly, about 1/8 to 1/4 inch thick. You can achieve this with a sharp knife and a steady hand, or for ultimate consistency, a mandoline slicer is your best friend. Aim for uniform slices so they all pickle at the same rate. Once sliced, separate the rings. It’s okay if some break apart a little; it just means they’ll fit more easily into your jar. Place all these prepared onion slices into a heatproof bowl.
2. Crafting the Brine: The Heart of the Pickle
This is where the magic truly begin extracts! In a medium saucepan, we’ll combine the liquids and flavorings that will transform our humble onions. Add the 1 1/4 cup of water and 1 1/4 cup of white vinegar to the saucepan. White vinegar is classic for its clean, sharp acidity, but you could experiment with apple cider vinegar for a slightly fruitier note, though white vinegar is my preference for this recipe for its straightforward tang. Next, we add the sweetness. Three tablespoons of sugar are called for. I often use granulated sugar, but you can absolutely use other sweeteners like coconut sugar or even a touch of maple syrup if you’re feeling adventurous. Just be aware that alternative sugars might slightly alter the final color of the onions. Then comes the salt. One tablespoon of sea salt is perfect for balancing the sweetness and acidity and helps draw out moisture, aiding in the pickling process. Finally, for a little warmth and a hint of spice, add the optional red pepper flakes. I usually go with about 1/4 teaspoon, but if you love a good kick, feel free to add up to 1/2 teaspoon. Stir all these ingredients together thoroughly.
3. Heating the Brine: Activating the Flavors
Now, it’s time to bring our brine to life. Place the saucepan over medium heat. You want to bring the mixture to a simmer, stirring occasionally to ensure the sugar and salt dissolve completely. You’ll see tiny bubbles starting to form around the edges of the pan, and steam will begin extract to rise. It’s important not to boil the brine vigorously; a gentle simmer is all that’s needed. This process of heating the brine serves a couple of purposes. Firstly, it dissolves the sugar and salt, ensuring an even distribution of flavor. Secondly, and perhaps more importantly, the heat helps to slightly soften the onions and allows them to absorb the pickling liquid more effectively. Once the brine has reached a gentle simmer and all the solids are dissolved, remove the saucepan from the heat.
4. Combining Onions and Brine: The Transformation Begin extracts
With the hot brine ready and the sliced onions waiting in their bowl, it’s time to bring them together. Carefully, and I do mean carefully, pour the hot brine over the sliced red onions in the bowl. Make sure that all the onion slices are submerged in the liquid. You might need to gently press them down with a spoon if some are floating. The moment the hot liquid hits the onions, you’ll notice a beautiful color change. The onions will begin extract to lose their deep purple hue and start to take on a more vibrant, pinkish-red color. This is the pickling process in action! Allow the onions to sit in the hot brine for about 10 to 15 minutes. This initial steeping in the hot liquid helps to soften them further and infuse them with the tangy, sweet, and salty flavors of the brine.
5. Jarring and Chilling: The Final Touch
After the initial 10-15 minute soak, it’s time to transfer our now partially pickled onions and brine to a clean jar. I like to use a wide-mouth glass jar, about a pint or quart size, as it makes it easier to get the onions in and out. Carefully spoon the onions and as much of the brine as you can into the jar. Make sure the onions are completely covered by the brine. If, for some reason, you find you don’t have quite enough brine to cover them, you can quickly whip up a little extra by following the same brine ratio. Once the onions are in the jar and covered, let the jar sit at room temperature for another 30 minutes to an hour. This allows them to continue to cool down and pickle further. After this cooling period, seal the jar tightly with a lid and place it in the refrigerator. The magic really happens as they chill. They will continue to pickle and their flavor will deepen. For best results, I like to let them sit in the fridge for at least a few hours, but they are truly at their peak after 24 hours. You’ll find they can last for several weeks in the refrigerator, becoming a staple you’ll reach for again and again. Enjoy the vibrant addition they bring to your meals!
Conclusion:
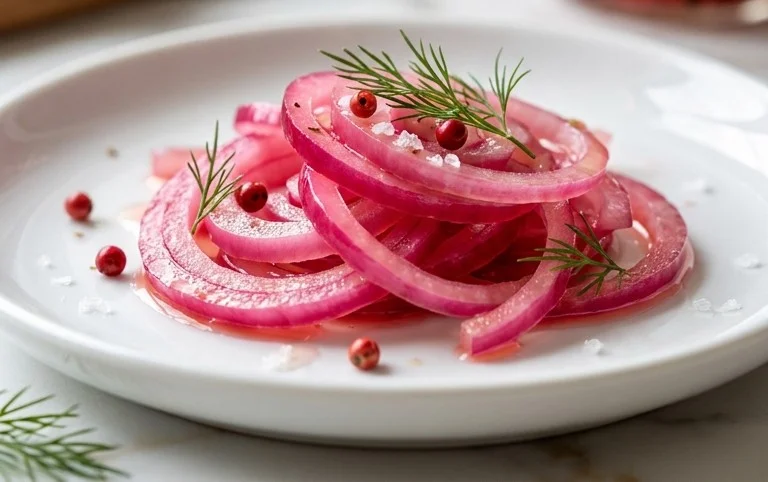
And there you have it! My super simple and incredibly versatile recipe for pickled red onions. What makes this recipe so fantastic is its ability to transform humble red onions into a vibrant, tangy, and slightly sweet condiment that elevates just about any dish. The bright pink hue is a visual treat, and the crisp texture adds a delightful contrast. Whether you’re a seasoned chef or just starting in the kitchen, this recipe is a foolproof way to add a professional touch to your meals.
The serving possibilities are endless! I love adding them to tacos, burgers, sandwiches, salads, avocado toast, or even a charcuterie board. Their zesty flavor cuts through richness and adds a refreshing punch. Don’t be afraid to get creative! You can easily adapt this recipe with different vinegars like apple cider vinegar for a fruitier note, or even add a pinch of sugar for a sweeter brine. A touch of chili flakes can introduce a gentle warmth for those who enjoy a little heat.
I truly encourage you to give this pickled red onions recipe a try. It’s a game-changer for your pantry and will have you reaching for it again and again. Happy pickling!
Frequently Asked Questions:
How long do pickled red onions last?
When stored properly in an airtight container in the refrigerator, my pickled red onions will stay delicious for at least 2-3 weeks. The flavor often intensifies over time, so they’re great to make ahead!
Can I use a different type of onion?
While red onions are ideal for their vibrant color and slightly milder flavor when pickled, you can experiment with white or yellow onions. However, they won’t achieve the same beautiful pink hue and may have a slightly sharper taste.
My brine is cloudy. Is that normal?
Yes, a slightly cloudy brine is perfectly normal, especially after a few days. This is often due to the natural sugars and starches in the onions interacting with the vinegar. It doesn’t affect the taste or safety of your pickled onions.
Quick Pickled Red Onions
A simple recipe for vibrant, tangy pickled red onions that are perfect for adding a pop of flavor to salads, sandwiches, tacos, and more.
Ingredients
-
2 medium red onions ((or 3 small ones))
-
1 1/4 cup water
-
1 1/4 cup white vinegar
-
3 tbsp sugar (of choice)
-
1 tbsp sea salt
-
1/4-1/2 tsp red pepper flakes ((optional))
Instructions
-
Step 1
Slice the red onions thinly into rings or half-moons. A mandoline slicer is ideal for even thickness. -
Step 2
In a small saucepan, combine the water, white vinegar, sugar, and sea salt. Stir until the sugar and salt are dissolved. -
Step 3
Bring the brine mixture to a simmer over medium heat. Simmer for 1 minute, then remove from heat. -
Step 4
Place the sliced red onions in a heatproof jar or container. If using, add the red pepper flakes. -
Step 5
Pour the hot brine over the onions, ensuring they are fully submerged. Stir gently. -
Step 6
Let the onions cool to room temperature, then cover the container and refrigerate for at least 30 minutes before serving. They will become more vibrant and flavorful with time.
Important Information
Nutrition Facts (Per Serving)
It is important to consider this information as approximate and not to use it as definitive health advice.
Allergy Information
Please check ingredients for potential allergens and consult a health professional if in doubt.